Pages

Showing posts with label Layering Circles Thinlits. Show all posts

Sunday, 31 May 2020

CTC #271 Week 1: CASE The Annual Catalogue

Hi!


Welcome back once again to the new CASEing The Catty Sunday Challenge Blog Hop. With the launch of the new Annual Catalogue only days away, we are kicking off with CASEing the front cover of the catalogue.


You can choose any element of the cover to CASE - the cards themselves, the colours, the techniques, the stamp sets - you imagination is your limit! I chose to CASE the cover photo itself.

scissorspapercard, Stampin' Up!, CASEing The Catty, Celebrate Sunflowers Bundle, Forever Gold Laser Cut Specilaty Paper, In Good Taste DSP

The wattle was one of the first things that caught my eye on the cover. To replicate that, I used one of the Gold Foil wreaths from the Forever Gold Laser Cut Specialty Paper. I'm not a Gold person, so I'd originally skipped over these, but after a Zoom chat with my lovely friend, Judy May, I decided I had to have them! If you're not much of a gold person, you can use the flip side, which is white. There are pops of Bermuda Bay on the cover, so I did the same on my card. It's a nice balance to the blonde wood paper from the In Good Taste DSP pack.

scissorspapercard, Stampin' Up!, CASEing The Catty, Celebrate Sunflowers Bundle, Forever Gold Laser Cut Specilaty Paper, In Good Taste DSP

I used a second piece of wood paper from the pack as my circle. I deliberately chose this section, with the strong lines created by the wood planks, as I thought it reflected the strong lines between the cards on the cover. I split the sentiment, from Celebrate Sunflowers, into three pieces to represent the three cards, and a scattering of sequins to finish it off.
scissorspapercard, Stampin' Up!, CASEing The Catty, Celebrate Sunflowers Bundle, Forever Gold Laser Cut Specilaty Paper, In Good Taste DSP

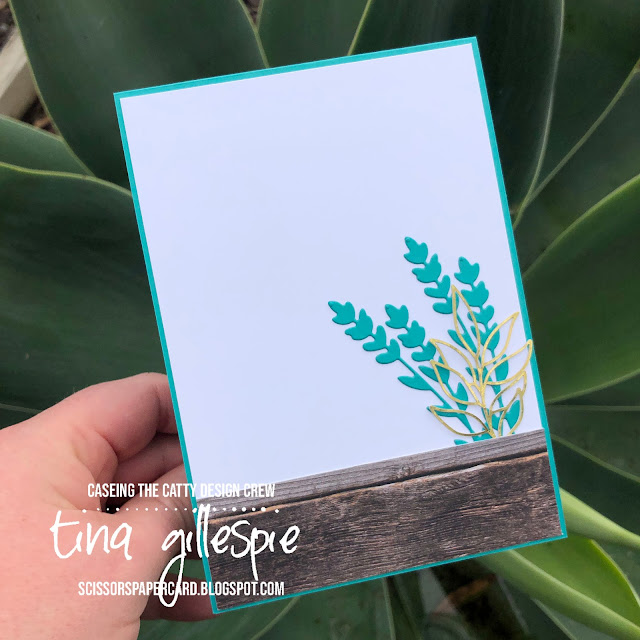
I used a smaller gold leaf piece from the Forever Gold pack to decorate the inside, layered over a couple of sprigs cropped using the new Sunflowers Dies, with some more In Good Taste DSP over the top. I've left off a sentiment for the inside, as 'Let's Celebrate You' could work for a few occasions. I can easily stamp an inside sentiment when I know how I'll use this card.

The Annual Catalogue challenge runs for two weeks. To enter all you need to do is make a card that is a CASE of some element of the front cover and post the picture in our Facebook group. Make sure you add a little description of when you are CASEing, especially if it's not obvious.


Before you go, however, don't forget to finish the Blog Hop! Next up is the lovely Michelle, with her gorgeous green card.


Bye for now,

Tina

Sunday, 28 July 2019

CTC #239: CASE A Layout

Hi!


Welcome back to a new CASEing The Catty Sunday Challenge Blog Hop. It's been another busy week in my household, so I just squeaked into the end of the list for the blog hop, after Monique.


This week we are choosing a card from page 103 of the Annual Catalogue to CASE, but with an extra twist - we need to change the theme. So if the card you choose is a thank you card, you need to make anything but a thank you card. Easy!


I was in a bit of a rush to get my card done, so I went for the Crumb Cake card at the top of this photo. In my rush I assumed it was a new baby card, as it's in the Kid's and Babies section. What's the opposite of a new baby card? A sympathy card. I always seem to need them for my stash.

scissorspapercard, Stampin' Up!, CASEing The Catty, Best Birds, Birds Of A Feather, Swirly Frames, Well Said, Stampin' Blends, Magnolia Lane DSP, Sympathy Card

It's funny how 'I need to get a card made in a hurry' morphed into 'I'll just do some colouring with my Blends', which I can never do in a hurry! I stamped the flower from Best Birds three times, masking each one as I went. Once all three were masked I stamped the leaves over the top. They were coloured with my Flirty Flamingo, Granny Apple Green and Daffodil Delight Blends.

scissorspapercard, Stampin' Up!, CASEing The Catty, Best Birds, Birds Of A Feather, Swirly Frames, Well Said, Stampin' Blends, Magnolia Lane DSP, Sympathy Card

The bird was then stamped and coloured using Daffodil Delight, Balmy Blue and Light Night Of Navy Blends, with Light Crumb Cake for the ground. The sentiment is from a Paper Pumpkin set I got while I was in the USA. I think it's Birds Of A Feather.

scissorspapercard, Stampin' Up!, CASEing The Catty, Best Birds, Birds Of A Feather, Swirly Frames, Well Said, Stampin' Blends, Magnolia Lane DSP, Sympathy Card

When I cut the card for the inside I was kidding myself that I'd only stamp one flower and leaf combo. As soon as I stamped the first flower I knew I had to do the whole trio - it wouldn't look right with just one. Sigh. Luckily I'm quicker at the photo editing and blog post writing than I am at making a quick card! LOL!

That's it for me for this week. Don't forget to join our Facebook group so that you can play along with our challenges each week.


In the meantime though, you're hopping off to see what Julia has made this week.


Bye for now,

Tina

Tuesday, 23 July 2019

Diagonal Folded Perennial Essence

Hi!

Today I have a fancy fold card for you. I made it as a class sample. Every now and then I get a hankering to make a fancy fold, and the Diagonal Fold card was one I hadn't tried yet.

scissorspapercard, Stampin' Up!, Perennial Essence DSP, Well Said Bundle, Springtime Impressions Dies, Diagonal Fold Card

It's a fairly simple fold to make. You score a piece of A4 card in half in both directions and then cut it in half diagonally. Done! This gives you two card bases to decorate. The hardest part was the cutting, only because it didn't fit in my trimmer, so I had to use a ruler and craft blade to cut the card.

scissorspapercard, Stampin' Up!, Perennial Essence DSP, Well Said Bundle, Springtime Impressions Dies, Diagonal Fold Card

I took a piece of Perennial Essence DSP and cut it to card front size and then chopped it down the middle on the same diagonal as my card base. The butterfly and 'thanks' had a coat of Wink Of Stella for a little added glimmer.

scissorspapercard, Stampin' Up!, Perennial Essence DSP, Well Said Bundle, Springtime Impressions Dies, Diagonal Fold Card

Nice and simple on the inside, just a piece of matching DSP and a lovely sentiment. Have you tried a Diagonal Fold card? It not, do give it a go - it's a fun and easy card (or two) to make.

Bye for now,

Tina

Thursday, 20 June 2019

JAI #462: Just Add A Sketch

Hi!


Sorry for the late post - I don't know if I'm coming or going this week! Anyway, on with the show! This week at Just Add Ink we have a sketch challenge, designed by Kim. It's a fun one, and the Design Team have made a lot of wonderful cards using it.


I decided to make a fancy fold card, but to do so I needed to rotate the sketch sideways. Totally fine, as long as we can still see the basis of the sketch in your card.

scissorspapercard, Stampin' Up!, Just Add Ink, A Good Man, Fancy Fold, Stampin' Blends

I'm not sure what the fold is called, I basically just chopped off half of the front of the card and overlapped the main image panel. I've been staring a lot with A Good Man, and the guy on the deck chair was the perfect image for this card. Some of my class ladies thought it was a bit American with the stripes, but I was going for a more nautical look. Either way it doesn't matter!

scissorspapercard, Stampin' Up!, Just Add Ink, A Good Man, Fancy Fold, Stampin' Blends

He was coloured using my Blends in Poppy Parade, Night Of Navy, Ivory, Smokey Slate and Crumb Cake.

scissorspapercard, Stampin' Up!, Just Add Ink, A Good Man, Fancy Fold, Stampin' Blends

To create the stripes, I cut strips of cardstock 1/2" wide in Poppy Parade and Night Of Navy. I also cut one in Whisper White to use as a spacer. I started with the Navy stripe and then used the spacer to lay the Poppy stripe next, and so on until I'd covered half of the inside. This shows up on the front when the card is closed.

What do you see in the sketch? Why not pop on over to the Just Add Ink blog, where you can see what the rest of the Design Team have created? You can also link up your card for the challenge. See you there!

Bye for now,

Tina
Tuesday, 14 May 2019

Softly With Sea Foam

Hi!


Sigh, we are getting close to the end now! This week we are using Soft Sea Foam on our Colour Creations Blog Share cards. It's a new colour, nearly a year old, but not a colour I've used a lot. It's a softer green and not yet a colour I automatically think of when I think about soft greens.

I decided to ink up my new stamp set, A Good Man, for the first time. It's a set that went straight to the top of my 'must have' list when I first saw it. I love that it's a masculine set that's not cars, fishing, hunting or tools. My hubby is more of a gamer, so those types of sets just aren't him. He's a great dad, so this set was just perfect. Having said that, I haven't used either of the 'dad' images on my card!

scissorspapercard, Stampin' Up!, Art With Heart, Colour Creations, A Good Man, Tranquil Textures DSP, Stampin' Blends

LOL, Rob would quite like relaxing like this though! I coloured the image with my Blends and then layered it on some Tranquil Textures DSP. The sentiments I've used on the card are a bit of a generic, have a great day, type. I love that this means the card would work for either a birthday or Father's Day.

scissorspapercard, Stampin' Up!, Art With Heart, Colour Creations, A Good Man, Tranquil Textures DSP, Stampin' Blends

The man's shirt was coloured with my Soft Sea Foam Blends. I used Night Of Navy on his shorts and Smokey Slate on the chair. His legs were a mix of Ivory and Petal Pink, while the ground was Crumb Cake. The 'sky' was created by colouring around the image with the light Balmy Blue marker and then going over it with the Colour Lifter marker to soften the colour and blur the edge. It's such a cool effect!

scissorspapercard, Stampin' Up!, Art With Heart, Colour Creations, A Good Man, Tranquil Textures DSP, Stampin' Blends

I stamped the same image inside, this time just using Soft Sea Foam ink and leaving it as just the outline. I don't think the inside needs more.

As always, you can pop on over to Catherine's blog to see the rest of this week's Soft Sea Foam cards. Do you like the colour? I do - I just have to remember to use it more!

Bye for now,

Tina

A Birthday Blog Hop For Kelly

Hi!


Welcome to my first post of the night - there'll be another one a bit later! For now though, I am hopping with my demonstrator friend, Kelly Kent. It's her birthday (hip hip hooray!) and she's celebrating by doing a blog hop. what a fun way to celebrate! The blog before mine was Shannon's, but we are all linked in a circle, so start wherever and end where you start! Confused? LOL!

Tonight's cards are the first I made using the technique that's going totally viral, especially after all us demo's went to New Zealand and cleared them out of Press & Seal! Yes, it's the Floating Frames technique. I hope you're not too sick of it yet!

scissorspapercard, Stampin' Up!, Floating Frames Technique, Picture Perfect Birthday, Birthday Cheer, Butterfly Duo Punch, Garden Impressions DSP

I made this card as a class sample and decided that it's far too hard for everyone to stamp, colour and cut a heap of flowers in a class, so we'd use punches with DSP instead. It really cuts down on the time involved but still makes a pretty awesome card! I used a sheet of 6x6 DSP from the Garden Impressions DSP pack combined with the Butterfly Duo punch for my card. One sheet of 6x6 gives plenty of butterflies for the front, with some left over to decorate the insides.

scissorspapercard, Stampin' Up!, Floating Frames Technique, Picture Perfect Birthday, Birthday Cheer, Butterfly Duo Punch, Garden Impressions DSP

I'm not going to explain the technique, there are plenty of videos and tutorials out there. I will give you a few tips though. I didn't take a photo, but before I laid out my punched shapes on the copy paper, I traced the shape of the circle die onto the paper. This allowed me to see where I would cut and hopefully I could avoid teeny tiny pieces of butterfly to try to stick a dimensional to!

scissorspapercard, Stampin' Up!, Floating Frames Technique, Picture Perfect Birthday, Birthday Cheer, Butterfly Duo Punch, Garden Impressions DSP

As it turned out, choosing a slightly mottled DSP worked well, as sometimes the Press & Seal sticks too well to the paper. If a little bit peels away, it's less obvious on a paper that already looks distressed!

scissorspapercard, Stampin' Up!, Floating Frames Technique, Picture Perfect Birthday, Birthday Cheer, Butterfly Duo Punch, Garden Impressions DSP

Can you tell where the paper peeled away a little? Didn't think so! LOL

scissorspapercard, Stampin' Up!, Floating Frames Technique, Picture Perfect Birthday, Birthday Cheer, Butterfly Duo Punch, Garden Impressions DSP

I kept the stamping simple by using the same sentiments on both cards, just switching the inside for outside to suit each one.

scissorspapercard, Stampin' Up!, Floating Frames Technique, Picture Perfect Birthday, Birthday Cheer, Butterfly Duo Punch, Garden Impressions DSP

Slightly dodgy photo, but here's both cards together. I've made a few more Floating Frames cards since these, including a pair using the Balloon Duo punch. It's a bit addictive!

That's it for me, now you're hopping off to visit Monique's blog to see what gorgeous card she's made for Kelly's Birthday Hop.


Bye for now,

Tina

Tuesday, 23 April 2019

Spruced Up Flamingo

Hi!


Gosh, we are getting to the end of our Colour Creations Blog Shares now. I will miss them! Hmmm, I wonder if I can convince everyone to continue for a further 5 weeks with the new In Colours? Maybe!

Anyway, this week we are up to Shaded Spruce. It's a fabulous deep green, new to the range this year as a part of the Regals colour family.

scissorspapercard, Stampin' Up!, Art With Heart, Colour Creations, Tropical Chic Bundle, Fabulous Flamingo, Amazing Life, Tropical Escape DSP, Fancy Fold

I recently saw this card by my JAI friend Lou, and thought it was a simple, but very effective fancy fold. Before I explain, let me show you how it folds out. You can see that there's a round window in the front of the card. I used my Tropical Chic stamp set to create a little frame for the window. It's carrying over to the new Annual Catalogue - yay!

scissorspapercard, Stampin' Up!, Art With Heart, Colour Creations, Tropical Chic Bundle, Fabulous Flamingo, Amazing Life, Tropical Escape DSP, Fancy Fold

The first flap opens to show the image from Fabulous Flamingo. I used my Stamparatus to line up all of the layers, making it so much easier to stamp. Sadly, the flamingo is retiring at the end of May. I used a piece of Tropical Escape DSP to anchor the flamingo panel. I will miss that DSP! You can see another little strip of it down the left side of the card....

scissorspapercard, Stampin' Up!, Art With Heart, Colour Creations, Tropical Chic Bundle, Fabulous Flamingo, Amazing Life, Tropical Escape DSP, Fancy Fold

...which is actually on the inside of the card. I like how it adds interest to both the middle layer and the inside layer - much like the flamingo for the front and middle.

So how do you make this card? Just take a piece of A4 card and cut it in half longways. Score at 4 inches and 8 inches and you're done! Oh, cut your window in the first 4 inch section so that it becomes the front of the card. This way the shorter panel becomes the middle flap, showing that little strip of DSP from the inside. It also folds much more nicely this way.

Time to pop on over to Catherine's blog for the rest of this week's Shaded Spruce cards. Don't forget that if you right click on each link you can open the link in a new tab or window to avoid having to jump back and forwards from Catherine's blog.

Bye for now,

Tina

Tuesday, 15 January 2019

Dragonflies In The Mossy Meadow

Hi!


This week's Colour Creations features Mossy Meadow, a colour I am yet to really warm to. It's a part of the Neutrals family and is a dark, earthy green. It's a feature colour in the gorgeous Petal Promenade DSP pack, so that was my starting point for this card.

scissorspapercard, Stampin' Up!, Art With Heart, Colour Creations, Humming Along, Varied Vases, Petal Promenade DSP, Detailed Dragonfly Thinlits

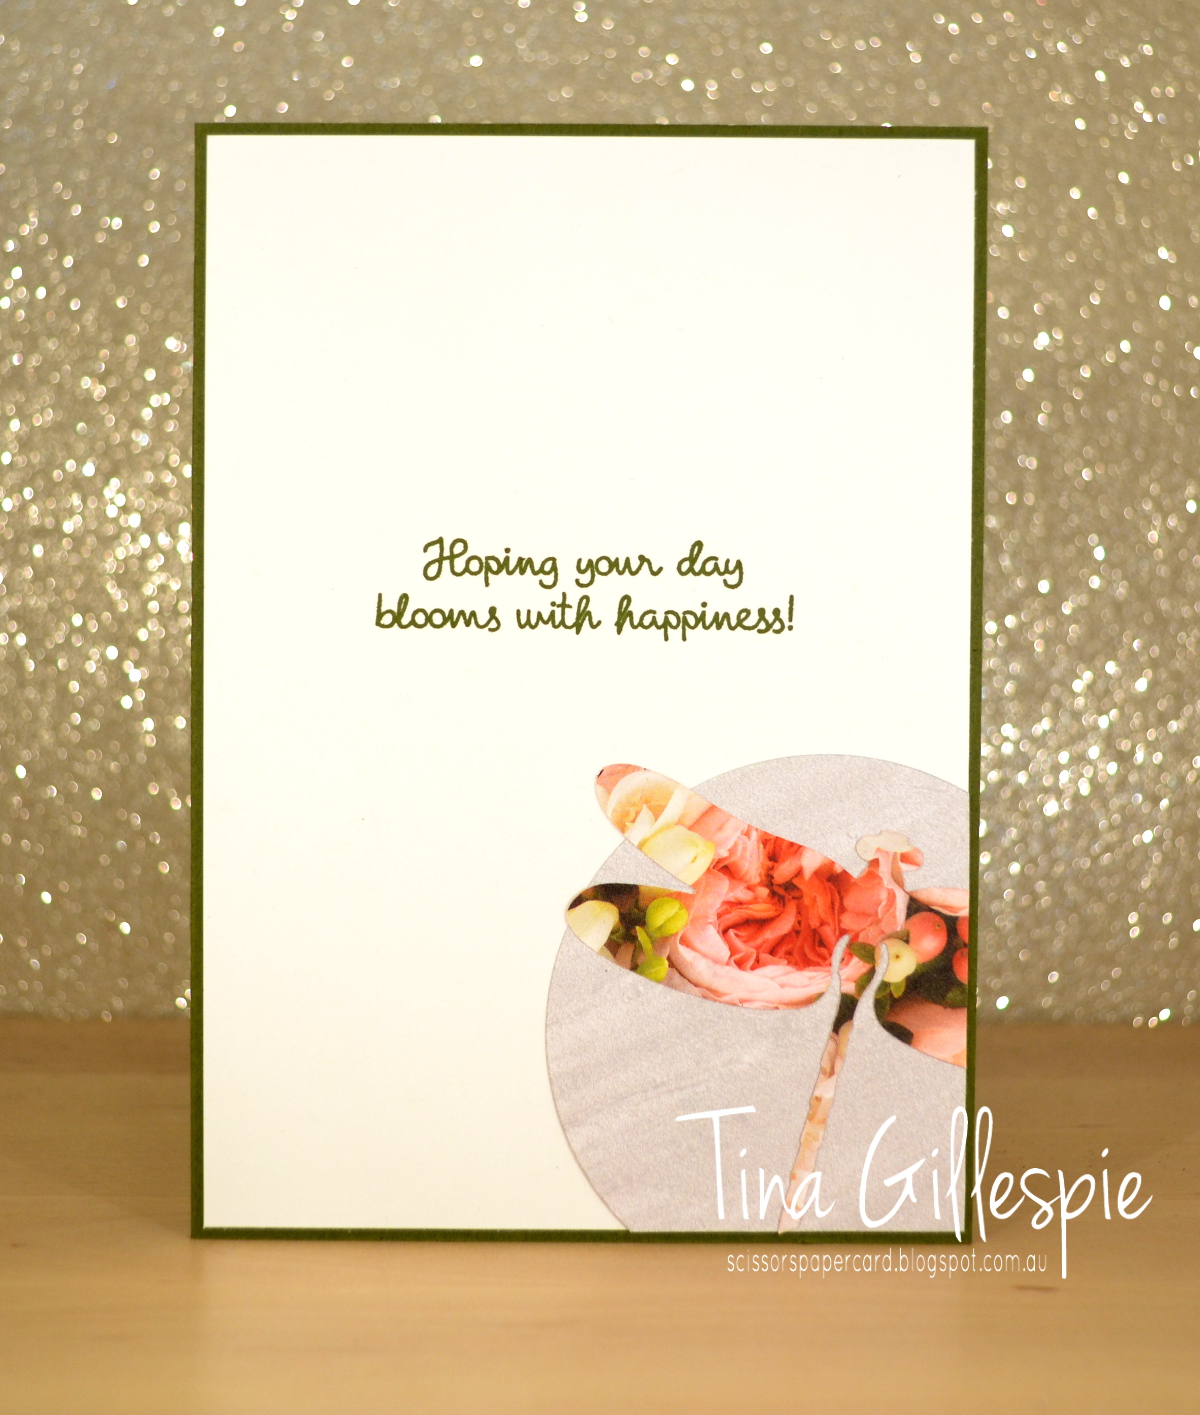
My class ladies had seen this card on my blog, featuring the Inlaid Dies Technique, and were keen to give it a go. That card was too complicated for a class situation, so I made this as a simpler alternative. I love how the floral paper looks cut into the dragonfly shape!

scissorspapercard, Stampin' Up!, Art With Heart, Colour Creations, Humming Along, Varied Vases, Petal Promenade DSP, Detailed Dragonfly Thinlits

So as a recap, the technique is a bit like masking, but with dies. You start at the back by cutting the circle. The hole is then 'filled' by the same sized circle in a different pattern paper, held in place with washi tape on the back. Next I cut the top dragonfly, again filling the hole with the floral paper. Finally, I cut and filled the lower dragonfly. You need to use a *lot* of washi on the back to hold it all in place, but it's worth it - I love the look!

scissorspapercard, Stampin' Up!, Art With Heart, Colour Creations, Humming Along, Varied Vases, Petal Promenade DSP, Detailed Dragonfly Thinlits

I kept the circle from the front, and also the first dragonfly die cut, to use on the inside. The dragonfly wasn't a complete cut, so I made sure he was flying off the edge to disguise that fact.

I hope you like the card and try out the technique - it's a fun one!

Why not pop on over to Catherine's Blog, where you can see what everyone else has done with Mossy Meadow this week?

Bye for now,

Tina

Thursday, 6 December 2018

JAI #437:Just Add I

Hi!

Welcome to the end of the week, the start of the weekend (yay!) and a new challenge!


This week at Just Add Ink it's one of my alphabet challenges. The letter up for duty this week is the letter I, which *really* got the Design Team thinking!


After a bit of thought, I decided I'd go with the Inlaid Die Cuts technique. Once you get your head around it, it's not tricky, just a bit time consuming. Here's my card, and then I'll explain!

scissorspapercard, Stampin' Up!, Just Add Ink, Wood Textures DSP, Best Route DSP, Celebrate You Thinlits, Bottles and Bubbles Framelits, Itty Bitty Birthdays

It's called inlaid, because even with all of those die cuts (I think there were 8!), the card front is completely flat - nothing sticking out at all.

scissorspapercard, Stampin' Up!, Just Add Ink, Wood Textures DSP, Best Route DSP, Celebrate You Thinlits, Bottles and Bubbles Framelits, Itty Bitty Birthdays

After cutting the card base in Wood Textures DSP, I then die cut it using the largest Layering Circle. I then cut the same. circle from Best Route DSP and inlaid the circle into the base, holding it in place with washi tape on the back. Next was the two straws (you work from the back of the design to the front), then the brown bottle, red label, green bottle, orange label, and finally the white 'celebrate'. Each time you replace the piece you cut from the design with a fresh piece that is held in place at the back with washi. The hardest part was the sentiment, as there are a whole lot of little bits that have to be stuck back down - all the little bits in the loops of each letter. I was a little frightened to do the celebrate in case I stuffed up all the work before it, but thankfully it worked!

scissorspapercard, Stampin' Up!, Just Add Ink, Wood Textures DSP, Best Route DSP, Celebrate You Thinlits, Bottles and Bubbles Framelits, Itty Bitty Birthdays

I used the same technique on the inside to make the bottle. This time I just cut a bottle from DSP. On the front I cut them from Whisper White and brayered on the colour. The label on the inside bottle is the one I cut from the green bottle on the front. As it was one of the last layers it was one of the only useable pieces left!

You can see what the rest of the super imaginative Design Team have created over at the Just Add Ink blog. Pleas join in the fun - link up your "I" cards over there too.

Bye for now,

Tina

Sunday, 25 November 2018

CASEing The Catty #205

Hi!

EDIT: Oh, wow, I was a winner at CASEing The Catty with this card!


It's been a long while since I've managed to play along with the CASEing The Catty challenge, but after a busy weekend with Rob and the kids, I decided I'd make sure I made the time to give the challenge a go. For challenge #205, the CTC have asked us to choose a birthday card from the catalogue and give it a Christmas twist. What fun! I made a cuppa and settled in with my Annual Catalogue and eventually decided I'd CASE the Mint Macaron/Gorgeous Grape card at the top right of page 136.

scissorspapercard, Stampin' Up!, CASEing The Catty, Star Of Light, Hearts Come Home, Swirly Frames, Twinkle Twinkle DSP, Hometown Greetings Edgelits, Christmas

I kept the layout pretty much the same, and I also used Swirly Frames on my focal panel, but to give it the Christmas twist, I went with the Hometown Greetings Edgelits.

scissorspapercard, Stampin' Up!, CASEing The Catty, Star Of Light, Hearts Come Home, Swirly Frames, Twinkle Twinkle DSP, Hometown Greetings Edgelits, Christmas

I started by stamping and cutting two of the large Swirly Frames circles in Night Of Navy and using my Layering Circles dies. I then took my Aquapainter and Night of Navy and Gorgeous Grape ink to create the evening sky on one of the circles. I was so thrilled with how that turned out! I also flicked over some Frost White Shimmer Paint to represent the stars. I cut the second circle with the edgelit, trimming off the second house as it didn't look quite right to me. I then used Dimensionals to pop it up on top of the first circle.

scissorspapercard, Stampin' Up!, CASEing The Catty, Star Of Light, Hearts Come Home, Swirly Frames, Twinkle Twinkle DSP, Hometown Greetings Edgelits, Christmas

The inside was kept fairly simple so that I'll have plenty of room to write a Christmas message when I send the card. Thanks to the CTC team for a fun challenge!

Bye for now,

Tina