Pages

Showing posts with label Little Numbers Thinlits. Show all posts

Thursday, 24 November 2022

JAI 631: Just Add A Sketch

Hi! 


Welcome to the new Just Add Ink Challenge. This week we have a Sketch challenge, with the sketch designed by me!
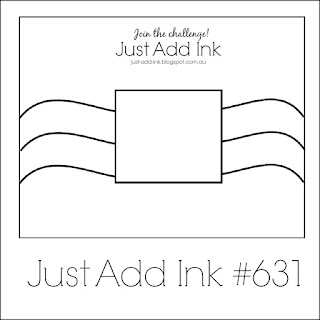

The Design Team had a whole lot of fun with those wavy lines in the background! I needed to make a card for a rugby league loving youngster, and his favourite team just happened to have three lines across their jersey, so it was the perfect choice for this sketch.

scissorspapercard, Just Add Ink, T-Shirt Builder Dies, Inspiring Canopy Dies, Little Numbers Dies, Play Ball, Ink Road Stamps Belated, Male Card

I used my Inspiring Canopy dies to crop the coloured cardstock before adhering it to the black background. The lines aren't quite as wavy as I would have liked, but I couldn't get my brain around cutting the three stripes by hand, so I made do with what I had!

scissorspapercard, Just Add Ink, T-Shirt Builder Dies, Inspiring Canopy Dies, Little Numbers Dies, Play Ball, Ink Road Stamps Belated, Male Card

I used my T-Shirt Builder Dies to crop a black jersey for the front of the card. I briefly toyed with the idea of adding tiny stripes to it, but my eyes and fingers rebelled at the thought! I compromised with the same number as his age on the top.

scissorspapercard, Just Add Ink, T-Shirt Builder Dies, Inspiring Canopy Dies, Little Numbers Dies, Play Ball, Ink Road Stamps Belated, Male Card

On the inside I used a retired set, called Play Ball. The sentiment is an Ink Road set, called Belated. Hopefully, even though it's late, the recipient will love the card.

That's all from me for now, but please jump on over to the Just Add Ink blog, where you'll find the rest of this week's Design Team cards. You can also link up your card for our challenge. I can't wait to see what you make with my sketch.

Bye for now,

Tina

Monday, 1 October 2018

Springing Into Muddy Puddles

Hi!

Oh dear, the long weekend caught me out, and I'm late with this post. It's a super fun one though, so hopefully that makes up for it's tardiness. Today's card is the one I made for m youngest son, Hudson, who recently turned 11. He's a huge Peppa Pig fan, and we have been watching it lots while he's been recovering from his recent surgery.

scissorspapercard, Stampin' Up!, Happy Birthday Gorgeous, Sunshine Sayings, Little Numbers Thinlits

To make the card I printed two of the same Peppa Pig scenes of the family jumping in muddy puddles - if you know Peppa Pig you know that it's something they do a lot! Here's where it gets super fun - I fussy cut the two groups pigs and popped each one up on a spring that I made. Look:


How fun is that! Hudson took one look at the card and gave it a kiss, so I guess that means that he loved it!

scissorspapercard, Stampin' Up!, Happy Birthday Gorgeous, Sunshine Sayings, Little Numbers Thinlits

The inside is pretty simple. I realised after I'd packed up my printer that I should have printed something to fussy cut for the inside. Oh well! I used an offcut of the front panel that I fussy cut to cut the numbers from so that the colours matched. Waste not, want not!

Bye for now,

Tina

Thursday, 5 July 2018

JAI #416: Just Add A Sketch

Hi!

Hooray for school holidays! I've been on the count down for weeks, and now they are here. Two weeks of chilled time home with the kids - I can't wait!


In the meantime, it's time for the new Just Add Ink challenge. This week Patrice has given us this fabulous sketch to work with.


It's so versatile - you could really do anything with that square! I went very literal with the sketch this week, as it suited the theme of my card.

scissorspapercard, Stampin' Up!, Kindred Stamps, Creative Imaginations, Just Add Ink, Building Blocks, Milestone Moments, Little Numbers Thinlits, Copics

Who doesn't love those colourful plastic building blocks? Until you step on one, that is! My kids are mad on it, but this card was made for a friend who, as you can probably guess, was turning 40. The figure stamp was from a set by Kindred Stamps called Building Blocks. The paper was some I had in my stash by Creative Imaginations.

scissorspapercard, Stampin' Up!, Kindred Stamps, Creative Imaginations, Just Add Ink, Building Blocks, Milestone Moments, Little Numbers Thinlits, Copics

I had a lot of fun colouring the little man with my Copic markers. Unfortunately I didn't have the correct colours among my Stampin' Blends. It was great practice for trying to show a curve in a shape by using highlight and lowlights. It's hard to see in the yellow head, but you can certainly see it in the top pant of his pants.

scissorspapercard, Stampin' Up!, Kindred Stamps, Creative Imaginations, Just Add Ink, Building Blocks, Milestone Moments, Little Numbers Thinlits, Copics

Anyone else got a certain song from a movie soundtrack stuck in their heads right now? LOL! Alex used to sing the famous line from it all the time, and it drove me nuts!

Why not pop on over to the Just Add Ink blog, where you can see the gorgeous cards the Design Team have come up with this week? You'll be just as amazed as I was how everyone has interpreted the sketch. What will you do with it? You can link up and join in the challenge on the blog. See you there!

Bye for now,

Tina

Thursday, 13 April 2017

JAI #355: Just Add A Sketch

Hi!


Waaa Hoo! The school holidays are finally here in South Australia! I'm really looking forward to some lazy days at home with the kids, with hopefully a bit of time for crafting. But for now, I have the new Just Add Ink challenge for you.


http://just-add-ink.blogspot.com/2017/04/just-add-ink-355sketch.html

This week Narelle has designed an awesome sketch for us to use. As soon as I saw it, I knew I wanted to use a die I purchased some months ago, but hadn't had a chance to use yet.

http://just-add-ink.blogspot.com/2017/04/just-add-ink-355sketch.html
The male members of my family are rather map-mad, so I knew that a die like the globe wouldn't go unused for too long in my stash! Before you ask, it's not a SU die, it's a Tim Holtz Sizzix die.


I also pulled out some long retired colours and papers for this card. Do you remember the Going Places DSP? It was one of my favourites for male cards. I made this card for my son Alex's 14th birthday. Then I remembered I used the same papers and colours for his 13th birthday card too!


The blue in the card is also a retired colour - Lost Lagoon. I just couldn't bring myself to part with it when it retired as an In Colour last year.


The inside stamp is still current though - I couldn't use ALL retired stuff on this card!


What do you see in the sketch? There's lots of room to play with it. I turned my card sideways, as the size of the globe suited a landscape card rather than portrait. I hope to see your creation over at Just Add Ink this week.


Bye for now,


Tina

Friday, 23 September 2016

JAI #330: Just Add A Sketch

Hi!


Welcome back to another Just Add Ink Challenge!


http://just-add-ink.blogspot.com/2016/09/just-add-ink-330sketch.html

This week Kim has designed a fantastic sketch for us to use in our card making.


I love the layered circle and square - it's nice to mix up the shapes a little sometimes!


I made this card for my son, Hudson. He turned 9 last week and absolutely loves In The Night Garden, especially the Tombliboos! He watches it and laughs and says 'uh-oh' when they do silly things like fall over and lose their trousers. Sometimes he gets so excited he shouts 'uh-oh' - that's just how much he loves it, so of course I had to make his card using one.


Ignore my terrible colouring, I was in a rush!


I actually coloured two images - one was a test to see how the colours worked. I liked the end result, so I included the 'test' image on the inside of the card.


What will you do with Kim's sketch? I hope I see you over at Just Add Ink!


Bye for now,


Tina


Monday, 14 March 2016

MKPLxSU Blog Share: Metallics

Hi!


Welcome to the March 2016 Memory Keeping With Project Life by Stampin' Up! Blog Share. This month we are focusing on the use of Metallics in our projects. I chose to do this by using both the Gold stickers in the Memories in the Making PL Collection and also some of our Gold Foil paper.

Apologies for the glare on the photos - I really should get organised so I'm photographing the layouts in the daylight rather than trying to use my light box at night!


I started putting together a 6x8 Album a year or so ago that documented my daughter, Ada's dancing. I only got as far as the title page before setting it aside to work on other things. As soon as I found out we were doing the metallics Blog Share I immediately thought of it again and decided it was a great opportunity to get more done. On this first page I used some of the Gold Foil paper to create the numbers for the journalling card. As this album will span many years, I wanted the year to stand out as people flick though the album.


You can see that I used one of the gold heart stickers to add a cute little touch to the flag at the bottom of the card.


I have to honestly say that I'm not a big user of metallics normally, which is probably why only one tiny gold heart sticker found it's way onto this page!


On the page above, I originally adhered the small square card directly onto the larger card. I wasn't happy with it though, as one just blended into the other. Solution - a matt of the Gold Foil paper under the smaller card to help separate the two and highlight the journalling.


For consistency, I am using the Little Numbers Framelits with the Gold Foil paper on each page that starts a new year in the album.


On this final page (for now), I used the Gold Foil paper to adjust the photo. The photo originally had Ada smack bang in the middle, which didn't leave me enough room to add in the small card. I decided to chop about an inch off the left hand side of the photo and then add the Gold Foil strip to the right hand side. This pushed Ada to the left, leaving enough room to adhere the small card for journalling. Problem solved!

Here are the links to the other ladies participating in this month's Blog Share. I hope you can find time to click on their links and enjoy some wonderful metallic Project Life by Stampin' Up! inspiration.


Bye for now,

Tina

Friday, 4 March 2016

JAI #301: Just Add Numbers

Hi!


How's your week been? I've had a fabulous week - nothing I can really pinpoint, just a general good feeling! I took advantage of that to work on my project for this week's Just Add Ink challenge, suggested by Nikki, which was to add numbers to our creations.

Last weekend Rob and the kids finally finished reading the Harry Potter books, so we were able to watch the final movie as a family. We have done this for the entire series - read the book then watch the movie. We've done this for the Narnia series too. I decided to scrap this occasion, as it was an important memory for our family.


The paper I used was from a kit I bought many years ago, but I've also used a few scraps of Stampin' Up! DSP from many years ago. I think the pack was called Well Worn, or something similar.


I've used both of my sets of number dies on the layout. I cut 1-7 from the Little Numbers Thinlits to represent the seven books in the series. The 1-8 are cut using the Large Numbers Framelits to represent the eight movies.


I couldn't resist using this sticker from the kit to throw another number onto the layout. All Harry Potter fans should know the significance! I created the bottom of the banner by inserting the strip of DSP into the underneath of the Label Bracket punch and then punching so that I only cut one end of the strip.


This last picture was just to show you that I tried something different with the photo - it was printed in sepia tones to better coordinate with the backing paper. I tried colour and black & white, but I think the sepia picture was the clear winner. What do you think?

How are you going to be inspired by the 'numbers' theme this week? I think it's a fantastic theme - so many possibilities! I can't wait to see them all over at Just Add Ink.

Bye for now,

Tina

Friday, 16 October 2015

JAI #284: Just Add A Fancy Fold

Hi!

Wow, it's been a week full of blog hops for me, and now I can finish up with my Just Add Ink card.


This week Di has challenged us to use a Fancy Fold in our creations.  I have been eyeing off these TeePee cards for yonks (a very long time for the non-Aussies!), so this was a great excuse to have a go.  They are so easy!!! I really don't know why I didn't try one sooner.


I have two great nephews who are turning one in the next couple of months so I decided to use this challenge to make a card for the first of the boys.


I really love this elephant stamp from Zoo Babies - in the bright Pacific Point it's a great option for those 'nearly a toddler' cards.


There's not a huge amount of space for writing on the card unless you use the inside, so the smaller sentiment from Endless Birthday Wishes was great.


Here's the card opened flat so you can see how it's put together.  I used 3 squares of cardstock cut to 4 1/8 inches and scored diagonally through the middle. The DSP is cut to 4 inches square and then cut on the diagonal, just slightly in from the middle on each side so you end up with a tiny strip that you toss out.  I cut the Whisper White cardstock the same way and then just rimmed off the bottom corner so it doesn't show when the card is closed.

To post you just open it flat and then fold it down the middle.  Easy!

The Design Team have done a fantastic job with this challenge.  You can see their Fancy Folds over on the Just Add Ink blog.  I hope to see yours there too!

Bye for now,

Tina

Wednesday, 7 October 2015

A Princess Card

Hi!

Today I have a card for you that uses a lot of retired product.  I had to share it anyway as it's so very cute!  On Sunday we attended the birthday of a very gorgeous 4 year old who is mad on a certain movie - you know, the one that most 4 year olds are obsessed with and sing endlessly.  Thank heavens my children were too old for that movie!


Have you worked out the movie yet? If not I guess you'll just have to let it go...


The princess dress was based on this one, I made a few minor changes to suit the products I had. Once I'd put the dress together I spritzed it with a mix of Isocol and Champange Mist Shimmer Paint (sadly retired) to give it a bit of shimmer.  Hopefully you can see it in the picture.


The only snow flake stamp I have is the one from the Perpetual Birthday Calendar set.  I think it works beautifully on this card.

Happy Birthday Jasmin, I hope you had a great day!

Bye for now,

Tina