Pages

Showing posts with label Painted Labels Dies. Show all posts

Wednesday, 26 October 2022

Colour Creations: Highland Heather

 Hi!


Hello, and thanks for stopping by for the new Colour Creations Blog Hop. This week we are featuring Highland Heather, a favourite of mine because it's a lovely, soft purple, and Heather is my mum's name!
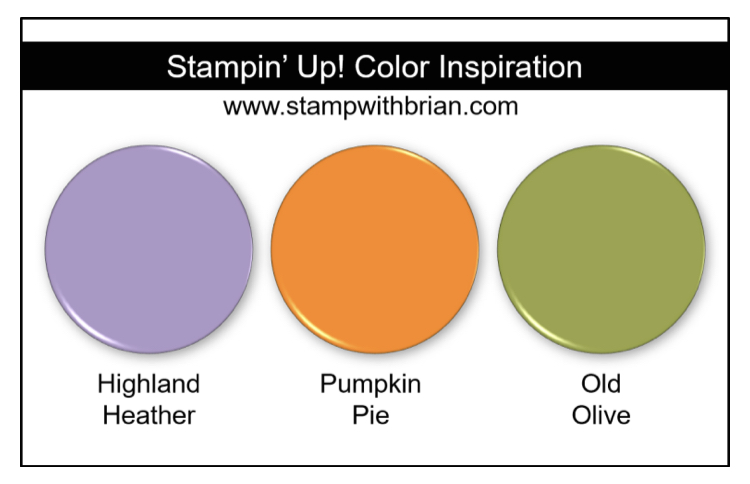

I chose to use this colour combo by Brian King on my card. I liked the purple, orange and green combo. It wasn't until I was browsing the Online Store for products that featured Highland Heather that I realised they were the colours (and Basic Black) in the Glitter Washi pack. 

scissorspapercard, Stampin' Up!, Colour Creations, Biggest Wish, Forever Flourishing Dies, Painted Labels Dies, Glitter Washi

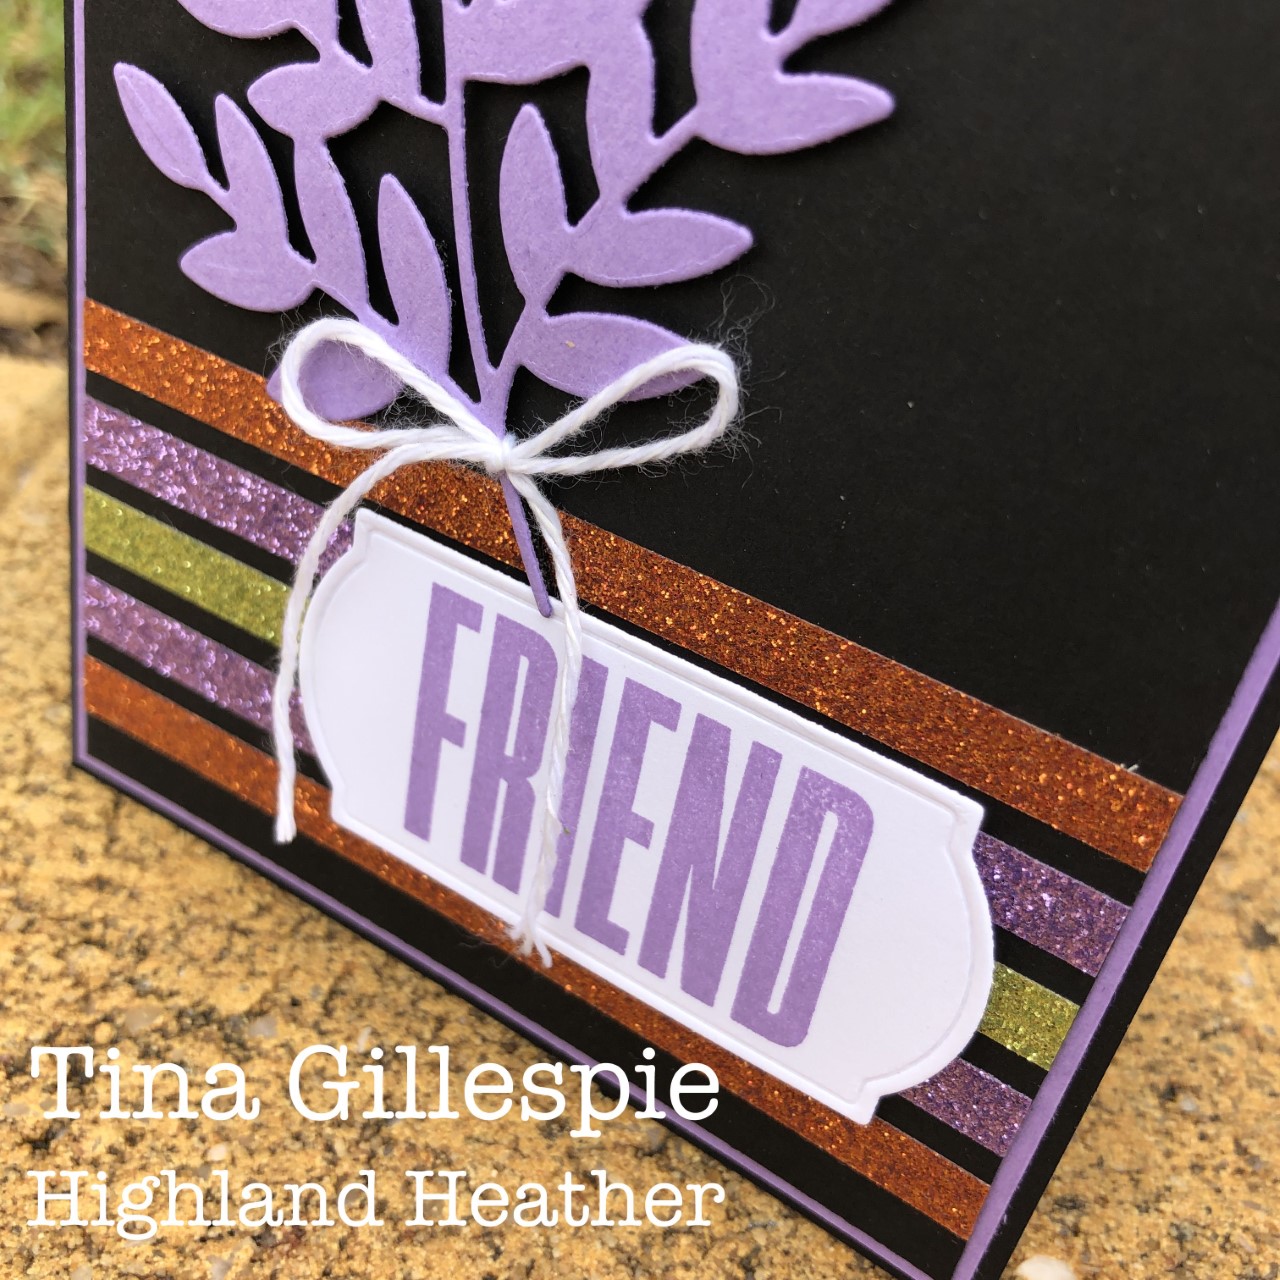
I started by layering some of the washi on some Basic Black cardstock. I really wanted the colours to pop, and I thought that black was better for this than white. The glimmer looks amazing in real life. The next addition to my card was the Forever Flourishing diecut, cropped from Highland Heather card. I popped it up over the black cardstock using my Black Dimensionals. Aren't they perfect for a card like this?
scissorspapercard, Stampin' Up!, Colour Creations, Biggest Wish, Forever Flourishing Dies, Painted Labels Dies, Glitter Washi

I wasn't loving the card at this stage - I felt that the washi and the diecut just weren't connecting. Hopefully the Biggest Wish sentiment, cropped with a Painted Labels die, does the job of pulling the elements together. I think it does!

scissorspapercard, Stampin' Up!, Colour Creations, Biggest Wish, Forever Flourishing Dies, Painted Labels Dies, Glitter Washi

I used all of the same elements on the inside of my card. 

Thanks again for stopping by, but please do keep jumping around our blog hop tonight. The next stop along the way is my lovely friend, Christine Blain.

If you run into any issues with links tonight, just pop on over to Catherine Proctor's blog. She does such a wonderful job of keeping us all organised each week.

Bye for now,

Tina

Sunday, 27 June 2021

CTC 324: CASE A Retiring Mini Project

 Hi!


Thanks for joining me for the new CASEing The Catty Sunday Challenge Blog Hop. This is the last week that products from the January-June Mini Catalogue will be available, so of course we are doing one last hurrah from the Mini.


In deciding which card to CASE, I thought about which stamp set was at the top of my 'must-have' list when the catalogue was released. The stamp set was Pretty Perennials, and as it didn't make the cut into the new Annual Catalogue, I thought it was fitting to give the set one last outing.


I thought that this card in the catalogue was sooo pretty, so it was my choice of card to CASE. I don't usually CASE a card exactly, but in this instance I couldn't resist - why change perfection?

scissorspapercard, Stampin' Up!, CASEing The Catty, Pretty Perennials, Joy To The World Paper Pumpkin, Painted Labels Dies

To create my stamped background, I started with half of a sheet of Whisper White A4 cardstock. I stamped the images across about 2/3rds of it, so that when I trimmed it down for the front and inside of my card I had stamping on both pieces. I hope that makes sense! 

scissorspapercard, Stampin' Up!, CASEing The Catty, Pretty Perennials, Joy To The World Paper Pumpkin, Painted Labels Dies

It's very difficult to photograph, especially as the day I took the photo was very gloomy, but I had a happy accident when flicking ink over the card. I used an Aqua Painter that I must not have cleaned well last time I used it, as the Pool Party ink came out shimmery! I must have used Shimmer Paint last time. It was a very happy accident!

scissorspapercard, Stampin' Up!, CASEing The Catty, Pretty Perennials, Joy To The World Paper Pumpkin, Painted Labels Dies

Here you can see the other half of the half-A4 sheet that I stamped in one go. It really does make things easier!

How will you choose a project from the Mini Catalogue to CASE? A favourite stamp set, like me, or maybe just a project that catches your eye? Either way, we'd love to see it, so please join our Facebook group and post your photo there. Can't wait to see it!


Before you go and get inky, please do finish our Blog Hop. Next in the line up is the lovely Peta, with an absolutely stunning card! You won't want to miss it!

Bye for now,

Tina

Wednesday, 5 May 2021

Colour Creations: Smoky Slate

 Hi!


Here we go again with the Colour Creations Creative Showcase, and this time we are looking at Smoky Slate. It's usually more of a background colour, I guess, so making it a feature was a little tricky! I love pairing crisp white with grey, so it was a no-brainer to go with the combo for my card.

scissorspapercard, Stampin' Up!, Colour Creations, Forever Fern, Forever Flourishing Dies, Painted Labels Dies, Subtle 3DEF, Seaside Notions

I started with the Forever Fern stamp set, stamping a few of the different fern images in Smoky Slate ink and cropping them with the matching Forever Flourishing Dies.

scissorspapercard, Stampin' Up!, Colour Creations, Forever Fern, Forever Flourishing Dies, Painted Labels Dies, Subtle 3DEF, Seaside Notions

The labels are from the Painted Labels Dies. The largest was used to crop some Silver Foil, and the smaller the Whisper White card that the sentiment, from Seaside Notions, was stamped on. A few Rhinestones finishes off the front.

scissorspapercard, Stampin' Up!, Colour Creations, Forever Fern, Forever Flourishing Dies, Painted Labels Dies, Subtle 3DEF, Seaside Notions

The inside is just more of the same die cut and images from the front. I'd stamped and cut a heap, so I had plenty left over!

It's time now to pop on over to Cathy's blog, where you'll find the rest of this week's Smoky Slate cards.

Bye for now,

Tina

Wednesday, 6 January 2021

Colour Creations: Night Of Navy

 Hi!


Welcome back to the Colour Creations Creative Showcase for 2021. We are continuing our alphabetical tour through the Stampin' Up! colour range, resuming with Night Of Navy. It's a lovely dark blue, with purple undertones, and is a part of the Neutrals family.

scissorspapercard, Stampin' Up!, Colour Creations, Creative Showcase, Pretty Perennials, Joy To The World, Perennial Petals Dies, Painted Labels Dies

I had yet to play with any of my new catalogue goodies, so I pulled out the Pretty Perennials Bundle for my card. I was keen to see how the flowers would go with the blue and white colour scheme - and I love it! I stamped the three watercolourish flowers on the front of my card in Night Of Navy ink and layered it over a Night Of Navy base.

scissorspapercard, Stampin' Up!, Colour Creations, Creative Showcase, Pretty Perennials, Joy To The World, Perennial Petals Dies, Painted Labels Dies

The sentiment label is from the Painted Labels dies, with the Silver Foil layer hand-cut to match the corner notches. I also cut the leaf spray from the Perennial Petals Dies from Silver Foil. The full die cut is to the left of the label, with just a single leaf to the bottom right.

scissorspapercard, Stampin' Up!, Colour Creations, Creative Showcase, Pretty Perennials, Joy To The World, Perennial Petals Dies, Painted Labels Dies

A few more flowers were stamped on the inside to finish off the card. Do you recognise the sentiment? I used it a *lot* at the end of last year! I was very excited to realise that the font in Pretty Perennials nearly perfectly matches the font in the Joy To The World Paper Pumpkin kit stamp set. Yay!

scissorspapercard, Stampin' Up!, Colour Creations, Creative Showcase, Pretty Perennials, Joy To The World, Perennial Petals Dies, Painted Labels Dies

I simply masked off the word 'Christmas' before stamping the sentiment. The single word 'Birthday' fits in the gap perfectly. I'm so excited to realise that the sentiment works equally as well for Birthdays as it does for Christmas! If you missed it last year, the Joy Of Christmas Paper Pumpkin kit is still available 😉

Thanks for joining me tonight, please head on over to the very lovely Catherine's blog, where you'll find the rest of this week's Night Of Navy links.

Bye for now,

Tina

Wednesday, 18 November 2020

Colour Creations: Melon Mambo

 Hi!


Thanks for joining me on another Tuesday evening for the new Colour Creations Showcase. This week we are all using Melon Mambo in our creations. Many years ago, the release of Melon Mambo as an additional In Colour was the start of the process of bringing the South Pacific market into line with the North American market. Although it's not a colour that I use a lot, it has that special little place in my SU journey.

scissorspapercard, Stampin' Up!, Colour Creations, Timeless Tulips, Stitched Shapes Dies, Painted Labels Dies, Stamparatus

I paired it with a stamp set that I don't use a lot either - Timeless Tulips. I was inspired by some cards by Michelle Taylor recently. She's the queen of In The Round stamping, or wreath stamping, where you use your Stamparatus to stamp in a circular design. My base layer has the largest tulip flower stamped either time in a circle. I layered a piece of Vellum, cropped with the swirly Painted Labels Die, over the top. I also teased out a length of the Forever Greenery Gold Thread and layered it over the Vellum.

scissorspapercard, Stampin' Up!, Colour Creations, Timeless Tulips, Stitched Shapes Dies, Painted Labels Dies, Stamparatus

Finally, I used my Stamparatus again to stamp the smallest tulip bud in the round. I fussy cut around the edge and them popped it up over the other layers. The smallest circle Stitched Shapes Die was the perfect space for the sentiment.

scissorspapercard, Stampin' Up!, Colour Creations, Timeless Tulips, Stitched Shapes Dies, Painted Labels Dies, Stamparatus

I layered the same two tulips on the inside, this time on the straight instead of in the round. I didn't usually pop up elements on the inside, but I felt that the row of smaller tulips needed it.

As always, it's time to pop on over to Catherine's blog, where she's hosting all of the rest of this week's Melon Mambo links. I can't wait to see what everyone does with this bold colour!

Bye for now,

Tina
Wednesday, 21 October 2020

Colour Creations: Highland Heather

 Hi!


It's time once again for the new Colour Creations Creative Showcase! This week we are up to Highland Heather, a soft purple from the Subtles colour family. It's a lovely purple, and the addition of it, and Gorgeous Grape, to the colour line up a few years ago made lots of people very happy.

A couple of months ago I participated in an ATC swap that featured the Faux Mother Of Pearl technique, and I thought it would be a good one to use again with Highland Heather.

scissorspapercard, Stampin' Up!, Colour Creations, Painted Poppies, Painted Labels Dies, Timeless Tulips, Shimmer Paint, Stampin' Blends, Faux Mother Of Pearl Technique

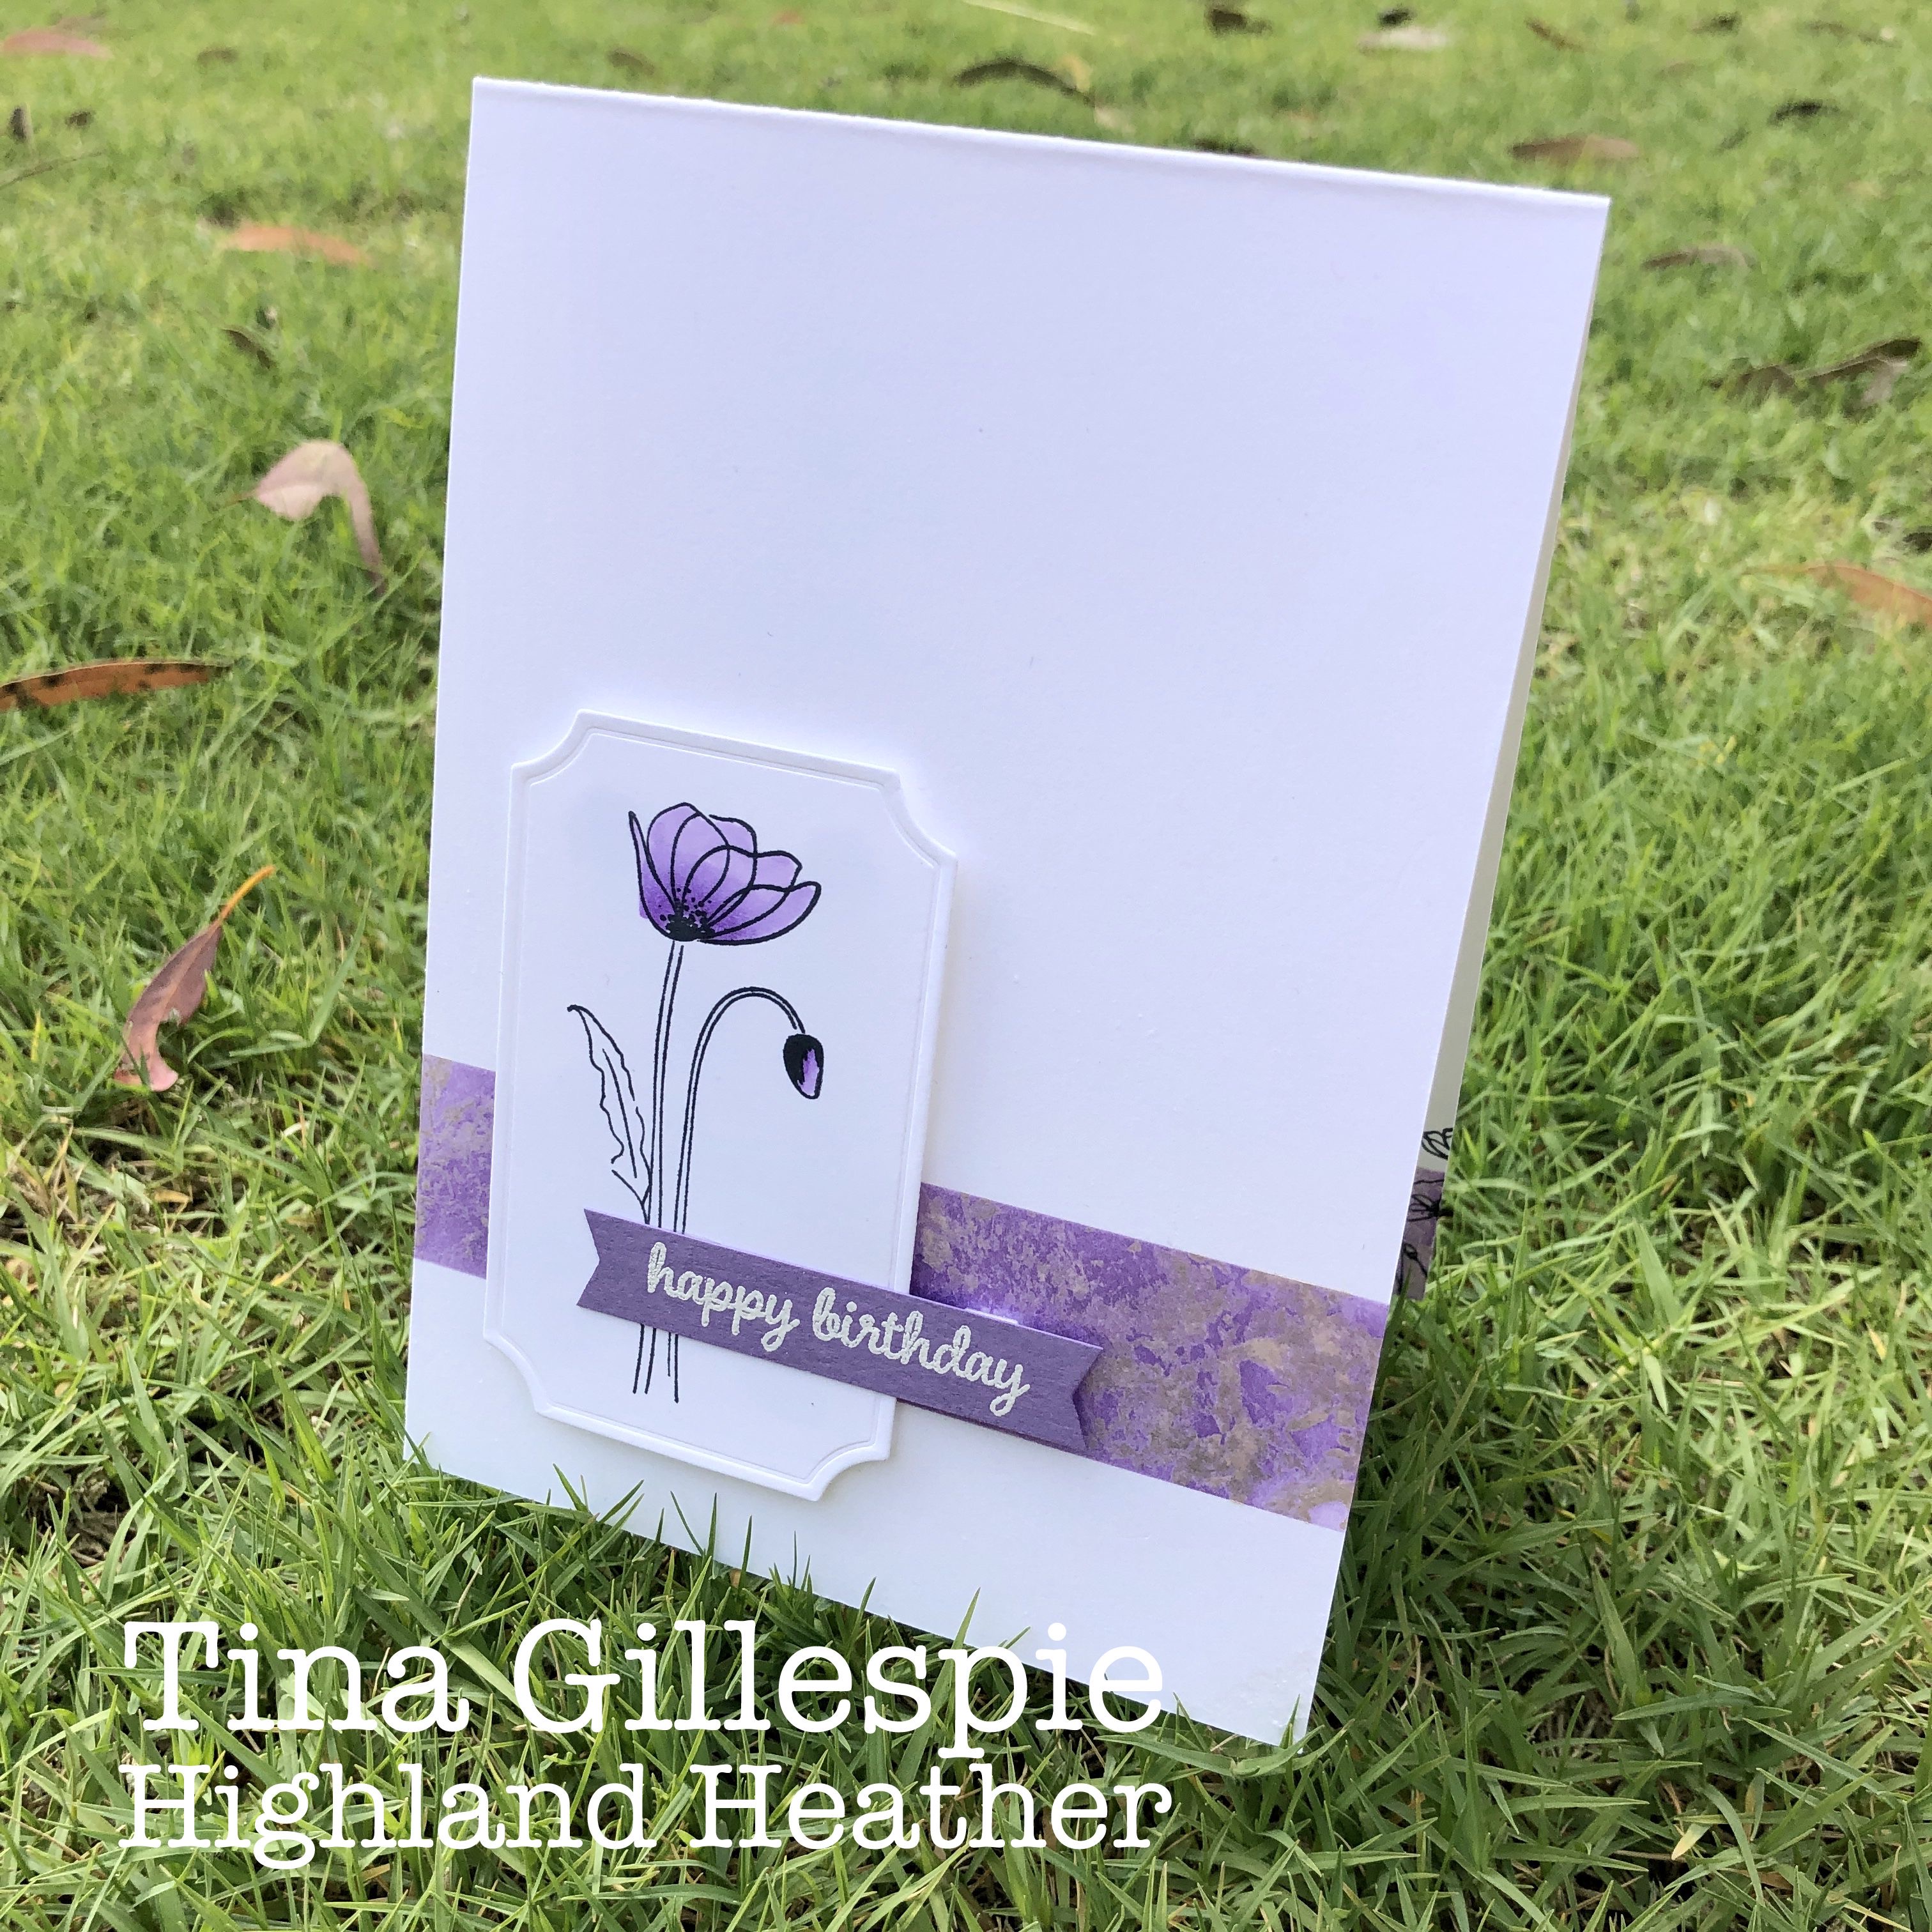
I started by masking off the strip along the bottom of my Thick Whisper White card base with some sticky notes. I then scrunched up some soft plastic wrap and dipped it onto some Frost White Shimmer Paint. I then dabbed the plastic all along the masked off section. You don't want the paint to completely cover the cardstock, so don't be too heavy handed. Once if was dry I sponged some Highland Heather ink over the top, and then peeled away the sticky notes.

scissorspapercard, Stampin' Up!, Colour Creations, Painted Poppies, Painted Labels Dies, Timeless Tulips, Shimmer Paint, Stampin' Blends, Faux Mother Of Pearl Technique

In this extreme side shot you can see the white of the shimmer paint a little better. The poppy was coloured with my Highland Heather Blends and cropped using a Painted Labels Die. The sentiment, from Timeless Tulips, was heat embossed with white embossing powder onto Highland Heather card and cropped with the Banners Pick A Punch.

scissorspapercard, Stampin' Up!, Colour Creations, Painted Poppies, Painted Labels Dies, Timeless Tulips, Shimmer Paint, Stampin' Blends, Faux Mother Of Pearl Technique

The bottom of the inside also has the Faux Mother Of Pearl treatment. I was unsure of how to proceed after applying the Highland Heather ink. I was going to stamp the same poppy as the front, but I though it might look too sparse. Luckily the Painted Poppies stamp set has the row of poppies. Perfect! I considered colouring the poppies that sit above the Faux Mother Of Pearl with my Blends, but I decide I liked them better plain. What do you think?

The rest of this week's links can be found over on Catherine's blog. I can't wait to see what everyone else has made with Highland Heather.

Bye for now,

Tina

Monday, 17 August 2020

Heart Of Christmas: August

Hi!


Welcome to August's Heart Of Christmas Showcase! The Art With Heart team are participating in a Monthly event in the lead up to Christmas. It's never too early to start on our Christmas cards, and so we hope we can inspire you to get creating!

This month I have a group of four cards that were once again inspired by my friend, Rachel Palmieri. She's been amazing at getting out of her comfort zone and doing Facebook videos, and I saw this technique in one of her videos.

scissorspapercard, Stampin' Up!, Heart Of Christmas, Brightly Gleaming SDSP, Joy Dies, Painted Labels Dies, Subtle 3DEF, Christmas Card

Basically, you take a 6 inch (15cm) square piece of DSP (non-directional is best), and measure in about 1 3/4 inch (3-4cm) from each side. You then cut the piece in half twice, from mark to mark, skipping one mark. You end up with four pieces of DSP that are a fun shape, ready to glue onto a card base. I went one step further and cut some cardstock the same way (but slightly bigger) to matt the DSP.

scissorspapercard, Stampin' Up!, Heart Of Christmas, Brightly Gleaming SDSP, Joy Dies, Painted Labels Dies, Subtle 3DEF, Christmas Card

I embossed the Thick Very Vanilla card base with my Sublte 3DEF before gluing on the DSP. I then used my Painted Labels and Joy Dies to create the sentiment panel. The label was cut from Copper Foil, which matches the DSP. I cut the word 'Joy' from the inside of the label, where I knew it would be covered by the layered die cuts. You can see that on the inside I used a little strip of the same DSP and Pretty Peacock cardstock as decoration.

scissorspapercard, Stampin' Up!, Heart Of Christmas, Brightly Gleaming SDSP, Joy Dies, Painted Labels Dies, Subtle 3DEF, Christmas Card

The best part about this cutting method is that, for not much more effort than it would take to make one card, you get four cards! It's a great way to boost your card stash very quickly. I will certainly be trying it with other papers. This paper is the gorgeous Brightly Gleaming SDSP, which has carried over from last year's Holiday Catalogue.

Tat's all from tonight, but please do pop on over to my lovely friend, Judy's blog, where you can find the rest of this month's cards.

Bye for now,

Tina

Wednesday, 10 June 2020

AWH Colour Creations: Basic Gray

Hi!


Welcome back to the second week of the Colour Creations Showcase. We are working through the colours in alphabetical order, which makes this week Basic Gray. Not a colour I use a lot, but I'm always up for a challenge! I had my new Blossoms In Bloom bundle out on my craft desk, so I decided to have a go at making a feminine card using a less traditional feminine colour.

scissorspapercard, Stampin' Up!, Colour Creations, Blossoms In Boom, Many Layered Blossoms Dies, Painted Labels Dies

I started by stamping the blooms onto my Whisper White card base, stamping off once first. I also stamped off for the flower centres and a few leaves.

scissorspapercard, Stampin' Up!, Colour Creations, Blossoms In Boom, Many Layered Blossoms Dies, Painted Labels Dies

The sentiment label is from Painted Labels, decorated with some flower die cuts from the Many Layered Blooms Dies. After I adhered them to my card, I thought they needed something a little extra. I cut some of the leaves from the big flower die and popped them underneath the flowers. It still needed more, so I added a Basic Rhinestone to the centre of each flower.

scissorspapercard, Stampin' Up!, Colour Creations, Blossoms In Boom, Many Layered Blossoms Dies, Painted Labels Dies

I stamped the flowers and leaves again on the inside, also stamped off. As nice as the flowers are in their entirety, sometimes it's nice to just use a portion of the image. I'm not sure that I love this card, but I do like it. Basic Gray was certainly a challenging colour to make a feminine card from, without any other colours to balance it.

Time now to head on over to Catherine's Blog, where you can find the rest of this week's Basic Gray cards. Next week is a favourite of mine, Bermuda Bay.

Bye for now,

Tina

Sunday, 10 May 2020

CTC #269 Week 2: Your Favourite Retiring Bundle

Hi!


Thanks for joining me once again for the new CASEing The Catty Sunday Challenge Blog Hop! We are mid way through our current challenge, which is to CASE Your Favourite Retiring Bundle.


This week I have chosen to use the Varied Vases bundle.


I have used the stamp set a lot, but mostly for the sentiments! I love the curly script font, especially as it's a smaller size. For my card I decided to get a bit more adventurous and use the vases and flowers.

scissorspapercard, Stampin' Up!, CASEing The Catty, Varied Vases Bundle, Ornate Layers Dies, Painted Labels Dies

I started by blending some ink on the front of the card. I used Purple Posy and Soft Sea Foam. Thankfully the Posy ink behaved itself and blended nicely. I cropped the panel using one of the new Ornate Layers Dies.

scissorspapercard, Stampin' Up!, CASEing The Catty, Varied Vases Bundle, Ornate Layers Dies, Painted Labels Dies

The flower outlines were stamped in Memento ink and then filled with colour. Stamped of Rococo Rose for the top flower (an orchid? I have no idea!) and stamped off Rich Razzleberry for the other flower. The vases were just cropped from Whisper White card. I tried stamping different colours and metallics, but nothing looked quite right other than WW.

scissorspapercard, Stampin' Up!, CASEing The Catty, Varied Vases Bundle, Ornate Layers Dies, Painted Labels Dies

I recreated the same scene on the inside - hahaha, I just realised I did the same on last weeks card! The sentiment I used on the inside is my favourite from the set. It works so well with any floral card, and I have used it a lot.

That's all from me this week. AS I said, we are mid way through this fortnight's challenge, so you have another week to get your card made, photographed and posted into our Facebook group. I'd love to know your favourite retiring bundle!


In the meantime though, please do finish the hop. I'm near the end this week, so if you started at the top, you're nearly done! If not, just keep going until you get back to where you started. Easy! Next up is the lovely Shannon, who has made a super cute card!


Bye for now, and a very Happy Mother's Day to the mums of all sorts out there!

Tina

Sunday, 26 January 2020

CTC #261 Week 2: Sale-A-Bration

Hi!


Happy Australia Day! I hope you've had a lovely day doing fun things. I was up early to play in my concert band at an Australia Day breakfast, and then played later in the afternoon at a Citizenship Ceremony. I could do without the speeches, but it's always fun seeing the range of new citizens welcomed to our city.


Australia Day or not, it's time for our weekly CASEing the Catty Sunday Challenge Blog Hop. As it's Week 2 of the challenge, we are still CASEing anything from the Sale-A-Bration catalogue. Flicking through, this Lily card with the die cut ombre background caught my eye. I love blue, so I think it was natural that I was drawn to it.


If you've been following my blog for a while, you know that I love a good sponge brayered ombre background, so that's how I chose to CASE this card. It was tempting to use the blues, but I decided in the end to use purples - Purple Posy, Highland Heather and Gorgeous Grape.

scissorspapercard, Stampin' Up!, CASEing The Catty, Label Me Bold, Sending You Thoughts, Stitched Stars Dies, Rectangle Stitched Dies, Painted Labels Dies, Sponge Brayer

It's interesting how this process shows up some of the undertones in the colours. For example, Purple Posy has a grey undertone, and you can see this at the top of the card where the purple fades out. Once I'd rolled on the three colours, I flicked some water over the top. Such a fun, cool effect!

scissorspapercard, Stampin' Up!, CASEing The Catty, Label Me Bold, Sending You Thoughts, Stitched Stars Dies, Rectangle Stitched Dies, Painted Labels Dies, Sponge Brayer

I die cut the starry swirl from Black Glimmer paper and adhered it to the ombre background. I forgot to peel off the coating on the back of the paper, so popping out all of the little bits was a pain, but I think it was worth it! I used the stars, plus a few extra in Whisper White and Gorgeous Grape that I had floating around on my desk, to finish off the front. The sentiment comes from Label Me Bold, a stamp set I am really loving.

scissorspapercard, Stampin' Up!, CASEing The Catty, Label Me Bold, Sending You Thoughts, Stitched Stars Dies, Rectangle Stitched Dies, Painted Labels Dies, Sponge Brayer

It's soooo hard to see, because it's very thin border, but I used the offcuts from the ombre background as a border for the Whisper White panel on the inside. When I rolled the front panel, I did a full card front sized piece for this very reason. It's a great time saver!

I'm all done, so I'm off to kick back for the rest of the Australia Day long weekend. I think I might do some sewing tomorrow. I have a quilt on the go that needs a little more work. It's for Alex's 17th birthday in April, so in theory I have plenty of time, but we all know how time can run away on us! Check out our Facebook Group for lots of inspiration, and upload your card for our Sale-A-Bration challenge.


To continue the hop, next up is the fabulous Siobhan.


Bye for now,

Tina