Hi!
Welcome back to Week Two of the first CASEing The Catty Sunday Challenge for 2020! As I mentioned last week, we have switched to running each challenge over two weeks, with a new blog hop each Sunday as usual. That means you get twice the inspiration for each challenge! Speaking of inspiring, the blog before mine was the fabulous Rebecca's, and you can find the link to the next blog at the end of my post.
This week continues with CASEing any project from the January-June Mini Catalogue. There's so much to choose from! Last week I CASEd a card fairly closely, so this week I went looking for a technique to CASE. I didn't have to go far!
This beauty is on page 3, and uses a watercolour wash on the die cut background. It's such a fun technique, so I was very keen to give it a try!
I don't have the Heart To Heart bundle, so instead I used my Springtime Impressions Dies. I started by washing Highland Heather, Coastal Cabana, Mango Melody and Flirty Flamingo over a piece of Watercolour Paper. Once it dried, I cropped it using the butterfly die.
The rest of the card is just layers of Basic Black cardstock and Follow Your Art DSP. I love how the DSP mimics the look of the butterfly, without all the effort! You might also be able to see that I embossed the largest black layer with the Layered Leaves 3D Embossing Folder.
I used a couple of DSP offcuts to add to the side of the writing panel on the inside. Just a slither - any more takes away from the watercolour wash look from the butterfly.
Have you made your card and posted it to our Facebook group in the last week? If not, you still have another week - get to it! LOL!
For now though, it's time to hop on over to the wonderful Siobhan's blog. Give a little 'rawr!' as you go!
Bye for now,
Tina
Showing posts with label Springtime Impressions Thinlits. Show all posts
Sunday, 12 January 2020
Tuesday, 23 July 2019
Diagonal Folded Perennial Essence
Hi!
Today I have a fancy fold card for you. I made it as a class sample. Every now and then I get a hankering to make a fancy fold, and the Diagonal Fold card was one I hadn't tried yet.
It's a fairly simple fold to make. You score a piece of A4 card in half in both directions and then cut it in half diagonally. Done! This gives you two card bases to decorate. The hardest part was the cutting, only because it didn't fit in my trimmer, so I had to use a ruler and craft blade to cut the card.
I took a piece of Perennial Essence DSP and cut it to card front size and then chopped it down the middle on the same diagonal as my card base. The butterfly and 'thanks' had a coat of Wink Of Stella for a little added glimmer.
Nice and simple on the inside, just a piece of matching DSP and a lovely sentiment. Have you tried a Diagonal Fold card? It not, do give it a go - it's a fun and easy card (or two) to make.
Bye for now,
Tina
Today I have a fancy fold card for you. I made it as a class sample. Every now and then I get a hankering to make a fancy fold, and the Diagonal Fold card was one I hadn't tried yet.
It's a fairly simple fold to make. You score a piece of A4 card in half in both directions and then cut it in half diagonally. Done! This gives you two card bases to decorate. The hardest part was the cutting, only because it didn't fit in my trimmer, so I had to use a ruler and craft blade to cut the card.
I took a piece of Perennial Essence DSP and cut it to card front size and then chopped it down the middle on the same diagonal as my card base. The butterfly and 'thanks' had a coat of Wink Of Stella for a little added glimmer.
Nice and simple on the inside, just a piece of matching DSP and a lovely sentiment. Have you tried a Diagonal Fold card? It not, do give it a go - it's a fun and easy card (or two) to make.
Bye for now,
Tina
Tuesday, 16 April 2019
Springtime In Sahara
Hi!
Welcome once again to the new Colour Creations Blog Hop. I'm joining in even though I'm still in New Zealand, so hopefully nothing technical goes wrong!
This week we are featuring a neutral that I don't use very much. - Sahara Sand. I was so lacking for inspiration that I went googling and I found this card by Teneale Williams that I decided to CASE. There are lots of products on her card that are long retired, so I had to make do with similar current products.
As the current butterfly is wider than the old style one, I flipped the card to be landscape orientation. I kept the strips of DSP at each end of the card, as I quite liked that feature.
I promise that I used some Sahara Sand DSP from the Neutrals pack on my card, the photo is just showing it as more like Crumb Cake! I pulled out an old favourite stamp set, Timeless Textures to add some detail under the butterfly. There are actually two butterflies layered - another feature I loved from Teneale's card.
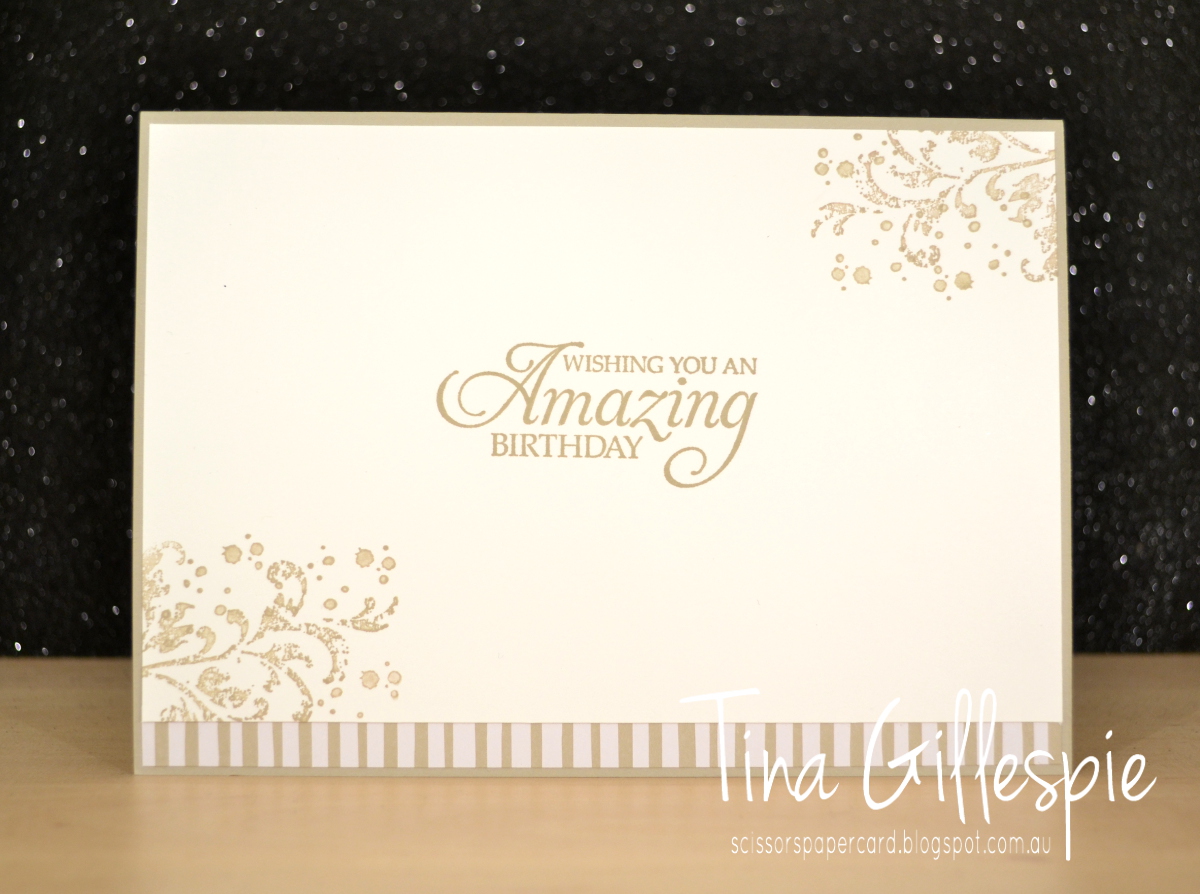
Similar inside stamping, and I also repeated the DSP under the panel trick for the strip along the bottom of the inside. I will have to remember that one!
Time once more to pop on over to Catherine's blog to see the rest of this week's Sahara Sand cards. You'll be glad you did.
Bye for now,
Tina
Welcome once again to the new Colour Creations Blog Hop. I'm joining in even though I'm still in New Zealand, so hopefully nothing technical goes wrong!
This week we are featuring a neutral that I don't use very much. - Sahara Sand. I was so lacking for inspiration that I went googling and I found this card by Teneale Williams that I decided to CASE. There are lots of products on her card that are long retired, so I had to make do with similar current products.
As the current butterfly is wider than the old style one, I flipped the card to be landscape orientation. I kept the strips of DSP at each end of the card, as I quite liked that feature.
I promise that I used some Sahara Sand DSP from the Neutrals pack on my card, the photo is just showing it as more like Crumb Cake! I pulled out an old favourite stamp set, Timeless Textures to add some detail under the butterfly. There are actually two butterflies layered - another feature I loved from Teneale's card.
Similar inside stamping, and I also repeated the DSP under the panel trick for the strip along the bottom of the inside. I will have to remember that one!
Time once more to pop on over to Catherine's blog to see the rest of this week's Sahara Sand cards. You'll be glad you did.
Bye for now,
Tina
Tuesday, 12 March 2019
Poppies On Parade
Hi!
Welcome to the new Colour Creations Blog Share! This week is another favourite colour of mine - Poppy Parade. I was very excited to see it back in the lineup after a bit of a hiatus.
Once again, I decided to try a new to me technique for the blog share. I receive the Splitcoast Stampers emails, and the latest had a tutorial for Die Embossed Watercolouring. The sample looked stunning, so I couldn't resist giving it a go.
Basically, you use you embossing mats and a die to create an embossed impression on your cardstock. I used Shimmery White, as it copes pretty well with watercolouring and is a cheaper alternative to watercolour paper. I used the large flower die from Springtime Impressions to create the base of my image. You then just watercolour the image. I used Poppy Parade, Daffodil Delight, Green Apple Green, Garden Green, Highland Heather, Soft Suede and Balmy Blue.
I have said many times that I am very much a 'slap on the colour' watercolourer. This perhaps isn't the best way to approach this technique! What do you think? Do you like the look and am I being too critical of myself? You can see that Poppy Parade is a very orange red, and watercolouring really brings this out. I used a second layer of ink in the embossed sections to add a bit of shading to the flower. I think that maybe this card is one of those 'stand back and unfocused your eyes a little' types of cards. LOL!
I think I will give this technique another go when I'm a bit less time poor and have more patience. Done correctly, I think it would be wonderful!
That's it for me, now you can pop on over to Catherine's blog to see the ret of this weeks Poppy Parade cards.
Bye for now,
Tina
Welcome to the new Colour Creations Blog Share! This week is another favourite colour of mine - Poppy Parade. I was very excited to see it back in the lineup after a bit of a hiatus.
Once again, I decided to try a new to me technique for the blog share. I receive the Splitcoast Stampers emails, and the latest had a tutorial for Die Embossed Watercolouring. The sample looked stunning, so I couldn't resist giving it a go.
Basically, you use you embossing mats and a die to create an embossed impression on your cardstock. I used Shimmery White, as it copes pretty well with watercolouring and is a cheaper alternative to watercolour paper. I used the large flower die from Springtime Impressions to create the base of my image. You then just watercolour the image. I used Poppy Parade, Daffodil Delight, Green Apple Green, Garden Green, Highland Heather, Soft Suede and Balmy Blue.
I have said many times that I am very much a 'slap on the colour' watercolourer. This perhaps isn't the best way to approach this technique! What do you think? Do you like the look and am I being too critical of myself? You can see that Poppy Parade is a very orange red, and watercolouring really brings this out. I used a second layer of ink in the embossed sections to add a bit of shading to the flower. I think that maybe this card is one of those 'stand back and unfocused your eyes a little' types of cards. LOL!
I think I will give this technique another go when I'm a bit less time poor and have more patience. Done correctly, I think it would be wonderful!
That's it for me, now you can pop on over to Catherine's blog to see the ret of this weeks Poppy Parade cards.
Bye for now,
Tina
Tuesday, 19 February 2019
Petals In The Springtime
Hi!
Tuesday night means it's time for the Art With Heart Colour Creations Blog Share. I've lost count of the number we are up to, but we are well past half way, and I'm impressed that I've managed to join in every week so far. Hopefully I haven't jinxed myself by saying that!
It's Petal Pink this week, which isn't a colour I particularly like. It's a little on the coral/peach side of the pinks and I prefer a pinker pink, if you know what I mean! It is a useful pink though, great for Caucasian skin tones, among other things. Anyway, on to the card! I used the partial die cutting technique to create the band across the middle of the Springtime Impressions Thinlit for the sentiment. I love how it creates one seamless piece for the front of the card.
To get the band, I lightly drew two lines across the Whisper White cardstock to mark where I wanted the band. I then ran my sandwich through the Big Shot, with one end of the top plate lined up with one of the lines. The older style plates with the straight edges work best for this technique. I then repeated for the other line. I then used my trimmer and snips to cut along the two lines, but just to remove the excess cardstock, I didn't cut through the die cut design. Does that make sense? If not, google it - Jennifer McGuire has a great video tutorial.
I finished the inside with a few of the coordinating flowers from the die set, adding a sequin to each centre to add a bit of glitz. This card will go to Ada's dance teacher, who is getting married in April. She likes her glitz!
Time to pop on over to Catherine's blog, where you can find the links to the rest of this week's Colour Creations cards.
Bye for now,
Tina
Tuesday night means it's time for the Art With Heart Colour Creations Blog Share. I've lost count of the number we are up to, but we are well past half way, and I'm impressed that I've managed to join in every week so far. Hopefully I haven't jinxed myself by saying that!
It's Petal Pink this week, which isn't a colour I particularly like. It's a little on the coral/peach side of the pinks and I prefer a pinker pink, if you know what I mean! It is a useful pink though, great for Caucasian skin tones, among other things. Anyway, on to the card! I used the partial die cutting technique to create the band across the middle of the Springtime Impressions Thinlit for the sentiment. I love how it creates one seamless piece for the front of the card.
To get the band, I lightly drew two lines across the Whisper White cardstock to mark where I wanted the band. I then ran my sandwich through the Big Shot, with one end of the top plate lined up with one of the lines. The older style plates with the straight edges work best for this technique. I then repeated for the other line. I then used my trimmer and snips to cut along the two lines, but just to remove the excess cardstock, I didn't cut through the die cut design. Does that make sense? If not, google it - Jennifer McGuire has a great video tutorial.
I finished the inside with a few of the coordinating flowers from the die set, adding a sequin to each centre to add a bit of glitz. This card will go to Ada's dance teacher, who is getting married in April. She likes her glitz!
Time to pop on over to Catherine's blog, where you can find the links to the rest of this week's Colour Creations cards.
Bye for now,
Tina
Monday, 12 November 2018
Orlando Swaps Part Two
Hi!
Today's post actually has my second and third swap items. I hadn't intended to make a third, but somehow I found it on the go before I'd even finished swaps one and two! Oops!
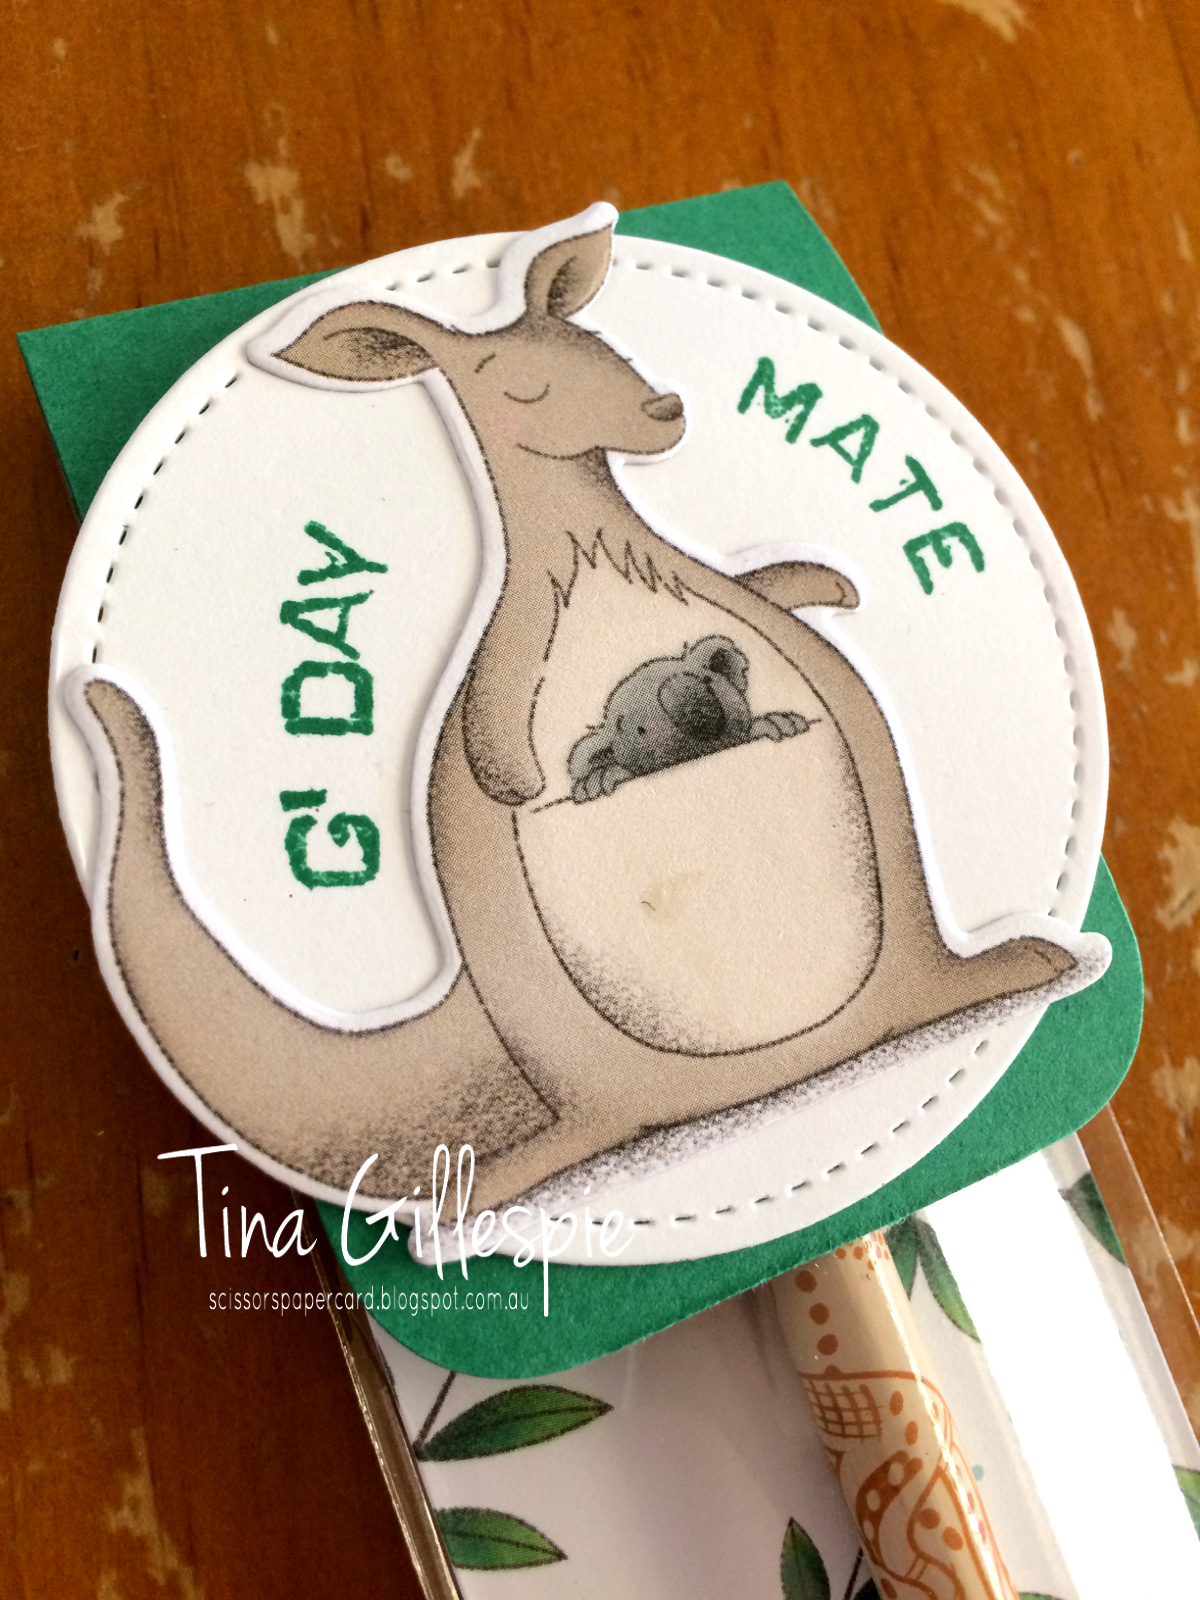
Let's start with swap two, which was actually my first idea. I had decided early on that I wanted to do something around an Australian flag pencil. Do you think I could find an Australian flag pencil without paying ridiculous prices? In the end I found these Aboriginal Art designs, which I think worked much better with my colour scheme.
I've used the Animal Expedition DSP again, as I wanted to use the large kangaroos this time. There are two leafy designs - this one with the frogs, and another with little birdies. I used a mix of the two as my backing piece. The bags are in the Annual Catalogue.
I used my Stamparatus to stamp the 'g'day mate' sentiment on the Stitched Circle. It's very cliche Australian, but I'm hoping that the American demos will love it! I made 24 of these swaps.
Finally, I have my last minute swap. I happened to be in Coles when my favourite Twinings Tea, Australian Afternoon, was half price. It was the smaller packs with individually wrapped bags. I grabbed two to take to the US, but when I realised they fit with the Australian theme of my swaps I decided to add them to the mix.
I didn't have enough Animal Expedition DSP left to use, so I decided to use some of my Garden Impressions DSP. I used my Envelope Punch Board to create a little tea bagged size envelope, which I topped with a Stitched Labels Framelit. I stamped a pair of sentiments from Balloon Celebration and then used part of the big floral die from Springtime Impressions for the little cluster of flowers. A few rhinestones finished off the design.
I wonder which of my swaps will be the most popular - the Tim Tam Slam, Pencil or Tea? What do you think?
Bye for now,
Tina
Today's post actually has my second and third swap items. I hadn't intended to make a third, but somehow I found it on the go before I'd even finished swaps one and two! Oops!
Let's start with swap two, which was actually my first idea. I had decided early on that I wanted to do something around an Australian flag pencil. Do you think I could find an Australian flag pencil without paying ridiculous prices? In the end I found these Aboriginal Art designs, which I think worked much better with my colour scheme.
I've used the Animal Expedition DSP again, as I wanted to use the large kangaroos this time. There are two leafy designs - this one with the frogs, and another with little birdies. I used a mix of the two as my backing piece. The bags are in the Annual Catalogue.
I used my Stamparatus to stamp the 'g'day mate' sentiment on the Stitched Circle. It's very cliche Australian, but I'm hoping that the American demos will love it! I made 24 of these swaps.
Finally, I have my last minute swap. I happened to be in Coles when my favourite Twinings Tea, Australian Afternoon, was half price. It was the smaller packs with individually wrapped bags. I grabbed two to take to the US, but when I realised they fit with the Australian theme of my swaps I decided to add them to the mix.
I didn't have enough Animal Expedition DSP left to use, so I decided to use some of my Garden Impressions DSP. I used my Envelope Punch Board to create a little tea bagged size envelope, which I topped with a Stitched Labels Framelit. I stamped a pair of sentiments from Balloon Celebration and then used part of the big floral die from Springtime Impressions for the little cluster of flowers. A few rhinestones finished off the design.
I wonder which of my swaps will be the most popular - the Tim Tam Slam, Pencil or Tea? What do you think?
Bye for now,
Tina
Monday, 2 July 2018
Springtime in Colour
Hi!
Today's card is not one I've CASEd from anyone in particular, but it's similar to a lot of cards that others have made. I've used the new Springtime Impressions Thinlits. I first loved them for the butterfly, but at second glance the other two dies, which I've used on this card, are pretty lovely too.
This card was fairly quick and easy to put together. I cut the large flower image with my Big Shot and then used my Stampin' Sponges to add colour to the flowers and leaves. The colours I used were Berry Burst, Calypso Coral, Crushed Curry, Garden Green and Lemon Lime Twist. There's no trick to adding the colour - it's literally jut sponged over the top.
Underneath where the die cut was going to lie I also sponged some Pool Party ink. It helps to make the colours in the flowers pop. A few pearls, a sentiment and a die cut flower (the third die in the set) and the card front was done!
The little flower die is so sweet that I couldn't help add a couple more to the inside of the card. So now, in the cold depths of winter, I am dreaming about Spring and new flowers!
Bye for now,
Tina
Today's card is not one I've CASEd from anyone in particular, but it's similar to a lot of cards that others have made. I've used the new Springtime Impressions Thinlits. I first loved them for the butterfly, but at second glance the other two dies, which I've used on this card, are pretty lovely too.
This card was fairly quick and easy to put together. I cut the large flower image with my Big Shot and then used my Stampin' Sponges to add colour to the flowers and leaves. The colours I used were Berry Burst, Calypso Coral, Crushed Curry, Garden Green and Lemon Lime Twist. There's no trick to adding the colour - it's literally jut sponged over the top.
Underneath where the die cut was going to lie I also sponged some Pool Party ink. It helps to make the colours in the flowers pop. A few pearls, a sentiment and a die cut flower (the third die in the set) and the card front was done!
The little flower die is so sweet that I couldn't help add a couple more to the inside of the card. So now, in the cold depths of winter, I am dreaming about Spring and new flowers!
Bye for now,
Tina
Monday, 25 June 2018
Polished Stone in Pink
Hi!
I mentioned a couple of weeks ago that I'd been playing around with the Polished Stone technique for my June classes. Today I have the first card I made using the technique.
I used Melon Mambo and Basic Black as the main colours on my card. I wanted to keep the colours dramatic but simple so that the focus would be on the Polished Stone panel.
Speaking of which, how lovely does that Polished Stone panel look? I used Melon Mambo, Pumpkin Pie and Daffodil Delight reinkers on Glossy Cardstock to achieve the effect. It's important to choose colours that are beside each other on the Colour Wheel, or you risk ending up with brown blobs instead of lovely colours. I went with a little more PP and DD, as I knew MM would dominate the combination.
I used the dotty stamp from Dragonfly Dreams on the inside, trying to recreate the Polished Stone in a small way.
Have you tried the technique yet? It's a fun one, so well worth trying!
Bye for now,
Tina
I mentioned a couple of weeks ago that I'd been playing around with the Polished Stone technique for my June classes. Today I have the first card I made using the technique.
I used Melon Mambo and Basic Black as the main colours on my card. I wanted to keep the colours dramatic but simple so that the focus would be on the Polished Stone panel.
Speaking of which, how lovely does that Polished Stone panel look? I used Melon Mambo, Pumpkin Pie and Daffodil Delight reinkers on Glossy Cardstock to achieve the effect. It's important to choose colours that are beside each other on the Colour Wheel, or you risk ending up with brown blobs instead of lovely colours. I went with a little more PP and DD, as I knew MM would dominate the combination.
I used the dotty stamp from Dragonfly Dreams on the inside, trying to recreate the Polished Stone in a small way.
Have you tried the technique yet? It's a fun one, so well worth trying!
Bye for now,
Tina
Tuesday, 15 May 2018
Kelly's Birthday Blog Hop
Hi!
Tonight I have something a little different for you. I'm blog hopping with the lovely Kelly Kent and 18 of her friends to celebrate her birthday. What a fun way to celebrate!
Being a blog hop, you should travel around each of the blogs until you get back to the blog you started on. The blog before me was the fabulous Jacqui Crouch. We don't get to see what the other hoppers have created until the blog hop starts, but I'm sure she's bound to have created something gorgeous!
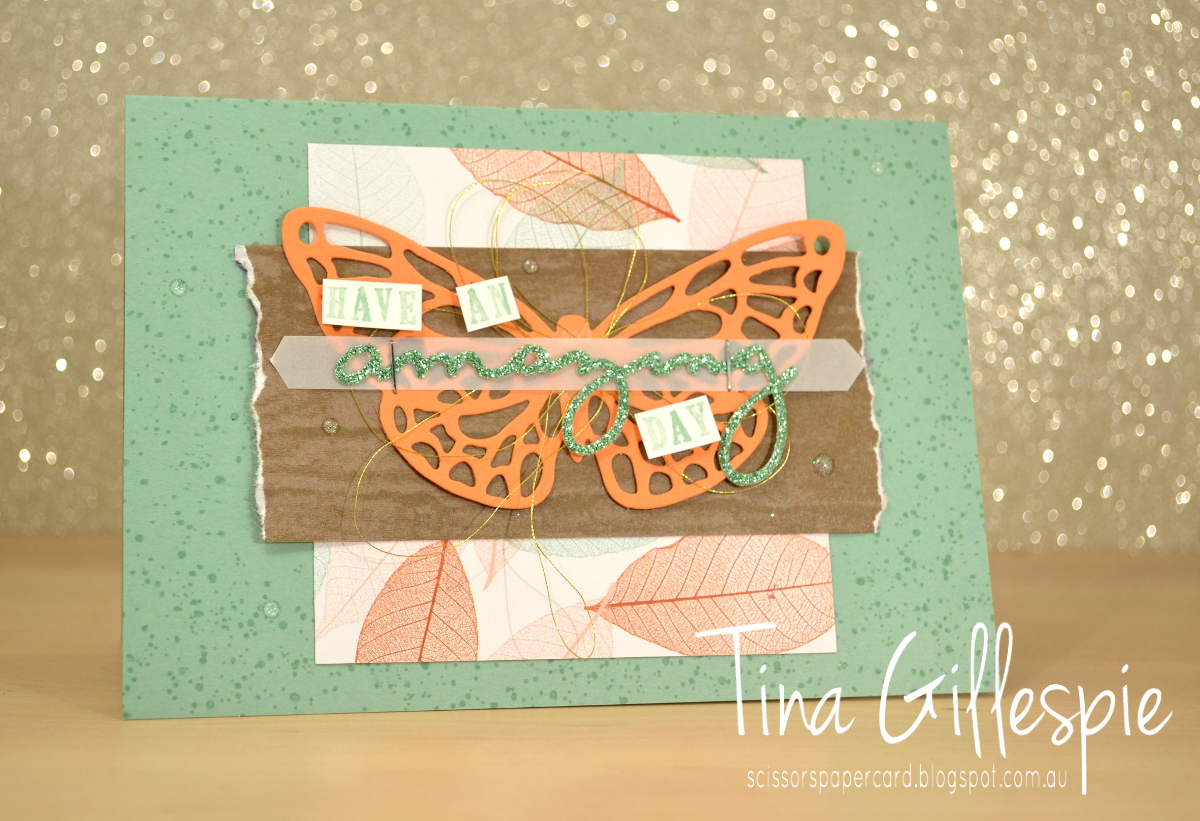
I decided to make a birthday card using some new, returning and retired products. I especially loved saying a big 'welcome back' to Mint Macaron. I was sooooo happy to see that name on the list of returning colours! I was so happy that I couldn't resist sneaking a little bit of the retired Mint Macaron Glimmer paper onto the card. It's so pretty and sparkly, as are the retiring Glitter Epoxy dots.
So, let see, what's new on my card? Look at that fantastic new butterfly die! It's so pretty! It's from the new die set called Springtime Impressions, and has a whole suite of products that it coordinates with that includes stamps, DSP, ribbon and embellishments. Speaking of DSP, the paper I have used today comes from the new Nature's Poem pack. It also has a whole suite of coordinating products! Finally, I've used a new stamp set called Pick A Pennant to stamp the sentiment.
I was very happy to see that Picture Perfect Birthday is carrying over to the new Annual Catalogue. It's such a fun set!
Well, that's it for me now. The blog hop will now take you on to the blog of the wonderful Jan McQueen. Just click on the Next button to get you there. Once you've finished this hop, why don't you pop on back to Kelly's blog? She's actually running TWO blog hops tonight for her birthday, so there's a whole other 20 gorgeous projects to look at. It's like a set of steak knives - buy one, get one free LOL. Click here for Kelly's second hop, but do finish this one first!
Bye for now,
Tina
Tonight I have something a little different for you. I'm blog hopping with the lovely Kelly Kent and 18 of her friends to celebrate her birthday. What a fun way to celebrate!
Being a blog hop, you should travel around each of the blogs until you get back to the blog you started on. The blog before me was the fabulous Jacqui Crouch. We don't get to see what the other hoppers have created until the blog hop starts, but I'm sure she's bound to have created something gorgeous!
I decided to make a birthday card using some new, returning and retired products. I especially loved saying a big 'welcome back' to Mint Macaron. I was sooooo happy to see that name on the list of returning colours! I was so happy that I couldn't resist sneaking a little bit of the retired Mint Macaron Glimmer paper onto the card. It's so pretty and sparkly, as are the retiring Glitter Epoxy dots.
So, let see, what's new on my card? Look at that fantastic new butterfly die! It's so pretty! It's from the new die set called Springtime Impressions, and has a whole suite of products that it coordinates with that includes stamps, DSP, ribbon and embellishments. Speaking of DSP, the paper I have used today comes from the new Nature's Poem pack. It also has a whole suite of coordinating products! Finally, I've used a new stamp set called Pick A Pennant to stamp the sentiment.
I was very happy to see that Picture Perfect Birthday is carrying over to the new Annual Catalogue. It's such a fun set!
Well, that's it for me now. The blog hop will now take you on to the blog of the wonderful Jan McQueen. Just click on the Next button to get you there. Once you've finished this hop, why don't you pop on back to Kelly's blog? She's actually running TWO blog hops tonight for her birthday, so there's a whole other 20 gorgeous projects to look at. It's like a set of steak knives - buy one, get one free LOL. Click here for Kelly's second hop, but do finish this one first!
Bye for now,
Tina
Subscribe to:
Posts (Atom)