Pages

Showing posts with label Just Sayin'. Show all posts

Monday, 29 October 2018

Great Scott!

Hi!

Today's card is one that I made for a very good friend. She's a mad fan of a certain trilogy of movies that involved a funny looking car and some time travel. My family are also big fans of this trilogy, so when I had the opportunity to buy some stamps that were a parody of the movies, I just had to buy them.

scissorspapercard, Kindred Stamps, Stampin' Up!, Back In Time, Just Sayin', Copics

The stamps are from my favourite pop culture company, Kindred Stamps, and are called Back In Time. I think they have retired now, so I'm very glad I got them when I did. Have you guessed the trilogy of movies?

scissorspapercard, Kindred Stamps, Stampin' Up!, Back In Time, Just Sayin', Copics

This image was a great way of practicing 'colouring white'. Clearly, you can't actually colour white, so it's about adding some shadows in a light grey to make the image come to life with a bit of shape. I was pretty pleased with my first attempt.

scissorspapercard, Kindred Stamps, Stampin' Up!, Back In Time, Just Sayin', Copics

Hehehe, I couldn't resist adding this retired Stampin' Up! stamp to the inside. My friend is a little older than me and sometimes I like to rub it in a little. She gives as good as she gets though!

Bye for now,

Tina

Thursday, 21 May 2015

AWH Blog Hop: Farewelling My Favourites

Hi!


Today I bring you another AWHT blog hop with some of the awesome ladies in the Art With Heart Stampin’ Up! Team. Today our focus is on our Favourite Retiring Product!


For my projects I decided to focus on the Flashback DSP.  It's a fabulous paper pack to use for slightly grungy male cards, as many of the pages have a distressed look.


I mostly like to keep male cards bold but clean and simple.  In this case I use the retiring What's Up punch to bracket the sentiment.  To do this I slid the DSP into the punch far enough to punch only the fatter arrow shape, and then repeated for the other side.


The sentiment is from another retiring stamp set/framelits combo: Just Sayin' and the Word Bubbles framelits.  I'm really going to miss the word bubbles - they are a lot of fun to use on cards!


To finish off the card I used the punched out pieces from the front and an old favourite (thankfully not retiring) Sassy Salutations.


On this card I have also used the Flashback DSP.  I wanted to make another male card, but a little more stepped up than the first card.  I decided to use the retiring Triangle punch to create a subtle feature that would help ground the sentiment panel. The geometric look of the triangles is fab on a male card.


The stamp set I used is from the Hip Hip Hooray Card Kit, which is retiring. I used my Real Red and Pool Party Stampin' Write markers to colour the image before I stamped it.


The inside was finished off with some more DSP and Triangles.  I also used another stamp from the Hip Hip Hooray set.

Let’s keep this blog hop hopping. Next up we have the amazing Genna Gifford.

http://thestampersmess.com/2015/05/farewell-to-my-favourite-blog-hop/

Sorry, Blogger isn't playing nicely and allowing me to add the link to Genna's blog on the image.  Just click here instead.

If you find a broken link or have come to this blog hop from a different entry point, you can view the participants below:

1. Judy May
2. Tina Gillespie
3. Genna Gifford
4. Ros Davidson
5. Claire Daly
6. Nikki Sadler
7. Kathryn Mangelsdorf
8. Kayleen McLean
9. Kathryn Ruddick
10. Jenny Van Dijk
11. Kate Morgan
12. Rachel Woollard
13. Barbara Lindsey

Monday, 5 January 2015

Creeper Card

Hi!

Do you have young children? If so, you're bound to know what Minecraft is.  My children play it lots.  Over the Summer holidays they have played it lots and lots. They talk to me about it lots too.  How about your children?  Anyway... Alex was invited to a mate's birthday party so I took the opportunity to make a punch art Creeper Card.


It's really easy to make, you just need a heap of different shades of green cardstock punched into 1 inch squares. I arranged them randomly to create the background.  I made this card ages ago, but I think I used Garden Green, Wild Wasabi, Old Olive and Pistachio Pudding.


I then used the 1 inch punch to create the face from Basic Black cardstock.  It took a bit of trial and error to get what I guess is the mouth bit right, but I did eventually.


Kids are a bit obsessed with their age, so I thought that this stamp was perfect for the inside!

Bye for now,

Tina

Friday, 31 October 2014

JAI #238: Just Add A Sketch

Hi!

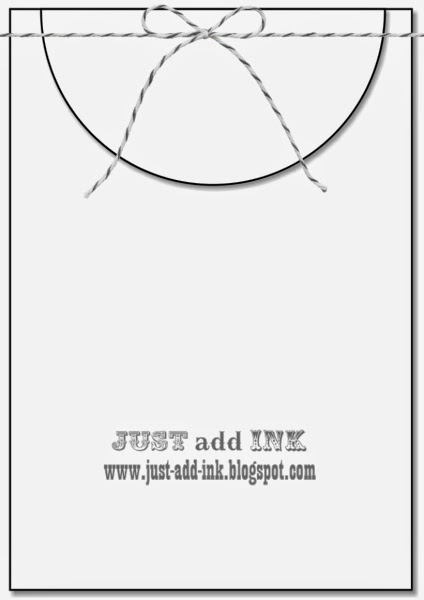
Happy Halloween, for those that celebrate the holiday. I don't really, but Rob and the kids do, so celebrate it I must!  Anyway, it's time for another Just Add Ink challenge, and this time Kim has designed a great sketch to inspire our creativity.


I had lots of fun with this sketch.  I cut quite a few Word Bubbles and played around with the positioning of them on the card.  None of it looked right though until I added the On Film film strip underneath.


The Tangello Twist background was created using the zig zag stamp out of Work Of Art, just stamped repeatedly.  I was quite impressed with how well I was able to line it up without the use of my Stamp-a-ma-Jig!


I was able to use the Word Bubbles I'd cut for the front and not used on the inside.  I hate to waste things, so it was a great solution!


I hope you have time to play along with us this week. The Design Team has had a lot of fun with the sketch.  Why don't you pop on over to the Just Add Ink blog to have a look?

Bye for now,

Tina

Monday, 15 September 2014

Draw The Line

Hi!

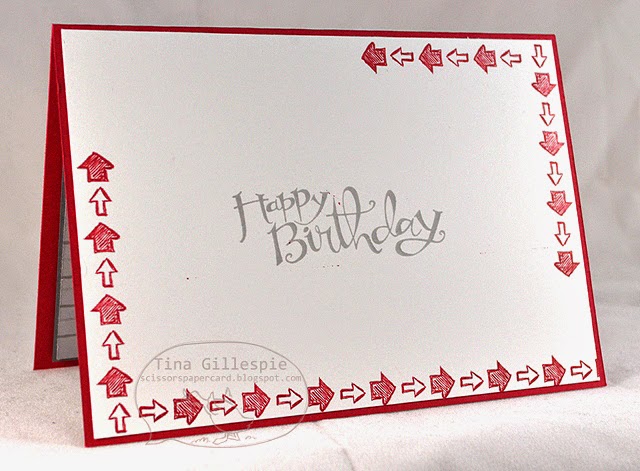
Where do you draw the line?  It's so much easier to draw the line with Stampin' Up!'s new photopolymer stamp set called Draw The Line! I recently ran a class on border stamps and this was one of the cards we made using the new stamp set.


I really love how easy photopolymer stamps are to line up!  We stamped the lines across the bottom in Smoky Slate and then again a second time without reinking.  As you can see through the stamps it was easy peasy to make sure that the spacing was even and the lines were straight.


The arrows are also a stamp in the set.  I thought they were a great way to add a little feature to the card, and they also tie in nicely with the new What's Up punched arrow. That punch is one of the current Weekly Deals, by the way!  I scribbled over the punchie with my Real Red marker to match the punchie to the stamped arrows.


I used the arrows again on the inside to add a border to the card.

Bye for now,

Tina

Friday, 5 September 2014

JAI #230: Just Add Dad

Hi!

This week at Just Add Ink we have a bit of an obvious, but still very fun, theme for our challenge this wee.  We want you to Just Add Dad!  Yes, with Father's Day in a couple of days we want you to show us what you've made.  If you don't celebrate Father's Day a male card would be fine too.


I made this card for Rob for Father's Day.  His favourite colours are red, white and black because his favourite footy team is the St George Dragons.  I went for a few retired items on the card too, including the Real Red Coredinations cardstock and the For My Family stamp set.


I've also used a lot of new stuff, like the Typeset SDSP and the Point & Click photopolymer stamp set.  Rob loves maps, so I deliberately chose the map page from the Typeset SDSP pack.


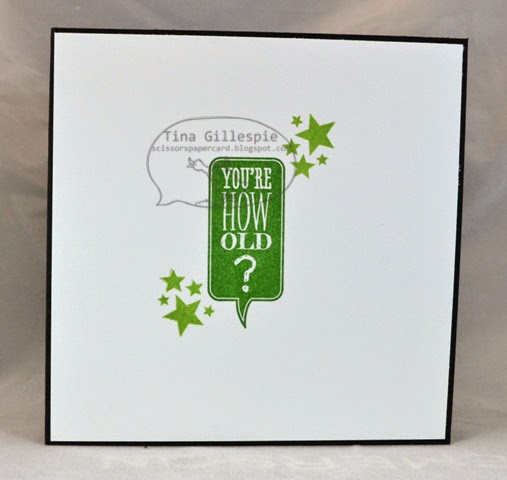
I love this little star cluster and the way it highlights the inside sentiment.  The sentiment is from the Just Sayin' stamp set, but I chose to use a different word bubble that the one it was in.  I used my Real Red marker to selectively colour the stamp to just use the words and then used the speech bubble from Point & Click to frame it.  Love the photopolymer stamps for easy placement!

Can't wait to see what you've all come up with for the males in your life! See you over at Just Add Ink.

Bye for now,

Tina

Monday, 11 August 2014

Masked Stars

Hi!

I mentioned recently that I participated in a cyber crop last month.  Today's card is another of the cards I made for one of the challenges we were set on the weekend.  The challenge was to use the colours in an inspiration picture that we were given.


There were a lot of bright colours in the inspiration picture we were given.  They were such a happy combination so I decided to make a happy card to go with them.  I used the new Stars Mask to create my happy card.  I held the mask over the cardstock and used my daubers to sponge the colour over the mask.  My old style inkpads worked the best, but I think that's because they are less 'juicy'.  I just need to remember to press a little lighter on my newer inkpads!


I didn't have the Star Framelits at that time, so I used my Eclectic Paper Piercing templates to pierce a star pattern and then I hand cut around the piercing.  I layered it on some Daffodil Delight cardstock and hand cut the matt.  Easy!


I also used the mask on the inside, but to make it a bit easier I sponged in Daffodil Delight only and they added some star punchies to bring in some colour.

The masks really are a heap of fun to play with!

Bye for now,

Tina

Friday, 27 June 2014

JAI #220: Just Add A Sketch

Hi!

Here we are at the end of another week.  They are flying past so quickly!  This week for our Just Add Ink challenge Kim has designed a sketch. It's really great - open to interpretation in so many fabulous ways.


The sketch stumped me for a while, but then I was looking through my new Everyday Adventure Project Life Card Collection and found the perfect card!


It works so well with the sketch! I matted it on Basic Black and then created a background for the card using the sentiment stamp from Just Sayin'.


I was pretty pleased with how it turned out, and I love that the cards from the Project Life sets can be used for more than just PL scrapbooking.


I hope you can find time to play along with us the week at Just Add Ink - it's a fabulous sketch!

Bye for now,

Tina