Hi!
Welcome to the latest Colour Creations Blog Share. This week we are making cards using Pool Party. Thankfully it's a colour I love as it's been a busy week and I was struggling a bit for inspiration. If you're a regular visitor to my blog you may have seen this card that I made for CASEing The Catty. It happened to be sitting on my desk when I sat to make my card for Colour Creations and so I decided to CASE my CASE of a catalogue card!
It was so easy to do, as conveniently Pool Party is one of the colours in the Painted Seasons DSP. So instead of Sunday's wintery Christmas card, I now have a summery, succulent Christmas card.
I CASEd myself nearly exactly, only switching out the paper, stamps and colours. Why mess too much with something I was happy with? The stitched elements all work so well together, don't you think?
So, yay! Another Christmas card added to the stash, and it's only March. Haha, I don't think I'll keep up the pace though - it's always a mad rush in November, or even December if I'm being honest with myself LOL.
That's it from me, now you can hop on over to Catherine's blog to see the cards that the rest of the team have created using Pool Party.
Bye for now,
Tina
Showing posts with label Star Of Light. Show all posts
Tuesday, 5 March 2019
Sunday, 3 March 2019
CTC #218: Sale-A-Bration
Hi!
It's the end of the weekend - boo - so it's the for the new CASEing The Catty blog hop - yay! The blog before mine was the lovely Lauren and I'm the last stop if you started at the beginning. If not, just keep hopping - the link to the next blog will be at the end of the post.
This week we are back to CASEing the Sale-A-Bration catalogues. You can choose something from either of the two brochures. This week my eye was caught by the Christmas card in the second release brochure. Did you notice it?
The Painted Seasons suite covers all the seasons, and the concept artist has made a Christmas card for winter. Which is weird for Australia, but let's not let a little weird stop us!
I sort of reversed the card, by cropping a piece of Poppy Parade cardstock using the Rectangle Stitched Thinlits. I then popped it up over the top of a piece of the winter DSP and adhered the whole lot to my Poppy Parade base.
Keeping with the stitched theme, I cropped a circle and a long, skinny rectangle for the sentiment. The pine cones were stamped using the Painted Seasons stamp set - one in Soft Suede, the other in Crumb Cake.
This was then repeated for the inside of the card. Yay, one more Christmas card to add to the stash!
That's it from me. Don't forget our Facebook group, where you can add your card for the week's challenge. Just click on the image below.
First though, if you have't finished the hop, jump on over to see what the lovely Michelle has made this week.
Bye for now,
Tina
It's the end of the weekend - boo - so it's the for the new CASEing The Catty blog hop - yay! The blog before mine was the lovely Lauren and I'm the last stop if you started at the beginning. If not, just keep hopping - the link to the next blog will be at the end of the post.
This week we are back to CASEing the Sale-A-Bration catalogues. You can choose something from either of the two brochures. This week my eye was caught by the Christmas card in the second release brochure. Did you notice it?
The Painted Seasons suite covers all the seasons, and the concept artist has made a Christmas card for winter. Which is weird for Australia, but let's not let a little weird stop us!
I sort of reversed the card, by cropping a piece of Poppy Parade cardstock using the Rectangle Stitched Thinlits. I then popped it up over the top of a piece of the winter DSP and adhered the whole lot to my Poppy Parade base.
Keeping with the stitched theme, I cropped a circle and a long, skinny rectangle for the sentiment. The pine cones were stamped using the Painted Seasons stamp set - one in Soft Suede, the other in Crumb Cake.
This was then repeated for the inside of the card. Yay, one more Christmas card to add to the stash!
That's it from me. Don't forget our Facebook group, where you can add your card for the week's challenge. Just click on the image below.
First though, if you have't finished the hop, jump on over to see what the lovely Michelle has made this week.
Bye for now,
Tina
Sunday, 25 November 2018
CASEing The Catty #205
Hi!
EDIT: Oh, wow, I was a winner at CASEing The Catty with this card!
It's been a long while since I've managed to play along with the CASEing The Catty challenge, but after a busy weekend with Rob and the kids, I decided I'd make sure I made the time to give the challenge a go. For challenge #205, the CTC have asked us to choose a birthday card from the catalogue and give it a Christmas twist. What fun! I made a cuppa and settled in with my Annual Catalogue and eventually decided I'd CASE the Mint Macaron/Gorgeous Grape card at the top right of page 136.
I kept the layout pretty much the same, and I also used Swirly Frames on my focal panel, but to give it the Christmas twist, I went with the Hometown Greetings Edgelits.
I started by stamping and cutting two of the large Swirly Frames circles in Night Of Navy and using my Layering Circles dies. I then took my Aquapainter and Night of Navy and Gorgeous Grape ink to create the evening sky on one of the circles. I was so thrilled with how that turned out! I also flicked over some Frost White Shimmer Paint to represent the stars. I cut the second circle with the edgelit, trimming off the second house as it didn't look quite right to me. I then used Dimensionals to pop it up on top of the first circle.
The inside was kept fairly simple so that I'll have plenty of room to write a Christmas message when I send the card. Thanks to the CTC team for a fun challenge!
Bye for now,
Tina
EDIT: Oh, wow, I was a winner at CASEing The Catty with this card!
It's been a long while since I've managed to play along with the CASEing The Catty challenge, but after a busy weekend with Rob and the kids, I decided I'd make sure I made the time to give the challenge a go. For challenge #205, the CTC have asked us to choose a birthday card from the catalogue and give it a Christmas twist. What fun! I made a cuppa and settled in with my Annual Catalogue and eventually decided I'd CASE the Mint Macaron/Gorgeous Grape card at the top right of page 136.
I kept the layout pretty much the same, and I also used Swirly Frames on my focal panel, but to give it the Christmas twist, I went with the Hometown Greetings Edgelits.
I started by stamping and cutting two of the large Swirly Frames circles in Night Of Navy and using my Layering Circles dies. I then took my Aquapainter and Night of Navy and Gorgeous Grape ink to create the evening sky on one of the circles. I was so thrilled with how that turned out! I also flicked over some Frost White Shimmer Paint to represent the stars. I cut the second circle with the edgelit, trimming off the second house as it didn't look quite right to me. I then used Dimensionals to pop it up on top of the first circle.
The inside was kept fairly simple so that I'll have plenty of room to write a Christmas message when I send the card. Thanks to the CTC team for a fun challenge!
Bye for now,
Tina
Wednesday, 21 November 2018
A Foxy Deer
Hi!
Today is the last Heart Of Christmas Blog Share for 2018. Have you enjoyed seeing all of the Christmas inspiration? Has it inspired you to start on your Christmas cards? I hope so!
The card I have made for this week's Blog Share has been one I've had on my mind for the entire 15 weeks of Heart Of Christmas. I just always kept putting off making it, as other ideas and new products took priority. As today's is the last, it was time to put ink to cardstock!
How cute is the reindeer? Can you see why I've been wanting to make this card? LOL
I couldn't resist adding a Red Rhinestone to turn him into Rudolph!
Here he is again on the inside. I hadn't intended to add the rhinestone to this deer's nose, but it just didn't look quite right without it after doing the one on the front.
You can see the rest of this final week's cards over at Claire's blog. I'm sure you'll love what you see.
Bye for now,
Tina
Today is the last Heart Of Christmas Blog Share for 2018. Have you enjoyed seeing all of the Christmas inspiration? Has it inspired you to start on your Christmas cards? I hope so!
The card I have made for this week's Blog Share has been one I've had on my mind for the entire 15 weeks of Heart Of Christmas. I just always kept putting off making it, as other ideas and new products took priority. As today's is the last, it was time to put ink to cardstock!
How cute is the reindeer? Can you see why I've been wanting to make this card? LOL
I couldn't resist adding a Red Rhinestone to turn him into Rudolph!
Here he is again on the inside. I hadn't intended to add the rhinestone to this deer's nose, but it just didn't look quite right without it after doing the one on the front.
You can see the rest of this final week's cards over at Claire's blog. I'm sure you'll love what you see.
Bye for now,
Tina
Thursday, 25 October 2018
JAI #432: Just Choose Two
Hi!
Hooray for Friday and the new Just Add Ink challenge.
This week Patrice has challenged us to Choose Two to add to our cards this week.
Which two will you choose of Buttons, Bows or Bling? I chose Bows and Bling.
I'm not sure if this card is a bit too footy jumper looking or not. What do you think? I think it's the stripe down the middle. I stamped over it with the starry swirl in Balmy Blue in to match the cardstock. The same stamp was also stamped in Night Of Navy on the larger layer.
My bling is these cute little stars that I found in my stash - I think they were a free gift with a purchase. I glued them over where the larger stars are in the swirl. A bit fiddly, but my Take Your Pick tool made the job much easier.
I repeated the swirls and stars on the inside. If you're going to bling something up, you may as well go big!
You can see the rest of the Design Team cards over at the Just Add Ink blog, where you can also link up your card. Which two will you choose?
Bye for now,
Tina
Hooray for Friday and the new Just Add Ink challenge.
This week Patrice has challenged us to Choose Two to add to our cards this week.
Which two will you choose of Buttons, Bows or Bling? I chose Bows and Bling.
I'm not sure if this card is a bit too footy jumper looking or not. What do you think? I think it's the stripe down the middle. I stamped over it with the starry swirl in Balmy Blue in to match the cardstock. The same stamp was also stamped in Night Of Navy on the larger layer.
My bling is these cute little stars that I found in my stash - I think they were a free gift with a purchase. I glued them over where the larger stars are in the swirl. A bit fiddly, but my Take Your Pick tool made the job much easier.
I repeated the swirls and stars on the inside. If you're going to bling something up, you may as well go big!
You can see the rest of the Design Team cards over at the Just Add Ink blog, where you can also link up your card. Which two will you choose?
Bye for now,
Tina
Wednesday, 17 October 2018
Non Traditional Christmas Traditions
Hi!
It's time for the new Heart Of Christmas Blog Share. This week has been a bit of a purple week for me. Did you see yesterday's Gorgeous Grape card? Tonight I've gone for the other new purple - Highland Heather. I've teamed it with the new Silver Foil Edged Cards and Envelopes, which you can find in the Holiday Catalogue.
I started by stamping the Sheet Music stamp in the top left and bottom right corners. I then sponged all around using Highland Heather ink, leaving the middle bare. I stamped the starry swirl from Star Of Light through the middle. I then splattered some water on the card, and finished by using my Aqua Painter to splatter some Frost White Shimmer Paint over the top. Be careful with the water - it does not agree with the silver foil.
The sentiment stamp is also from the Holiday Catalogue. It's from the Christmas Traditions bundle, which also includes the punch and a gorgeous Christmas tin. How perfect is this sentiment with the Sheet Music stamp? I've layered it over a Silver Foil banner and a vellum circle.
Luckily, another stamp set has some more lyrics from the same song! I've used Hearts Come Home on the inside. I've finished it off in the same way as the front of the card. I really love the way the swirls look along the edge of the sponging. I think I'll use that on another card soon!
You can find the rest of this week's Heart Of Christmas cards over at Claire's Blog. I always look forward to seeing what everyone creates each week.
Bye for now,
Tina
It's time for the new Heart Of Christmas Blog Share. This week has been a bit of a purple week for me. Did you see yesterday's Gorgeous Grape card? Tonight I've gone for the other new purple - Highland Heather. I've teamed it with the new Silver Foil Edged Cards and Envelopes, which you can find in the Holiday Catalogue.
I started by stamping the Sheet Music stamp in the top left and bottom right corners. I then sponged all around using Highland Heather ink, leaving the middle bare. I stamped the starry swirl from Star Of Light through the middle. I then splattered some water on the card, and finished by using my Aqua Painter to splatter some Frost White Shimmer Paint over the top. Be careful with the water - it does not agree with the silver foil.
The sentiment stamp is also from the Holiday Catalogue. It's from the Christmas Traditions bundle, which also includes the punch and a gorgeous Christmas tin. How perfect is this sentiment with the Sheet Music stamp? I've layered it over a Silver Foil banner and a vellum circle.
Luckily, another stamp set has some more lyrics from the same song! I've used Hearts Come Home on the inside. I've finished it off in the same way as the front of the card. I really love the way the swirls look along the edge of the sponging. I think I'll use that on another card soon!
You can find the rest of this week's Heart Of Christmas cards over at Claire's Blog. I always look forward to seeing what everyone creates each week.
Bye for now,
Tina
Monday, 15 October 2018
Everything Is Awesome At Christmas
Hi!
Today's card is one I made for a challenge in the Kindred Stamps Facebook group. The challenge was to use a non-Christmas stamp set to make a Christmas card. The first temptation is to just whack a Santa hat on a person or animal, but I wanted to do something a bit more than that.
I wracked my brain for over a week, and then I just happened to walk past Alex's bedroom as he dug through his loose Lego. Bingo!
When my kids were younger they used to make all kinds of shapes out of their Lego bricks, including Christmas trees. I decided to use my Kindred Stamp Building Blocks stamp set to make a Christmas tree.
I started at the top with the double brick and then masked it before I stamped the larger brick in the second layer. I continued masking and stamping until I had the width I wanted for the tree, finally finishing with a trunk. I then stamped some flowers to represent the star on top and a few baubles.
I couldn't make a Christmas card like this without Santa, so I made one for the inside. I stamped the basic man and then I used the stamp that is a top view of the single brick to create a belt buckle. I just used a marker to add lines to turn it onto a belt. Challenge completed!
Bye for now,
Tina
Today's card is one I made for a challenge in the Kindred Stamps Facebook group. The challenge was to use a non-Christmas stamp set to make a Christmas card. The first temptation is to just whack a Santa hat on a person or animal, but I wanted to do something a bit more than that.
I wracked my brain for over a week, and then I just happened to walk past Alex's bedroom as he dug through his loose Lego. Bingo!
When my kids were younger they used to make all kinds of shapes out of their Lego bricks, including Christmas trees. I decided to use my Kindred Stamp Building Blocks stamp set to make a Christmas tree.
I started at the top with the double brick and then masked it before I stamped the larger brick in the second layer. I continued masking and stamping until I had the width I wanted for the tree, finally finishing with a trunk. I then stamped some flowers to represent the star on top and a few baubles.
I couldn't make a Christmas card like this without Santa, so I made one for the inside. I stamped the basic man and then I used the stamp that is a top view of the single brick to create a belt buckle. I just used a marker to add lines to turn it onto a belt. Challenge completed!
Bye for now,
Tina
Wednesday, 10 October 2018
Saved!
Hi!
Welcome to the new Heart Of Christmas Blog Share. I think we are up to about week 9 now, and so far I've managed to make a card each week. It's so nice to be well on my way to having my Christmas cards finished for 2018.
Today's card came about after a little experiment didn't go as well as I'd hoped. I was wanting to see if I could used Isocol to activate Brushos powder over the top of an image stamped in Momento ink. Momento is designed to with with Blends, so water would have made the ink run. As it turns out, it does work, just differently than it would with water.
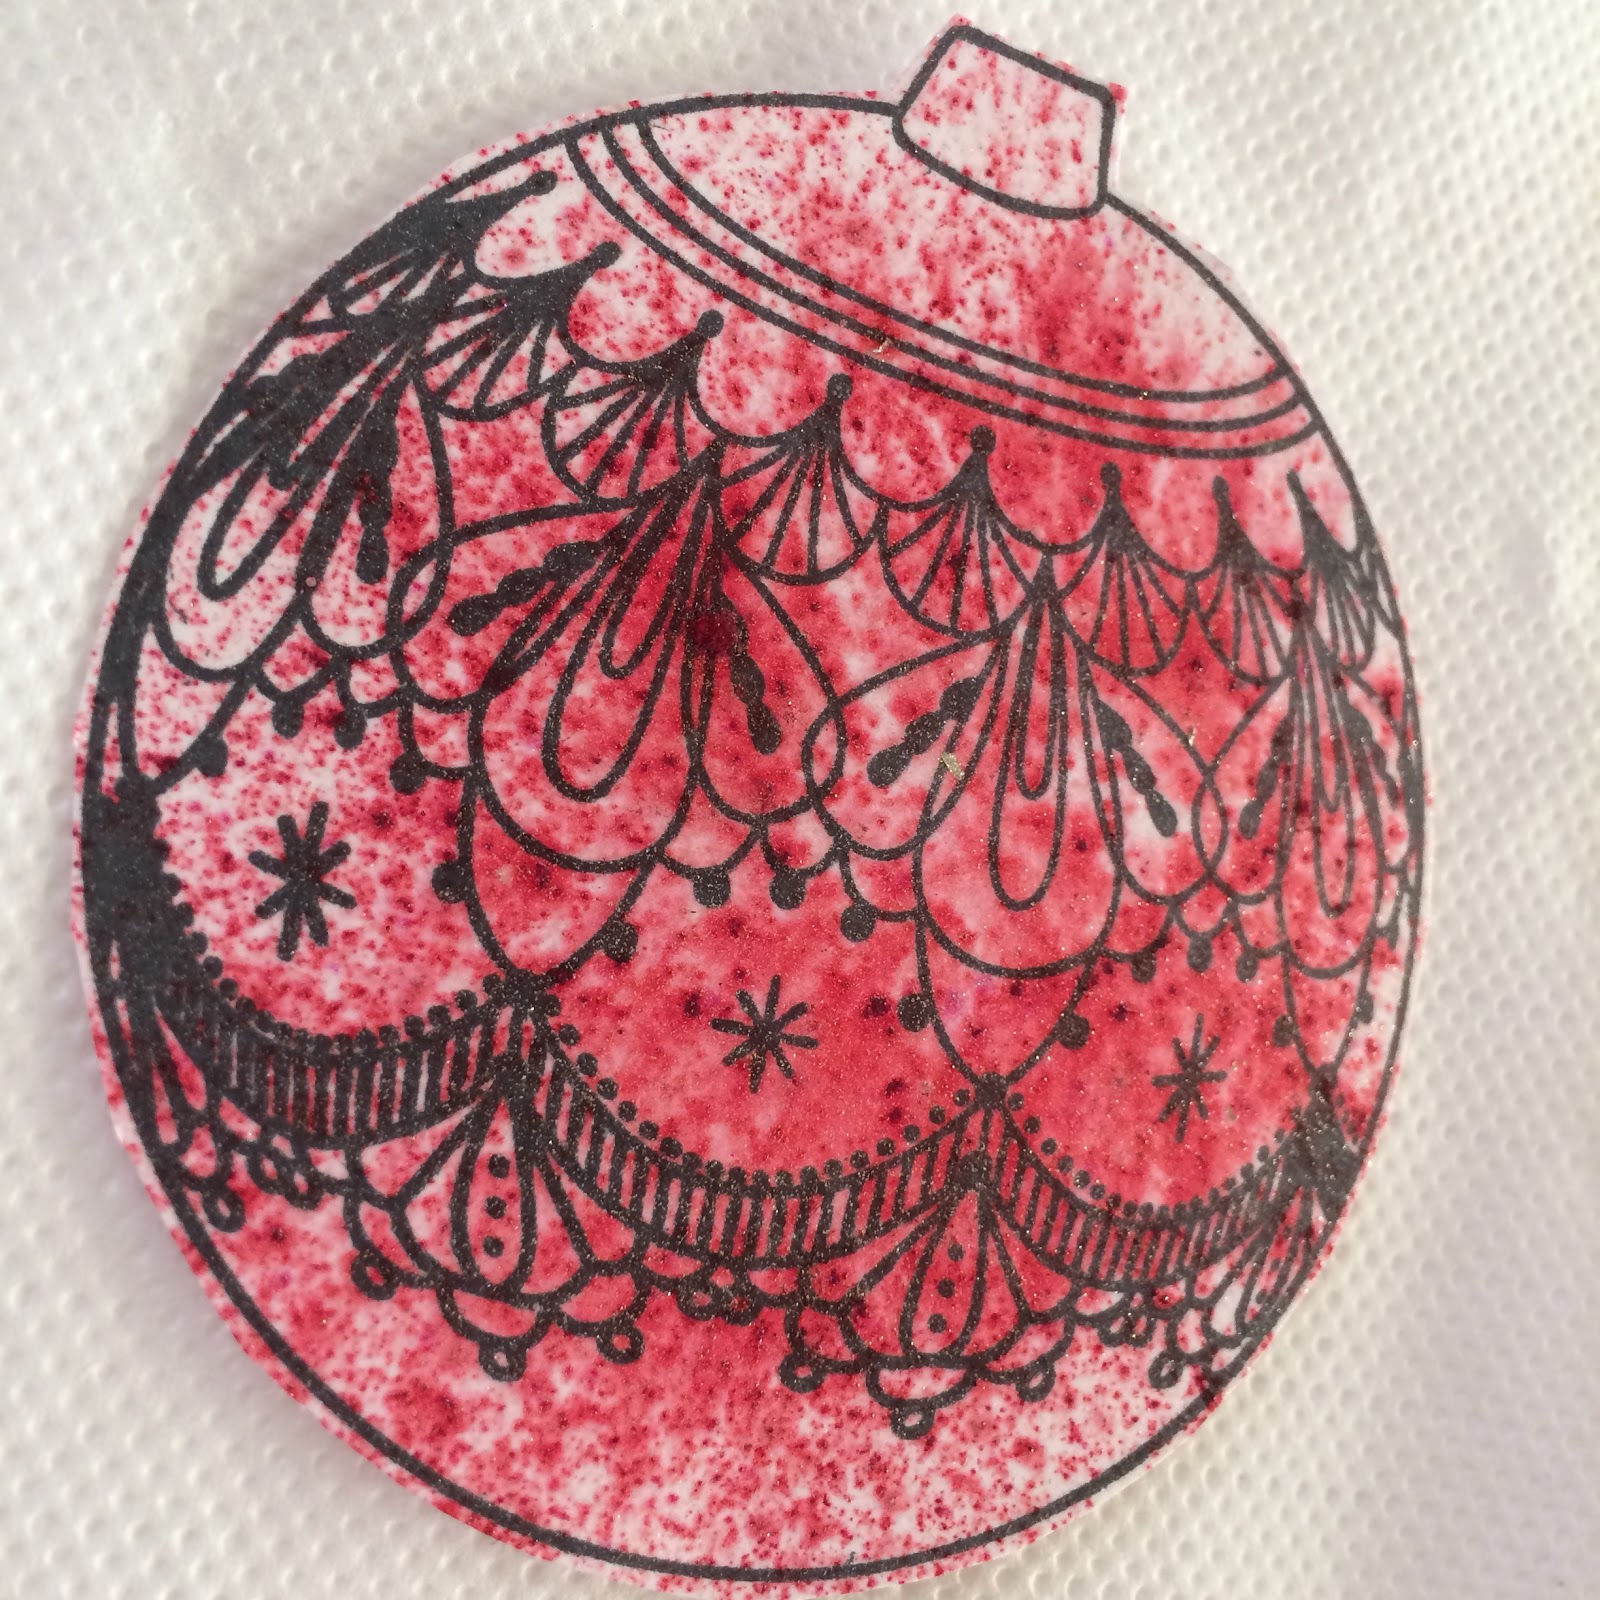
I chose the Brilliant Red Brushos because I was making a Christmas card, and red is Christmassy - right? Unfortunately, as one of my Facebook followers said, she was getting a serial killer vibe after I asked if it looked too much like blood splatter. LOL! Despite this, I was determined to make it work on a card, so after a bit of a think, this is what I made. The layout was a CASE of this card by my friend, Judy May.
Red ornament, minus the serial killer blood splatters! Yay! I recently hosted an ATC swap with a Glitter Window technique theme, so it seemed a brilliant solution to my problem. Basically, you cut a hole in your card, run some clear packing tape across the back so that the sticky side is up, and then dump glitter over the top. Our Dazzling Diamonds is perfect for this, because you can still see through it. Finally, you adhere a stamped image behind the window so that you can see it through the window.
A little bit of detail is lost when you do this technique, so to make the bauble look more like a bauble I took an old black marker (in case I ruined it) and coloured bits of the design to make them a lot bolder. I was pretty pleased with the overall effect. What do you think? Did I redeem the bauble?
The bauble had done my head in by this point, so a super simple inside was definitely in order!
You can see the rest of this week's cards over at Claire's blog. I love seeing what everyone makes each week.
Bye for now,
Tina
Welcome to the new Heart Of Christmas Blog Share. I think we are up to about week 9 now, and so far I've managed to make a card each week. It's so nice to be well on my way to having my Christmas cards finished for 2018.
Today's card came about after a little experiment didn't go as well as I'd hoped. I was wanting to see if I could used Isocol to activate Brushos powder over the top of an image stamped in Momento ink. Momento is designed to with with Blends, so water would have made the ink run. As it turns out, it does work, just differently than it would with water.
I chose the Brilliant Red Brushos because I was making a Christmas card, and red is Christmassy - right? Unfortunately, as one of my Facebook followers said, she was getting a serial killer vibe after I asked if it looked too much like blood splatter. LOL! Despite this, I was determined to make it work on a card, so after a bit of a think, this is what I made. The layout was a CASE of this card by my friend, Judy May.
Red ornament, minus the serial killer blood splatters! Yay! I recently hosted an ATC swap with a Glitter Window technique theme, so it seemed a brilliant solution to my problem. Basically, you cut a hole in your card, run some clear packing tape across the back so that the sticky side is up, and then dump glitter over the top. Our Dazzling Diamonds is perfect for this, because you can still see through it. Finally, you adhere a stamped image behind the window so that you can see it through the window.
A little bit of detail is lost when you do this technique, so to make the bauble look more like a bauble I took an old black marker (in case I ruined it) and coloured bits of the design to make them a lot bolder. I was pretty pleased with the overall effect. What do you think? Did I redeem the bauble?
The bauble had done my head in by this point, so a super simple inside was definitely in order!
You can see the rest of this week's cards over at Claire's blog. I love seeing what everyone makes each week.
Bye for now,
Tina
Wednesday, 12 September 2018
Dashing Along In Gold
Hi!
Welcome to a new week's Heart Of Christmas.
In September you can earn the Dashing Along DSP pack FREE with a qualifying order. Us lucky demonstrators got to get our hands on it a month early, and I have had a little (OK, a lot) of fun with it. I think the paper I have used on today's card is my favourite in the pack.
Isn't that design in tonal Cherry Cobbler just luscious? I layered it on a Cherry Cobbler cardstock base, as any other colour looked a bit jarring with the design I was going for. I love the look, and will certainly be doing it again!
To stretch the crafting dollar a bit further, I die cut the star from the Gold Foil layer that's under the main panel. No-one would ever know, and it's a very handy trick! I washed under the star with Cherry Cobbler ink, deliberately making the section that sits under the centre of the star a little darker.
There's more of that lovely DSP and Gold Foil on the inside. It's always worth doing your insides, it doesn't take much more effort, but it really lifts your cards to the next level.
How are you going with your Christmas cards? You can find lots of inspiration with the rest of this week's cards over at Claire's blog.
Bye for now,
Tina
Welcome to a new week's Heart Of Christmas.
In September you can earn the Dashing Along DSP pack FREE with a qualifying order. Us lucky demonstrators got to get our hands on it a month early, and I have had a little (OK, a lot) of fun with it. I think the paper I have used on today's card is my favourite in the pack.
Isn't that design in tonal Cherry Cobbler just luscious? I layered it on a Cherry Cobbler cardstock base, as any other colour looked a bit jarring with the design I was going for. I love the look, and will certainly be doing it again!
To stretch the crafting dollar a bit further, I die cut the star from the Gold Foil layer that's under the main panel. No-one would ever know, and it's a very handy trick! I washed under the star with Cherry Cobbler ink, deliberately making the section that sits under the centre of the star a little darker.
There's more of that lovely DSP and Gold Foil on the inside. It's always worth doing your insides, it doesn't take much more effort, but it really lifts your cards to the next level.
How are you going with your Christmas cards? You can find lots of inspiration with the rest of this week's cards over at Claire's blog.
Bye for now,
Tina
Thursday, 23 August 2018
JAI #423: Just Add Colour
Hi!
This week at Just Add Ink we have a colour challenge for you. Kim has given us the following colours to work with.
Just a note that our Colour Challenge rules have changed slightly. Where previously we allowed the addition of any of the Neutrals to the challenge colours, with the Colour Revamp at Stampin' Up! we are now only allowing the addition of any of the Basics or Metallics.
I loved this colour combo, but I found Soft Suede the hardest to include. In the end, I decided to use it to make some earth for my sweet little elephant to stand on. Once I go my head around that, the rest came together easily! I used my Basic Grey Watercolour Pencil to colour the elephant and then blended (as usual!) with my Wink Of Stella pen. I think I've forgotten how to use the pencils with water!
To bring some silver into the mix, I heat embossed some stars and the sentiment. I didn't feel like it was enough silver, so I decided to add some to the edges of the main panel and the card base. To do this I swiped my Versamark inkpad over the edges of the cardstock and then tipped the embossing powder over the edges. I then heat set the powder as usual. It's such a cool effect, as it's not uniform all the way around the edge. It was my first time trying this technique, but certainly not the last!
I just had to include the back side of the elephant on the inside. It's hard to see in the photos, but I used my new Tufted DTIEF to emboss the Bermuda Bay cardstock on the front. I also embossed the smaller strip for the inside to tie them together.
That's ti for me today - you can see the gorgeous cards the rest of the team have created with Kim's colours over at the Just Add Ink blog. Don't forget our rules have changed slightly when you are making your masterpiece!
Bye for now,
Tina
This week at Just Add Ink we have a colour challenge for you. Kim has given us the following colours to work with.
Just a note that our Colour Challenge rules have changed slightly. Where previously we allowed the addition of any of the Neutrals to the challenge colours, with the Colour Revamp at Stampin' Up! we are now only allowing the addition of any of the Basics or Metallics.
I loved this colour combo, but I found Soft Suede the hardest to include. In the end, I decided to use it to make some earth for my sweet little elephant to stand on. Once I go my head around that, the rest came together easily! I used my Basic Grey Watercolour Pencil to colour the elephant and then blended (as usual!) with my Wink Of Stella pen. I think I've forgotten how to use the pencils with water!
To bring some silver into the mix, I heat embossed some stars and the sentiment. I didn't feel like it was enough silver, so I decided to add some to the edges of the main panel and the card base. To do this I swiped my Versamark inkpad over the edges of the cardstock and then tipped the embossing powder over the edges. I then heat set the powder as usual. It's such a cool effect, as it's not uniform all the way around the edge. It was my first time trying this technique, but certainly not the last!
I just had to include the back side of the elephant on the inside. It's hard to see in the photos, but I used my new Tufted DTIEF to emboss the Bermuda Bay cardstock on the front. I also embossed the smaller strip for the inside to tie them together.
That's ti for me today - you can see the gorgeous cards the rest of the team have created with Kim's colours over at the Just Add Ink blog. Don't forget our rules have changed slightly when you are making your masterpiece!
Bye for now,
Tina
Tuesday, 21 August 2018
A Coastal Christmas
Hi!
Welcome back to another Colour Creations Blog Share. We are featuring a returning colour this week - the lovely Coastal Cabana.
I was glad to see the return of Coastal Cabana to the Brights Collection. It's such a pretty greenish blue. I love how crisp it looks when paired with white, so that's what I went with this week.
Can you see in this picture that the star and sentiment are on one piece of cardstock? I've used the die to cut the star out above and below the sentiment strip, but not cut the bits in between. I was so pleased with how it turned out, and I will certainly be trying it again. I continued to layer on top of the large star, using Silver thread, a Silver foil die cut star and a tiny Coastal Cabana star that I enhanced with Wink Of Stella. I also used some of the bits popped out from the foil star to decorate the ends of the large star. Fiddly, but a fun finishing touch for the star.
LOL, it's been a long time since I've used a single stamp set to make a card, but Star of Light had everything I needed in one convenient set.
Now you're off to Catherine's blog where you can find the rest of this week's Coastal Cabana cards.
Bye for now,
Tina
Welcome back to another Colour Creations Blog Share. We are featuring a returning colour this week - the lovely Coastal Cabana.
I was glad to see the return of Coastal Cabana to the Brights Collection. It's such a pretty greenish blue. I love how crisp it looks when paired with white, so that's what I went with this week.
I also love a Christmas card in non-traditional colours. I stared by heat embossing the starry flourish stamp with white embossing powder and then stamping some more stars around it. The sentiment and large star use a technique I've been wanting to try for ages - partial die cutting.
Can you see in this picture that the star and sentiment are on one piece of cardstock? I've used the die to cut the star out above and below the sentiment strip, but not cut the bits in between. I was so pleased with how it turned out, and I will certainly be trying it again. I continued to layer on top of the large star, using Silver thread, a Silver foil die cut star and a tiny Coastal Cabana star that I enhanced with Wink Of Stella. I also used some of the bits popped out from the foil star to decorate the ends of the large star. Fiddly, but a fun finishing touch for the star.
LOL, it's been a long time since I've used a single stamp set to make a card, but Star of Light had everything I needed in one convenient set.
Now you're off to Catherine's blog where you can find the rest of this week's Coastal Cabana cards.
Bye for now,
Tina
Subscribe to:
Posts (Atom)