Pages

Sunday, 12 September 2021

CTC 335: CASE A 3D Project

 Hi!


I hope you've had a wonderful weekend, and thanks for choosing to end it with the CASEing The Catty Sunday Challenge Blog Hop. Is there a better way to end the weekend? 


This week we are asking you to choose a 3D project from the Annual Catalogue to CASE. There are lots of them, all scattered through the catalogue. 

My eye was caught by this ombre gift bag on page 87. I loved the bright colour of the bag and the white-embossed cookies scattered across the front. I decided to convert these ideas into card format, rather than a gift bag.

scissorspapercard, Stampin' Up!, CASEing The Catty, Joy To The World Paper Pumpkin, Oh So Ombre DSP, Stitched Rectangle Dies, Shaker Card, Christmas Card

I started with a piece of Blackberry Bliss Oh So Ombre DSP. I could have done the ink blending myself, but I decided to give myself a break and cheat with the DSP. I cropped the centre rectangle out using my Stitched Rectangle Dies. I left the rectangle in situ and stamped the flower from the Joy To The World Paper Pumpkin kit in Golden Glitz Delicata Ink repeatedly across the front, matching the gift bag.

scissorspapercard, Stampin' Up!, CASEing The Catty, Joy To The World Paper Pumpkin, Oh So Ombre DSP, Stitched Rectangle Dies, Shaker Card, Christmas Card

The gold ink does not show up well in photos, but it's gorgeous on real life! I used the two stamped pieces to create the shaker card, filled with gold sequins.

scissorspapercard, Stampin' Up!, CASEing The Catty, Joy To The World Paper Pumpkin, Oh So Ombre DSP, Stitched Rectangle Dies, Shaker Card, Christmas Card

I stamped the flower in gold ink again on the inside - it's so pretty!

Do you pay much attention to the 3D Projects in the catalogues? Now's your chance! You could choose to make a 3D project yourself, or convert some ideas from the project into a card, as I have done. Your imagination is your only limit! Once you've made your project, just upload a photo to our Facebook Group.


Next up on our Blog Hop tonight is the very clever Julia Quinn, who has turned her 3D project into something different - you won't want to miss it!

Bye for now,

Tina

Thursday, 9 September 2021

JAI 571: Just Add Lines

 Hi!


Thanks for joining me for the new Just Add Ink challenge. This week Kelly is challenging us to add lines to our cards.


Hmm, that got me thinking about all the ways to add lines to a project. There's a lot of choices - stamping, stencilling, DSP, scoring, just to name a few. Now, you know that I like to think out of the box for these challenges, and initially I was thinking about trying to incorporate a one-liner joke into a card, but I couldn't make it work. Then I was going through my Christmas supplies and found a subway art style stamp from Ink Road Stamps, called Subway Art: Christmas. It's perfect for the challenge - it consists of a whole lot of lines from Christmas songs.

scissorspapercard, Stampin' Up!, Ink Road Stamps, Just Add Ink, Subway Art: Christmas, Words Of Cheer, Peaceful Prints DSP SAB, Gingerbread Dies, Silver Foil, Christmas Card

I started by stamping the lines on Whisper White card in Garden Green ink, and then used a Blending Brush to apply some more ink around the edges. It was matted on a piece of Peaceful Prints DSP and then to a Garden Green card base.

scissorspapercard, Stampin' Up!, Ink Road Stamps, Just Add Ink, Subway Art: Christmas, Words Of Cheer, Peaceful Prints DSP SAB, Gingerbread Dies, Silver Foil, Christmas Card

One of the lines in the stamp was from Silver Bells, one of my favourite Christmas songs. It inspired the silver foil bells on the front of my card. The dies are from the Gingerbread Dies set, and both layers are cut from the Silver Foil - isn't it a cool effect?

scissorspapercard, Stampin' Up!, Ink Road Stamps, Just Add Ink, Subway Art: Christmas, Words Of Cheer, Peaceful Prints DSP SAB, Gingerbread Dies, Silver Foil, Christmas Card

I cut an extra bell to go on the inside. I backed the foil with adhesive sheet before cropping the bells. This helps to keep all of the little pieces in place. I removed them for the bells on the front, as they were double layered, but I kept them in place for the inside bell. The sentiment is from Words Of Cheer.

That's all from me for tonight, but please do head on over to the Just Add Ink blog, where you'll find the rest of this week's Design Team cards. You can also link up your card for our challenge. The hardest part will be deciding how to add lines to your card!

Bye for now,

Tina

Wednesday, 8 September 2021

Colour Creations: Daffodil Delight

 Hi!


Hello again! It's time yet again for the new Colour Creations Blog Hop. Boy, are the weeks flying by fast, or what?? Anyway, this week we are looking at Daffodil Delight, which is my favourite yellow in the Sampin' Up! range. Such a bright, happy colour!

scissorspapercard, Stampin' Up!, Colour Creations, Plentiful Plants, Hand-Penned Petals, Layering Circles Dies, Stamparatus

Once again, I find myself very time poor, so it's another quick and easy card tonight! I started by cropping a circle from a piece of copy paper and using my Blending Brush to apply ink to the Whisper White card. I deliberately inked more around the edges of the circle and didn't ink the centre at all.

scissorspapercard, Stampin' Up!, Colour Creations, Plentiful Plants, Hand-Penned Petals, Layering Circles Dies, Stamparatus

I used my Stamparatus to stamp the pot plant images from Plentiful Plants so that I could stamp multiple times to get a darker image. The sentiment is from Hand-Penned Petals. A White Twine bow finished off the front of the card.

scissorspapercard, Stampin' Up!, Colour Creations, Plentiful Plants, Hand-Penned Petals, Layering Circles Dies, Stamparatus

I stamped the same pot plant images on the inside, but just stamped them once. A little more Daffodil Delight ink was brushed over the top. The image is a little darker than it appears in the photo, but not quite as dark as the front.

Next up is my wonderful friend, Ros Davidson. I love how she uses the Colour Coach to guide her choices each week. It's fun guessing which combo she'll use!

As always, the fabulous Catherine Proctor is keeping the Hoppers super organised. If you find a broken link, you can jump back to her blog to pick up your trail - just remember who's blog should come next on the Hop.

Bye for now,

Tina

Monday, 6 September 2021

Heart Of Christmas Week 10

 Hi!


Hello to another Monday evening on the blog and a new Heart Of Christmas Blog Hop. We are up to Week 10, and it is my turn to host the Hop. I've had a very time poor few days leading up to the Hop, so unfortunately I don't have a group of Sheetload cards for your tonight, just a one-off design that I CASEd from Karen Hadler.

scissorspapercard, Stampin' Up!, Heart Of Christmas, Words Of Cheer, Be Dazzling SP, Stampin' Blends, Sale-A-Bration, Christmas Card

Karen's card was square and featured the Delicate Dahlias stamp set alongside the Be Dazzling Specialty Paper - both Sale-A-Bration freebies until the end of the month.

scissorspapercard, Stampin' Up!, Heart Of Christmas, Words Of Cheer, Be Dazzling SP, Stampin' Blends, Sale-A-Bration, Christmas Card

I've used my new Words Of Cheer stamp set, and coloured it with my Cherry Cobbler and Old Olive Blends. How fabulous does the Dazzling paper look in the sunlight? I can't believe that this is the first time that I have used it!!

scissorspapercard, Stampin' Up!, Heart Of Christmas, Words Of Cheer, Be Dazzling SP, Stampin' Blends, Sale-A-Bration, Christmas Card

Nice and simple on the inside! The card is a single layer, so I didn't want too much colouring with the Blends to bleed through to the back.

Pleas do continue your way around our Hop tonight. The AWH Team are a talented bunch, so you're in for a treat! Next up is Rosa Leydon, who always has something lovely to see.

If you find a broken link along the way, you can come back to my blog for the full list of participants. You'll find a link to my blog at the end of everyone's posts.

Tina Gillespie


Rosa Leyden


Kate Morgan


Sharon Davern


Christine Blain


Theresa Gerrard


Catherine Proctor


Michele Taylor


Ros Davidson


Caroline Manwaring


Judy May


Rachel Woollard


Andrea Sargent


Bye for now,

Tina

Sunday, 5 September 2021

CTC 334: Gingerbread & Peppermint Suite

 Hi!


Happy Sunday! And Happy Father's Day to the dads out there! My kids treated Rob to a sleep in, some thoughtful gifts and pancakes for breakfast. My daughter also plans to cook dinner, so I'm sure Rob will say he's had a great day.


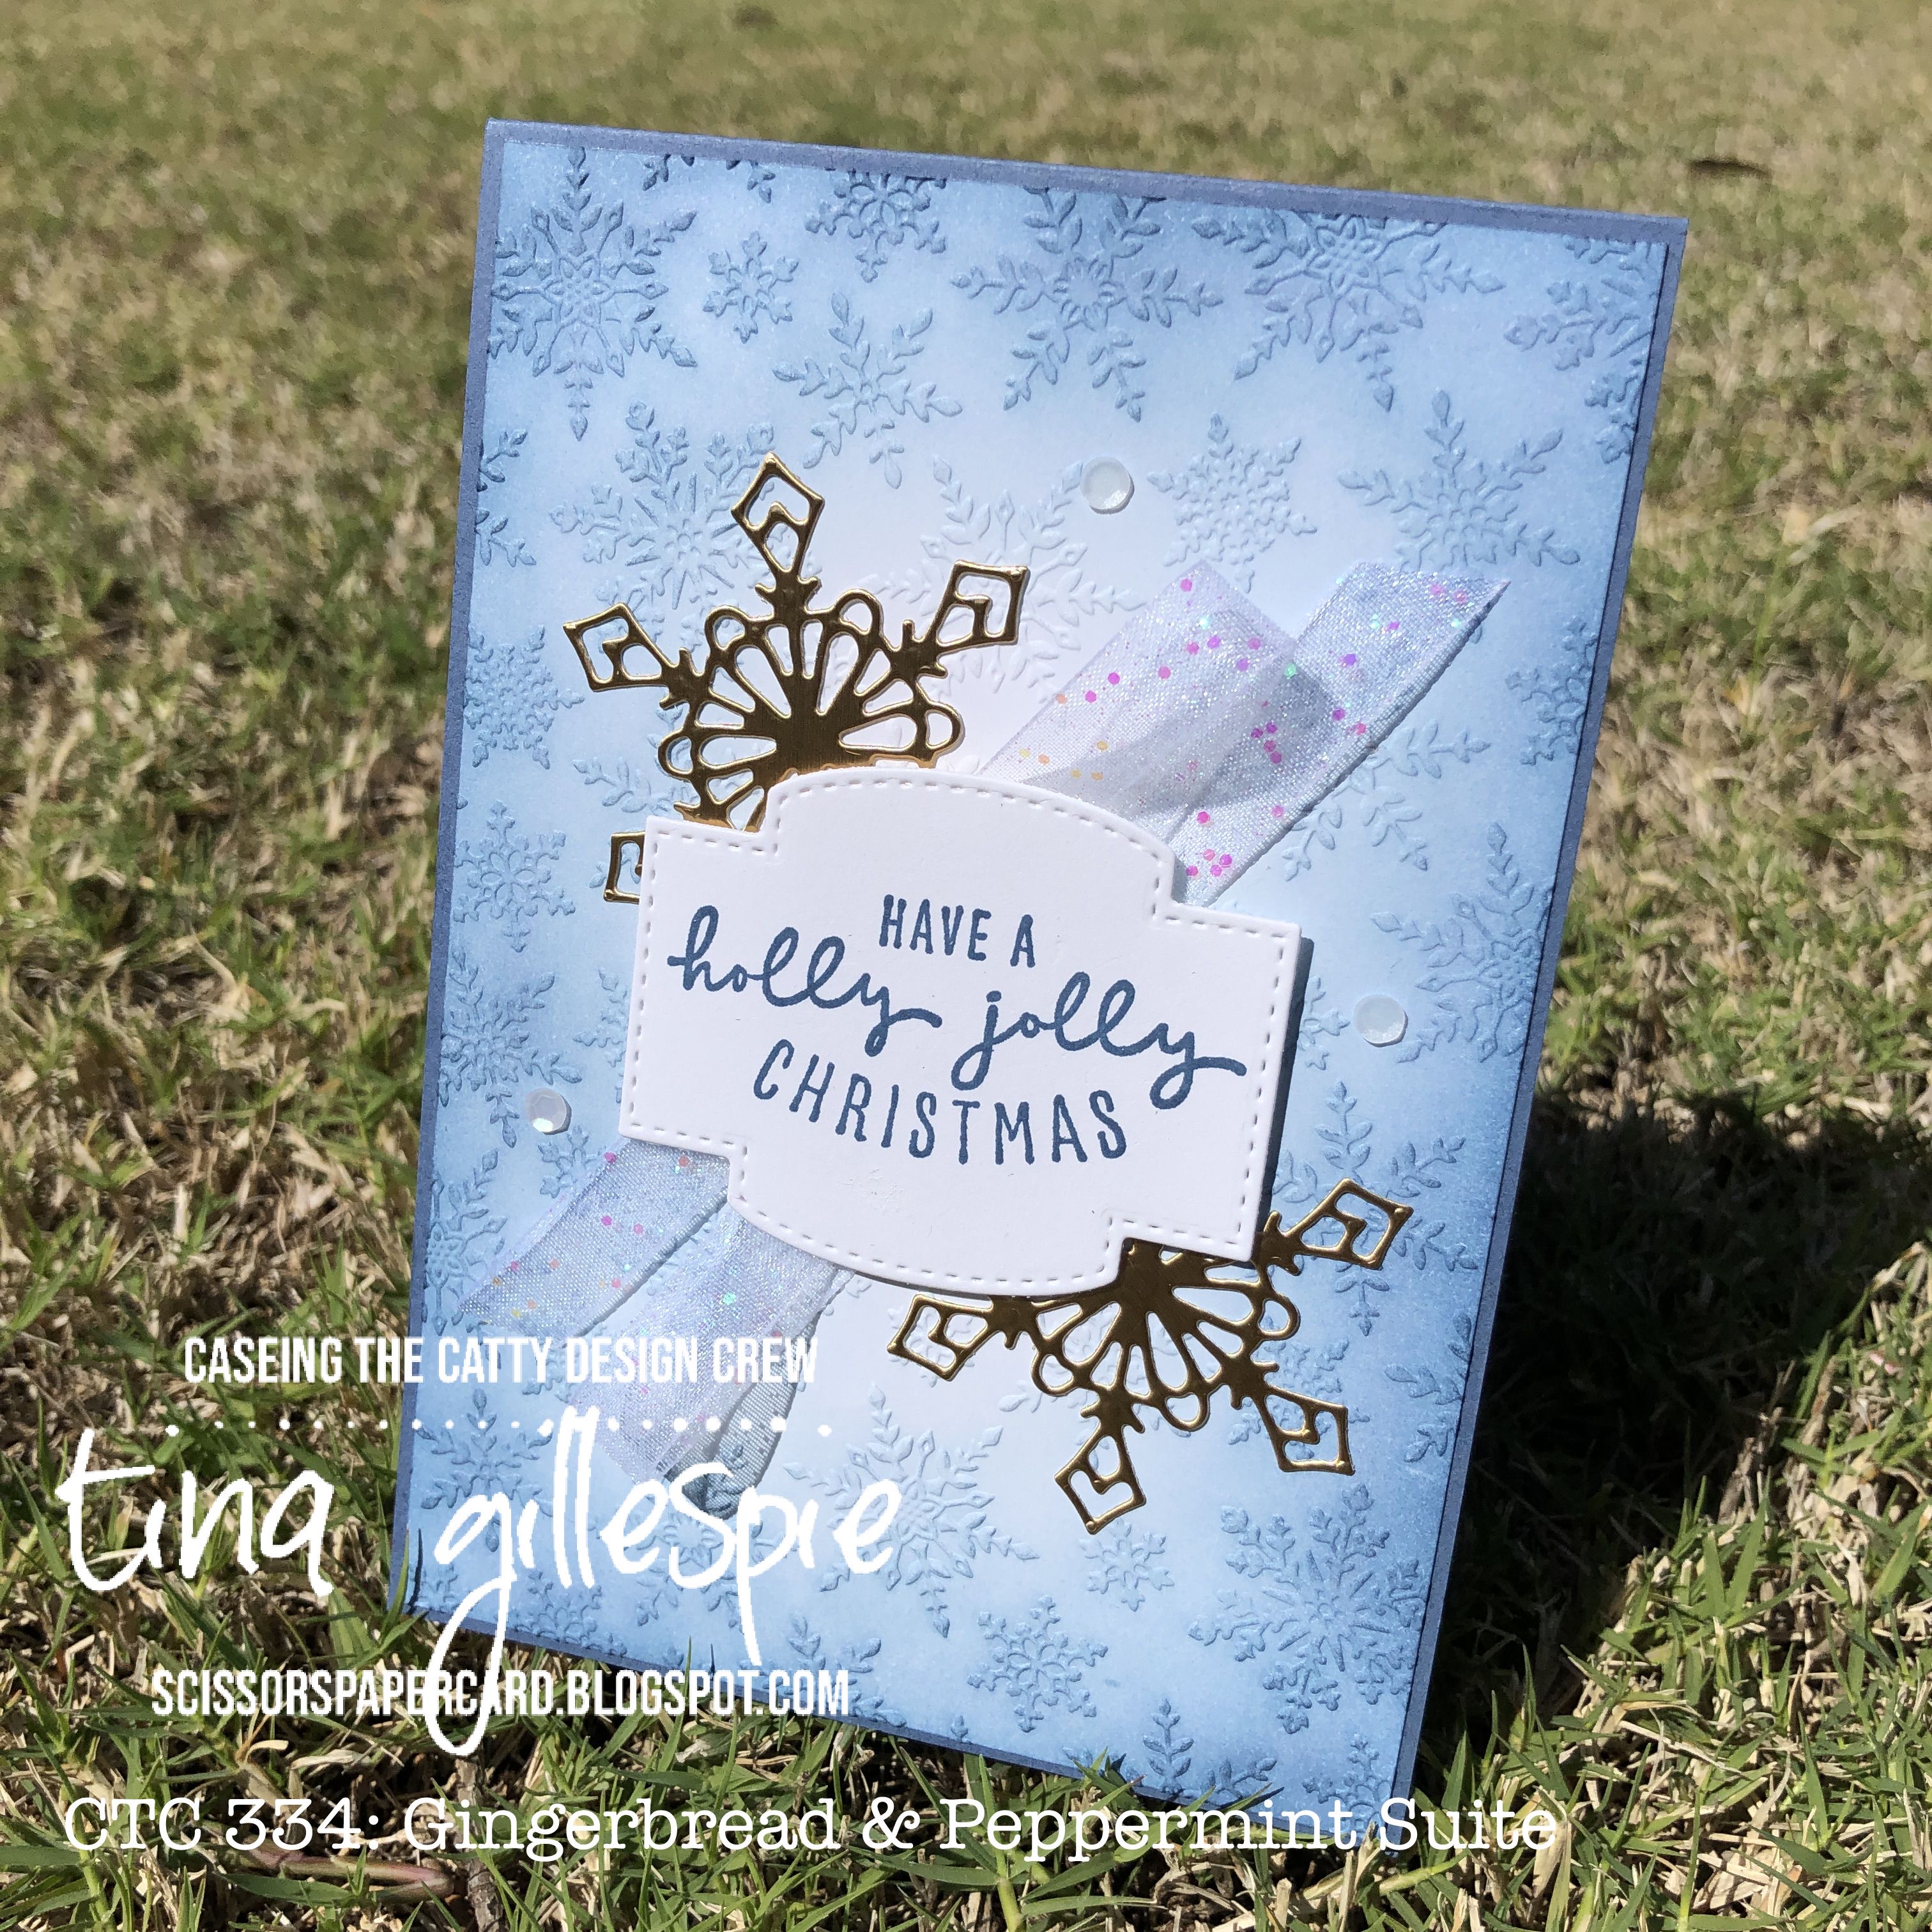
This week for the CASEing The Catty Sunday Challenge, we are asking you to CASE the Gingerbread & Peppermint Suite. We've expanded that to include pages 8 to 15, so there is plenty of choice for you to CASE. I'm very much a blue girl, so this card on page 13 caught my eye.


I loved the gold snowflakes against the deep blue, and the soft sponging over the sentiment. I'm still tossing up about buying those snowflake dies - they are very pretty, but I don't often use snowflakes on my Christmas cards.

scissorspapercard, Stampin' Up!, CASEing The Catty, Christmas To Remember, Winter Snow EF, Gingerbread Dies, Stitched So Sweetly Dies, Christmas Card

I do have the Gingerbread Dies, and so I used the snowflake die from that set on my card. I backed a piece of the Gold Brushed Metallics paper with some Adhesive Sheet before die cutting, so that the delicate snowflake was easy to adhere to my card. 

scissorspapercard, Stampin' Up!, CASEing The Catty, Christmas To Remember, Winter Snow EF, Gingerbread Dies, Stitched So Sweetly Dies, Christmas Card

The background of my card is a retired embossing folder, I think called Winter Snow. I sponged over the top of it with a Blending Brush and Misty Moonlight ink, making sure that it was darker around the edges and faded to white in the middle.

scissorspapercard, Stampin' Up!, CASEing The Catty, Christmas To Remember, Winter Snow EF, Gingerbread Dies, Stitched So Sweetly Dies, Christmas Card

I did a little more sponging on the inside so that I could add another gold snowflake over the top. The sentiments I used are from Christmas To Remember, with the front on cropped using a Stitched So Sweetly Die.

After you've finished checking out our Blog Hop, don't forget to pop on over to our Facebook group. You need to be a member to enter the challenge, but that's an easy process. We can't wait to see what you make.


Next up tonight is the wonderful Peta Stephen. You won't want to miss her gorgeous metallic card.

Bye for now,

Tina

Thursday, 2 September 2021

JAI 570: Just Add Colour

 Hi!


Hooray for another Friday! I'm soooo ready for the weekend - how about you? I'm hoping to get a little quilting done, perhaps some card making too. I hope you've got something fun planned, too. If not, why not try the new Just Add Ink challenge?


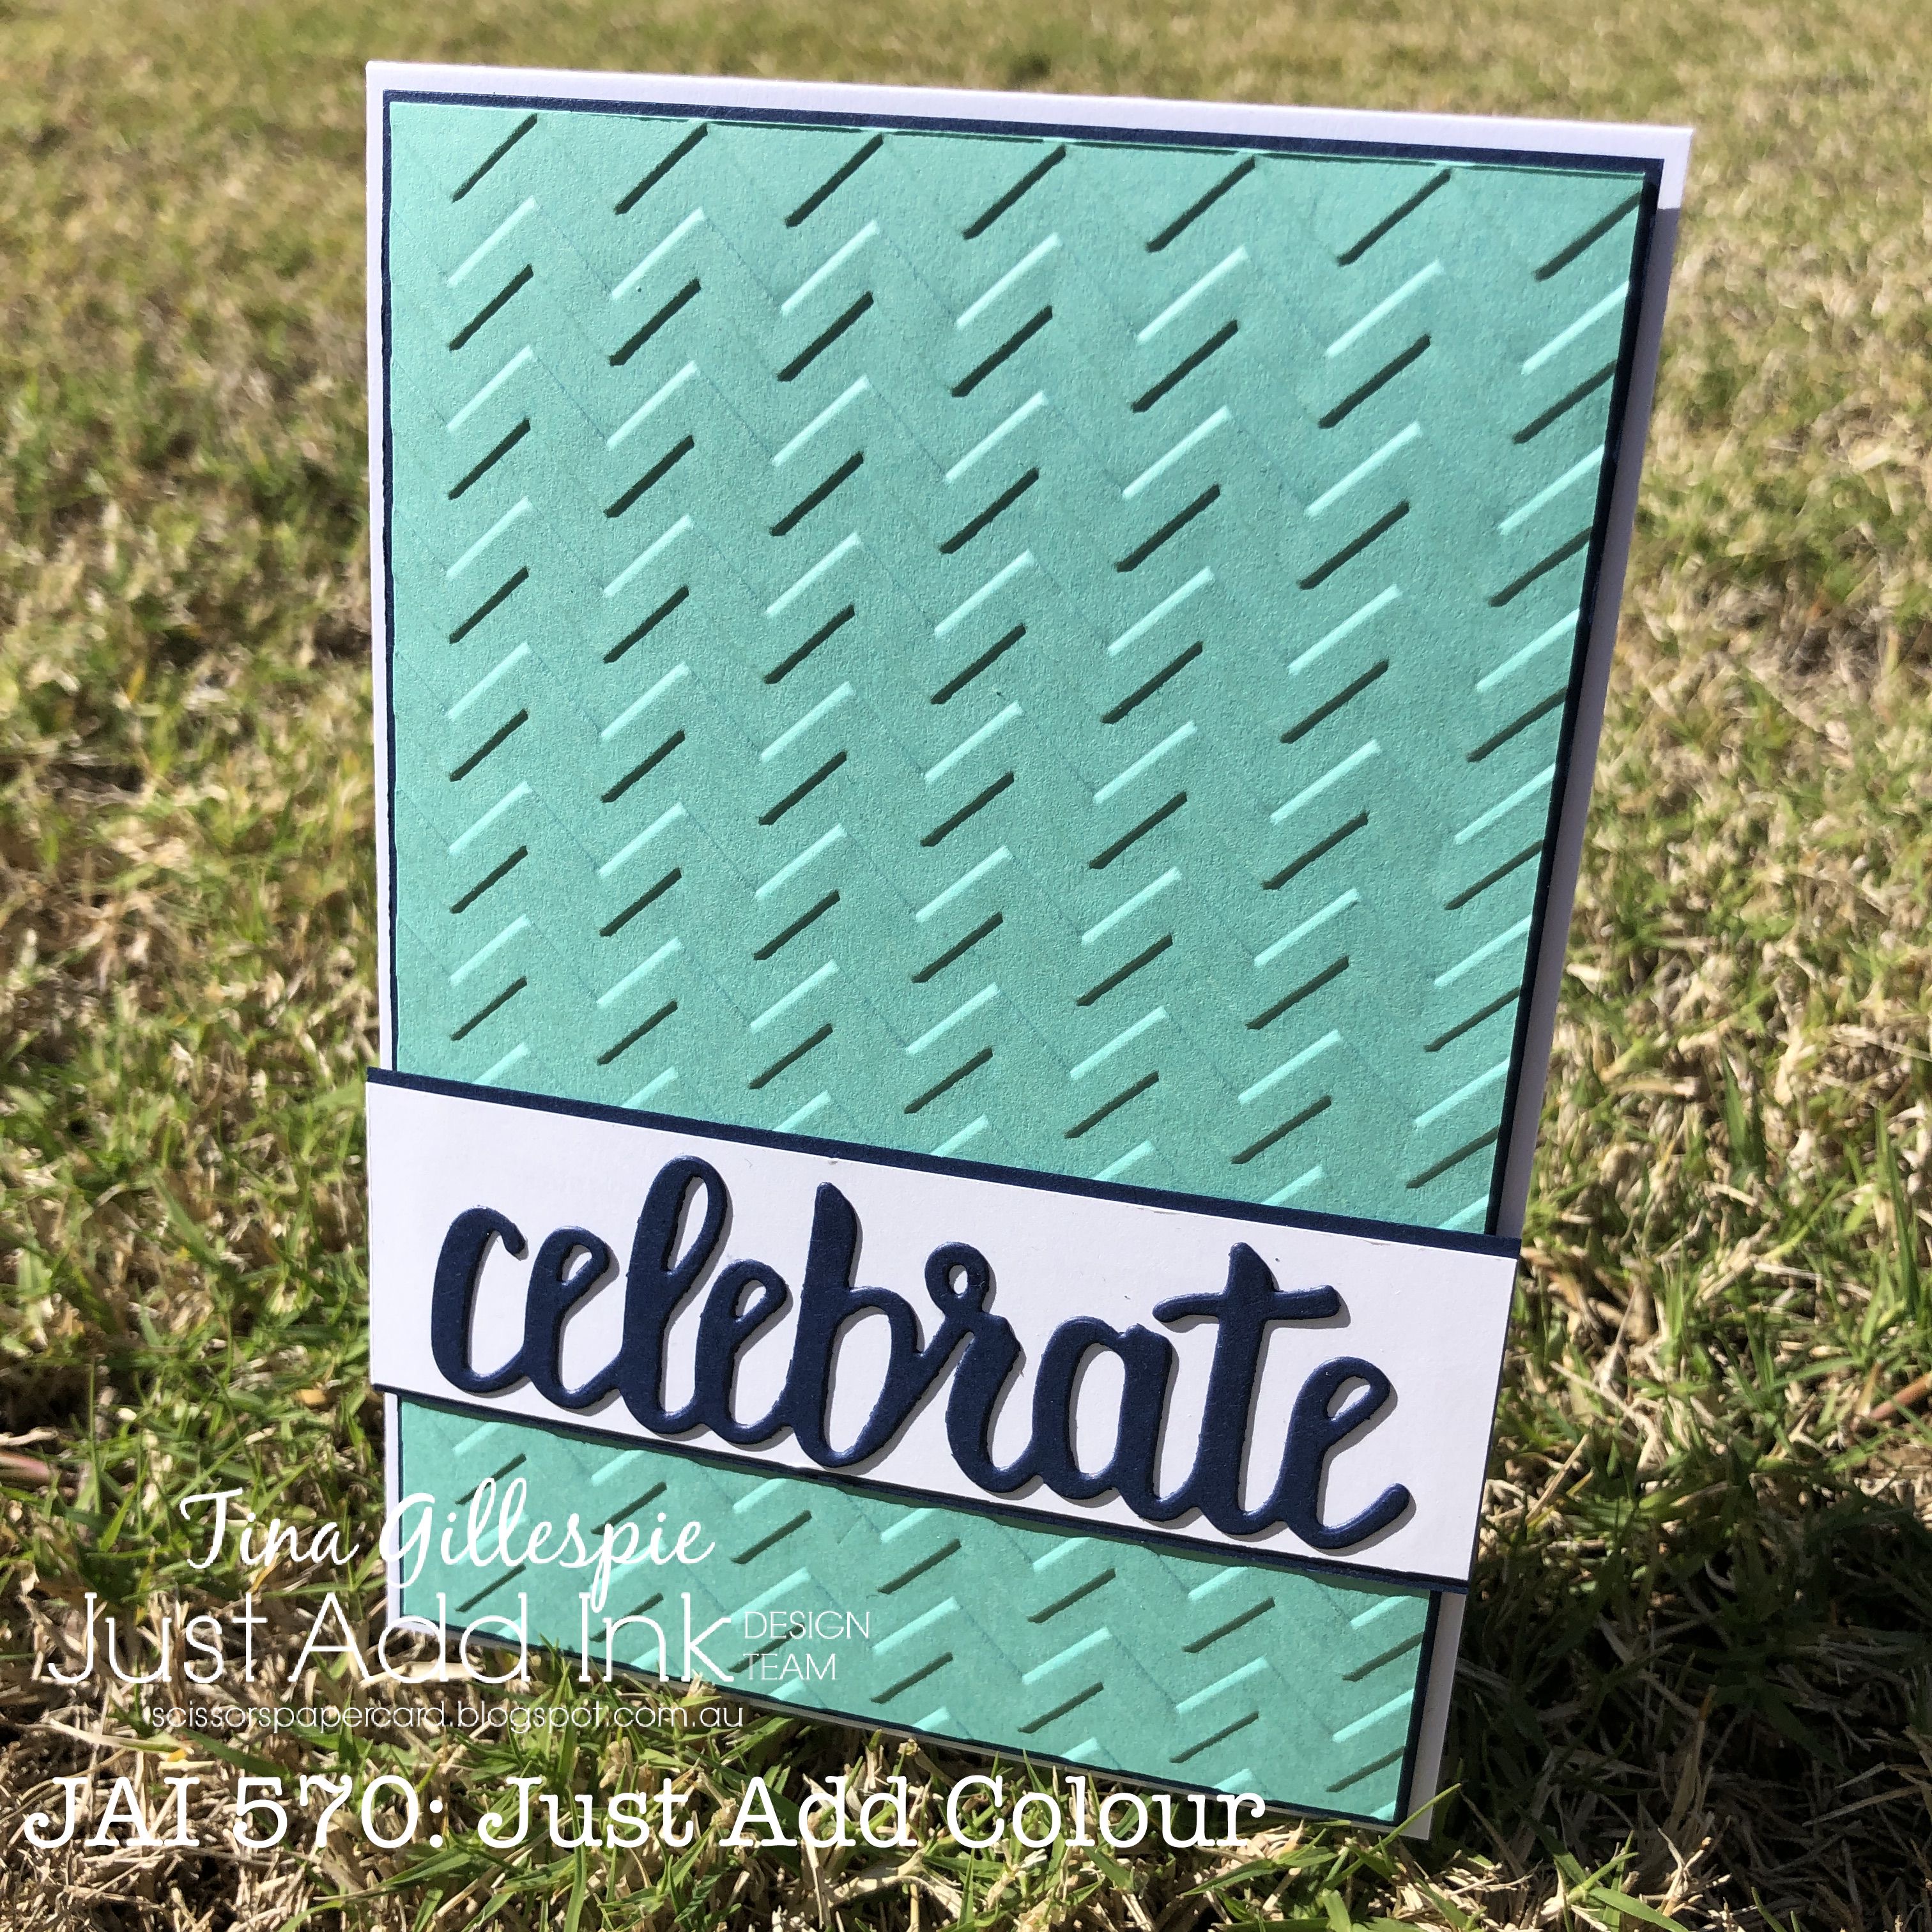
Isn't this colour combo fabulous? I love the two different blues, and the addition of white keeps it fresh. I'm not sure why, but I pulled out a couple of long-retired products to play with on my card.

scissorspapercard, Stampin' Up!, Just Add Ink, A Good Man, Celebrate You Thinilts, Chevron Embossing Folder, Masculine Card

The first of which is the Chevron Embossing Folder. It's such a fun background! However, the folder was designed before SU started releasing square folders, so to get a portrait orientation card I had to emboss two pieces of card - the join is under the sentiment panel.

scissorspapercard, Stampin' Up!, Just Add Ink, A Good Man, Celebrate You Thinilts, Chevron Embossing Folder, Masculine Card

Speaking of the sentiment, it's my other retired product. It's from the Celebrate You Thinlits set, which I think started off as a Sale-A-Bration item, but was included in the following year's Annual Catalogue. I'm a sucker for word dies, so they stayed in my collection after they retired.

scissorspapercard, Stampin' Up!, Just Add Ink, A Good Man, Celebrate You Thinilts, Chevron Embossing Folder, Masculine Card

I really wasn't sure what to put on the inside of the card, so I ended up making it a masculine card by stamping the image and sentiment from A Good Man. I feel like the front could be either masculine or feminine, but the inside is definitely masculine. What do you think?

That's all from me for tonight - I'm off to enjoy my weekend! The Royal Adelaide Show should have been on this week, but it was cancelled due to COVID. My kids still get an extra long weekend off from school, so it will be nice to have four days at home with them.

Please jump on over to the Just Add Ink Blog to see the cards that the rest of the Design Team have created. You can also add your card to the link gallery. I can't wait to see what you do with these colours.

Bye for now,

Tina

Wednesday, 1 September 2021

Colour Creations: Crushed Curry

 Hi!

Welcome to another Wednesday night on my blog, and the new Colour Creations Blog Hop. This week we are all creating with Crushed Curry, which appears to be a not-very-popular colour amongst the AWH Team. What do you think? Like it, dislike it, or a bit 'whatever' about it? I probably fall into the latter group. It's not a colour I automatically reach for when I need a yellow, but I don't completely dislike it either.

scissorspapercard, Stampin' Up!, Colour Creations, Let's Party Treat Packaging Kit, Stitched Shapes Dies

Having said that, I did use a minimal amount on my card! To be fair - I used a minimal amount of black, too! I used the circles dies in my Stitched Shapes Dies to crop the three circles, and then chopped each one in half. You could use the Layering Circles Dies just as easily to create the same look.

scissorspapercard, Stampin' Up!, Colour Creations, Let's Party Treat Packaging Kit, Stitched Shapes Dies

Because the card is so plain, I jazzed it up with some Black Shimmer Paper. It's so much fun to work with! The sentiment is from one of the new kits that Stampin' Up! have released, called Let's Party Treat Packaging Kit. I mostly got the kit for the cute critter stamps, but I absolutely love the fonts and the sentiments, too.

scissorspapercard, Stampin' Up!, Colour Creations, Let's Party Treat Packaging Kit, Stitched Shapes Dies

I'm not sure if I like the inside of my card. I wanted to try something a little different, but I think that the colours make it look like crime scene tape! LOL! Maybe I need to try it again with a different colour.

Thanks for joining me once again, but please do continue your way around our Blog Hop. The next stop is my lovely friend, Di Furniss. I always love what she makes!

As always, our wonderful host is the lovely Catherine, so if you find a broken link, or just wish to see the full list of participants for tonight's Hop, just pop on over to her blog.

Bye for now,

Tina