Pages

Monday, 12 November 2018

Orlando Swaps Part Two

Hi!

Today's post actually has my second and third swap items. I hadn't intended to make a third, but somehow I found it on the go before I'd even finished swaps one and two! Oops!

Let's start with swap two, which was actually my first idea. I had decided early on that I wanted to do something around an Australian flag pencil. Do you think I could find an Australian flag pencil without paying ridiculous prices? In the end I found these Aboriginal Art designs, which I think worked much better with my colour scheme.

scissorspapercard, Stampin' Up!, Animal Expedition DSP, Animal Friends Thinlits, Stitched Shapes Thinlits, Labeler Alphabet

I've used the Animal Expedition DSP again, as I wanted to use the large kangaroos this time. There are two leafy designs - this one with the frogs, and another with little birdies. I used a mix of the two as my backing piece. The bags are in the Annual Catalogue.
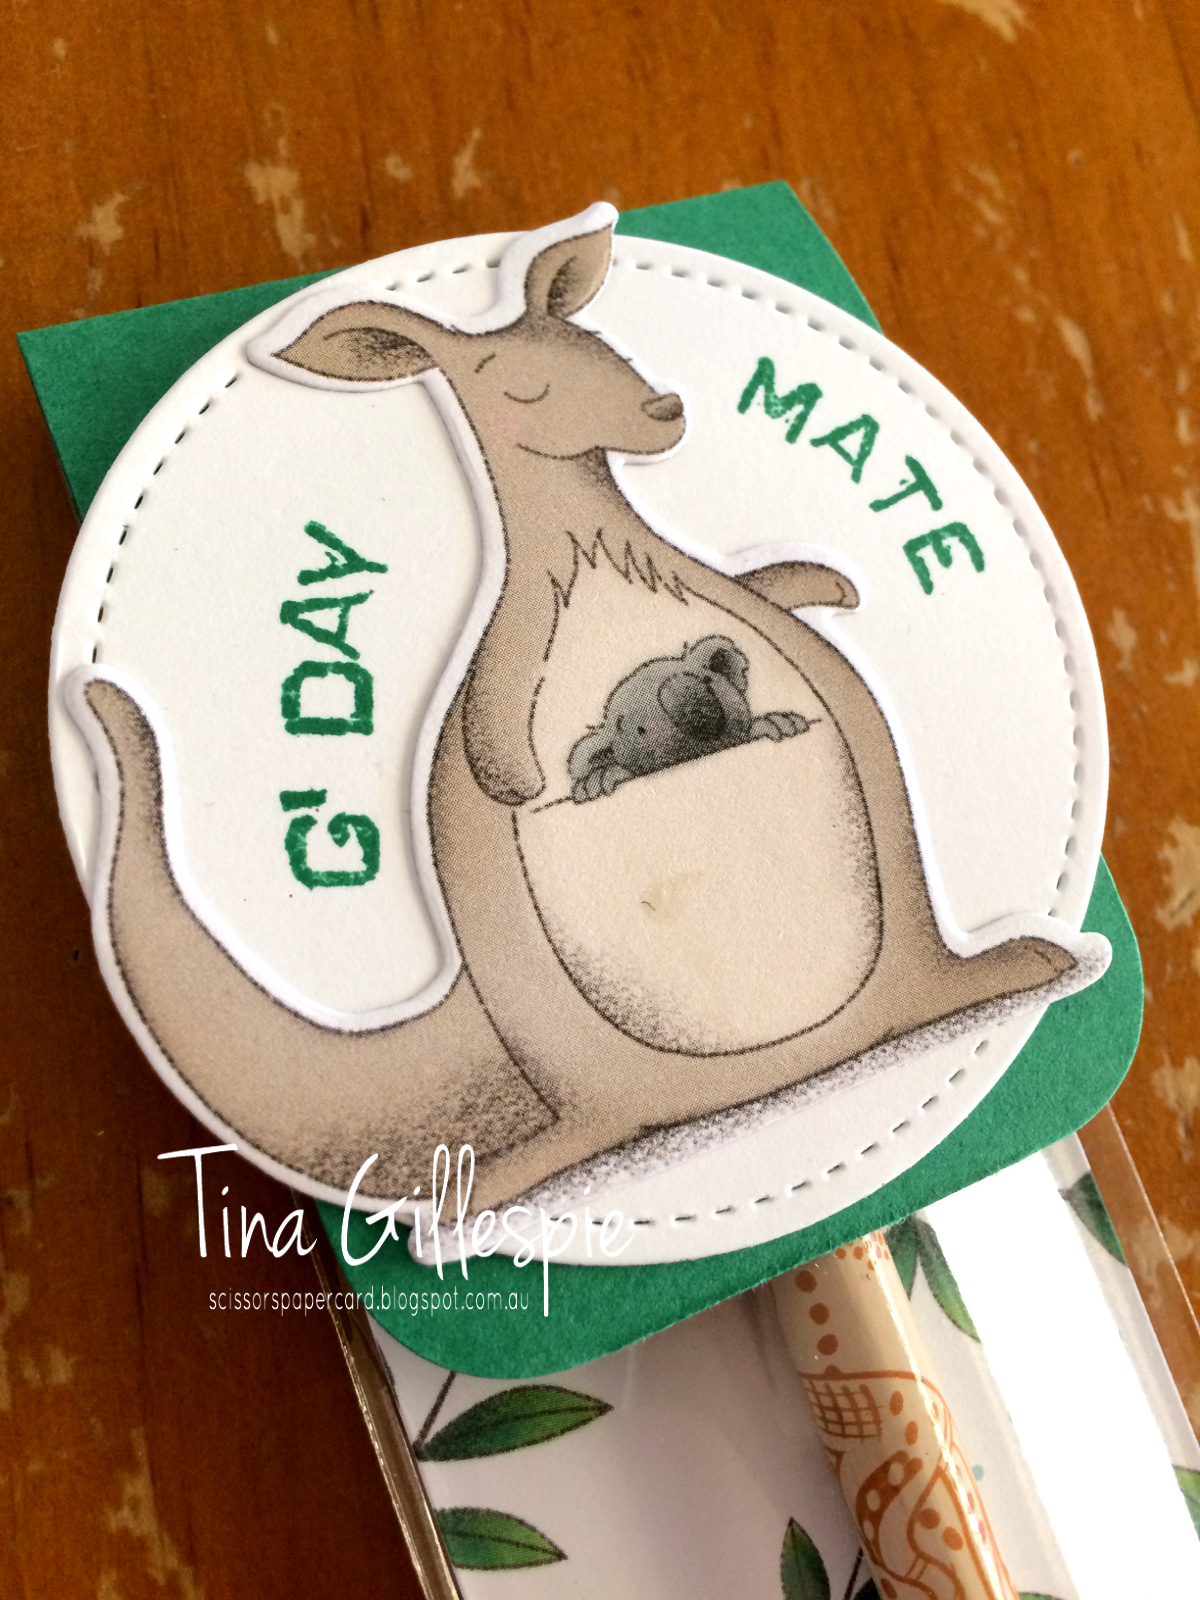
scissorspapercard, Stampin' Up!, Animal Expedition DSP, Animal Friends Thinlits, Stitched Shapes Thinlits, Labeler Alphabet

I used my Stamparatus to stamp the 'g'day mate' sentiment on the Stitched Circle. It's very cliche Australian, but I'm hoping that the American demos will love it! I made 24 of these swaps.

Finally, I have my last minute swap. I happened to be in Coles when my favourite Twinings Tea, Australian Afternoon, was half price. It was the smaller packs with individually wrapped bags. I grabbed two to take to the US, but when I realised they fit with the Australian theme of my swaps I decided to add them to the mix.

scissorspapercard, Stampin' Up!, Garden Impressions DSP, Springtime Impressions Thinlits, Stitched Labels Thinlits, Balloon Celebrations

I didn't have enough Animal Expedition DSP left to use, so I decided to use some of my Garden Impressions DSP. I used my Envelope Punch Board to create a little tea bagged size envelope, which I topped with a Stitched Labels Framelit. I stamped a pair of sentiments from Balloon Celebration and then used part of the big floral die from Springtime Impressions for the little cluster of flowers. A few rhinestones finished off the design.

I wonder which of my swaps will be the most popular - the Tim Tam Slam, Pencil or Tea? What do you think?

Bye for now,

Tina

Friday, 9 November 2018

Orlando Swaps Part One

Hi!

How exciting - today is the first day of OnStage in Orlando. I wrote this post a couple of weeks ago, but still, I bet I'm going to be excited on the day!

Normally on a Friday I'd have the latest Just Add Ink post for you, but to cater for OnStage, last week's challenge actually runs for two weeks. Click on the link to check out the challenge details.

Instead I have for you one of the swaps I made to take to Orlando. Did you know that most Americans have never heard of the chocolatey goodness that is a Tim Tam? Did you also know that you can buy a box of 150 individually wrapped Tim Tams at Officeworks? What a perfect opportunity to educate some people on the delights of Tim Tams!


I started by working out how I was going to package the Tim Tam. I ended up deciding to use my Envelope Punch Board and the Crafty Owl's Box Buster to create a little box. This is the shape I ended up with, after starting with a 5 1/8" square piece of DSP.

scissorspapercard, Stampin' Up!, OnStage Swaps, Animal Expedition DSP, Labeler Alphabet, Envelope Punch Board, Stamparatus

I had to do some additional trimming on the bottom left and top right corners, as they wouldn't fold nicely into the box if I didn't. Once I'd folded along the score lines and snipped to create flaps, I turned the piece over and used my SNAIL to adhere some instructions to the inside of the box. Yep, I'm going to educate my fellow on how to do the Tim Tam Slam!

scissorspapercard, Stampin' Up!, OnStage Swaps, Animal Expedition DSP, Labeler Alphabet, Envelope Punch Board, Stamparatus

I then popped a Tim Tam into the box and folded the instructions over the top. I then started folding the box. I worked out that if I folded the larger long edge, followed buy the two short edges and finally the shorter long edge, I could get away with using one of my demo labels to hold the box closed.

scissorspapercard, Stampin' Up!, OnStage Swaps, Animal Expedition DSP, Labeler Alphabet, Envelope Punch Board, Stamparatus

If I tried folding in the short edges first there wouldn't be enough of the flaps exposed to stick to the label.

scissorspapercard, Stampin' Up!, OnStage Swaps, Animal Expedition DSP, Labeler Alphabet, Envelope Punch Board, Stamparatus

Here's the bottom of the box with my label attached. Now - how to decorate the top?

scissorspapercard, Stampin' Up!, OnStage Swaps, Animal Expedition DSP, Labeler Alphabet, Envelope Punch Board, Stamparatus

Aww, how cute! I made 40 of these swaps, as that's how many little kangaroos there are in two packs of the Animal Expedition DSP. I had very sore hands after hand cutting all 40 kangaroos and 80 branches! Thankfully, for the stamping I was able to use my Stamparatus for super quick production line stamping.

I'll be back on Monday with my other swap.

Bye for now,

Tina

Wednesday, 7 November 2018

A CASE Of A CASE Of Myself

Hi!

Try saying that five times quickly!


Today's card is a CASE of both a card I made recently (that was a CASE of another card I made that was a CASE of a decor item in the Annual Catalogue - confused yet?), and also of an ATC I made recently for a swap I hosted. Let's get unconfused!

scissorspapercard, Stampin' Up!, Art With Heart, Heart Of Christmas, Hearts Come Home, Hometown Greetings Edgelits, Shimmer Paint

The front of the card is a CASE of my ATC. An ATC is an Artist Trading Card, and is usually a 2.5 by 3.5 inch card that is decorated. This time we did ATC Coins, which are 2.5 inches round. Here's my ATC so that you can see how I CASEd myself.

scissorspapercard, Stampin' Up!, Art With Heart, Heart Of Christmas, Merry Christmas To All, Hearts Come Home, Hometown Greetings Edgelits, Shimmer Paint

I used the same colour combo, but without the Daffodil Delight on the card. I also went for the slightly larger houses, as I used larger circles on the card. I kept the smaller houses for the inside of my card.

scissorspapercard, Stampin' Up!, Art With Heart, Heart Of Christmas, Hearts Come Home, Hometown Greetings Edgelits, Shimmer Paint

The starry (or even snowy) sky is made by flicking Shimmer Paint over the cardstock using an Aqua Painter or a small paintbrush. You basically pick up some paint with the brush and then flick the bristles of the brush over the edge of the paint lid while holding it over the cardstock. Play around with the amount of paint and the distance flicked to get different sized splatters. It is a bit messy though, so make sure you cover anything that doesn't need splatters.

scissorspapercard, Stampin' Up!, Art With Heart, Heart Of Christmas, Hearts Come Home, Hometown Greetings Edgelits, Shimmer Paint

This inside of the card is a CASE of this card. I won't try to explain the chain of CASEd cards, you can follow the links on each post if you're curious! I loved how the inside of my last card turned out, so I copied it pretty much exactly for this card. I just switched out the DSP for the Shimmer Paint splatters. I think they look more like snow than the stars on the DSP.

Claire is once again hosting this week's Blog Share over on her blog. Don't forget to go check out everyone's cards - you won't be disappointed!

Bye for now,

Tina

Tuesday, 6 November 2018

Na Na Na Na Na Na Na Na Bat Punch!

Hi!

LOL, I couldn't resist that blog post title, and you'll see why in a second!


It's the new Colour Creations Blog Share, and this week we are looking at a new neutral, Grey Granite. As greys go, it's an ok grey. I thought it was a bit hard to get excited about grey, until I had the idea for this card.

scissorspapercard, Stampin' Up!, Art With Heart, Colour Creations, Spooky Bats Punch, Stitched Shapes, Best Route DSP, Twinkle Twinkle DSP, Treehouse Adventure

Its classic Batman! I went with the colours in the original TV Batman to create this fun kid's birthday card. It may in fact also be the colours from the original comic, but I dare not ask my husband or I might still be getting the answer half an hour later. He likes the opportunity to show off his super hero knowledge!

scissorspapercard, Stampin' Up!, Art With Heart, Colour Creations, Spooky Bats Punch, Stitched Shapes, Best Route DSP, Twinkle Twinkle DSP, Treehouse Adventure

I was inspired by Batman's cape and utility belt on the front of the card. The Blueberry Bushel DSP is from the Best Route DSP - just a scrap I had left over from another project. The Grey Granite piece is from the Twinkle Twinkle DSP pack. I thought it was a bit more interesting than just a plain Grey Granite background. The Pineapple Punch ribbon was a great substitute for Batman's utility belt.

scissorspapercard, Stampin' Up!, Art With Heart, Colour Creations, Spooky Bats Punch, Stitched Shapes, Best Route DSP, Twinkle Twinkle DSP, Treehouse Adventure

The Spooky Bats punch is a part of the Halloween range in the current Holiday Catalogue. I'm not big into Halloween, but I just had to have this punch to make Batman cards. I made the rookie mistake of asking Rob about the shape of the bat however, and yes, I did get a very extended answer!

That's it for me, as usual the rest of this week's cards are over at Catherine's blog.

Bye for now,

Tina

Monday, 5 November 2018

An Expedition Gift

Hi!

I wrote this post a couple of weeks ago, but by the time it publishes, I will have been in Salt Lake City for a couple of days with my friend and travel mate, Judy May. If all went to plan, we would have spend the weekend checking out the city and listening to the Mormon Tabernacle Choir with fellow travellers Kathryn Mangelsdorf and Rachel Palmieri. We are off to tour Stampin' Up! Head Office today. How exciting, to see where it all happens!

Today's post is about the card and little gift I made and had made for Judy. She did an amazing job planning and organising our trip, for which I was very grateful.

scissorspapercard, Stampin' Up!, Treehouse Adventures, Animal Outing, Animal Expedition DSP, Animal Friends Thinlits

I used paper from the Animal Expedition DSP, as it's so cute, and I thought a perfect choice for the card. I really love the birdie paper! The sentiment, from Treehouse Adventures, is also the perfect choice for the card - I fee like we really are off on an adventure.

scissorspapercard, Stampin' Up!, Treehouse Adventures, Animal Outing, Animal Expedition DSP, Animal Friends Thinlits

I stamped and then coloured the Kangaroo with my Blends. I used the Soft Suede, Smoky Slate and Petal Pink combos. Can you see the silver around the edges? I ran out of Silver Foil paper, so I sponged the edge of the card with Versamark ink and then added Silver Embossing Powder before heat embossing. Too easy!

scissorspapercard, Stampin' Up!, Treehouse Adventures, Animal Outing, Animal Expedition DSP, Animal Friends Thinlits

I also had a bone folder engraved to commemorate the trip. My friend, Alisha and her hubby did the engraving for me. I was so pleased with how it turned out!

scissorspapercard, Stampin' Up!, Bunch Of Blossoms, Animal Expedition DSP, Window Box Thinlits

To make the case for the bone folder I took a strip of Berry Burst cardstock that was a little wider and nearly twice as long as the folder. I rounded the corners and then scored lines for the fold at the bottom and the flap at the front. I then took a piece of Animal Expedition DSP and wrapped it around the cardstock, adhering it to the cardstock at the back. You need to do this with the bone folder inside the cardstock, otherwise it may end up too tight a fit. I then tied a length of Berry Burst ribbon around the whole thing.

scissorspapercard, Stampin' Up!, Bunch Of Blossoms, Animal Expedition DSP, Window Box Thinlits

How sweet is this sentiment and tag? The stamp is from the Bunch Of Blossoms stamp set, and the tag is from the Window Box Thinlits set. I punched a small heart from Silver Glimmer Paper using the Cookie Cutter Builder Punch.

scissorspapercard, Stampin' Up!, Bunch Of Blossoms, Animal Expedition DSP, Window Box Thinlits

I hope Judy enjoys using her bone folder while remembering our trip for many years to come.

scissorspapercard, Stampin' Up!, Bunch Of Blossoms, Animal Expedition DSP, Window Box Thinlits

Of course, I had to get one for myself too!

Bye for now,

Tina

Thursday, 1 November 2018

JAI #433: Just Choose Colour

Hi!

As you're reading this (assuming you're reading it on Friday!), I'm on my way to the USA to attend Stampin' Up!'s OnStage event in Orlando, Florida. How exciting! I've been planning this trip for a long time, it's the trip of a lifetime for me!


But for now, I have this week's Just Add Ink challenge card. Actually, this challenge will run for a fortnight as most of the JAI Design Team will be attending various OnStage events. I wish they could all come with me to Orlando!


This time we have a gorgeous, bright set of colours set by Jo. I really love them - so happy and fresh!

scissorspapercard, Stampin' Up!, Just Add Ink, Animal Expedition DSP, Best Route DSP, Label Me Pretty, Shimmer Paint

This card was made using a heap of scraps I had on my craft desk. I had a stack of triangles left over from making my swaps using the Animal Expedition DSP, and once I realised that some of them were Berry Burst and Lemon Lime Twist, I decided they'd be perfect for this card. The Blueberry Bushel triangles came from the Best Route DSP.

Originally I was trying to recreate a toy I had when I was a kid - you may have had one too. It was a sort of black and white 'snake' that you could twist and bend into nearly any shape you could think of. Do you remember the toy I'm talking about? I couldn't quite get that to work on my card, so instead I used the concept to create a series of 'L' shapes on the front.

scissorspapercard, Stampin' Up!, Just Add Ink, Animal Expedition DSP, Best Route DSP, Label Me Pretty, Shimmer Paint

Once all that was done, I kind of got stumped on what to do next. I then remembered these wooden words I had left from an old catalogue and decided to colour them. I first pushed it into my Blueberry Bushel ink pad, but the result was a bit darker than I'd hoped. I was able to soften it by painting over the top with some Frost White Shimmer Paint.

scissorspapercard, Stampin' Up!, Just Add Ink, Animal Expedition DSP, Best Route DSP, Label Me Pretty, Shimmer Paint

Thankfully, I had enough triangles left over to complete the inside. This card is going to be given to a North American demonstrator who was kind enough to arrange some Paper Pumpkin kits for us, so I thought the 'you're the best' sentiment was perfect for the inside. I can't wait to stamp and put together the kits with her and my housemates in Orlando.

Are you in love with this colour combo yet? I am! You can see what the rest of the Design team has made over at the Just Add Ink blog. Remember, you've got two weeks to join in the fun this time.

Bye for now,

Tina

Wednesday, 31 October 2018

Tags and Tidings At Christmas

Hi!

Are you ready for another week of Christmas inspiration? I think we are up to week 12, which means I have an extra 12 cards in may stash that I wouldn't usually have at this time of year.


I made this week's card last week while I was watching the movie 'Sully' on TV. Have you seen it? The movie tells the story of the plane that landed in the Hudson River and everyone survived. It was quite interesting and exciting, so I think my colouring suffered at times. Luckily I wasn't trying to work on a trickier card!

scissorspapercard, Stampin' Up!, Art With Heart, Heart Of Christmas, Tags & Tidings, Christmas Tags Thinlits, Stitched Shapes Framelits, Santa's Workshop SDSP

I used the Tags and Tidings bundle on this card. It's a cute little stamp and die set that makes a ton of sweet little tags. It's one large stamp and one large die, so you can stamp and cut 16 different tags in two quick steps. Nice!

scissorspapercard, Stampin' Up!, Art With Heart, Heart Of Christmas, Tags & Tidings, Christmas Tags Thinlits, Stitched Shapes Framelits, Santa's Workshop SDSP

I trimmed the tag loops off of the three picture images, as I didn't need them to be tags on this card. The Holly Jolly one I left, as I liked the shape and timing it would have looked strange to say the least. I coloured the images with my Poppy Parade, Shaded Spruce and Soft Suede Blends Markers. I then sponged some Pool Party ink onto the Whisper White squares behind them. I helps the tags to pop from the background.

scissorspapercard, Stampin' Up!, Art With Heart, Heart Of Christmas, Tags & Tidings, Christmas Tags Thinlits, Stitched Shapes Framelits, Santa's Workshop SDSP

It's tricky to see in the photo, but I also sponged the Pool Party ink on the inside before adhering the tag to the cardstock.

You can find the links for the rest of this week's Heart Of Christmas cards over at Claire's blog. I'm loving seeing what everyone makes each week, and I'm sure you are too.

Bye for now,

Tina