Pages

Monday, 13 August 2018

It's Good To Be Green

Hi!

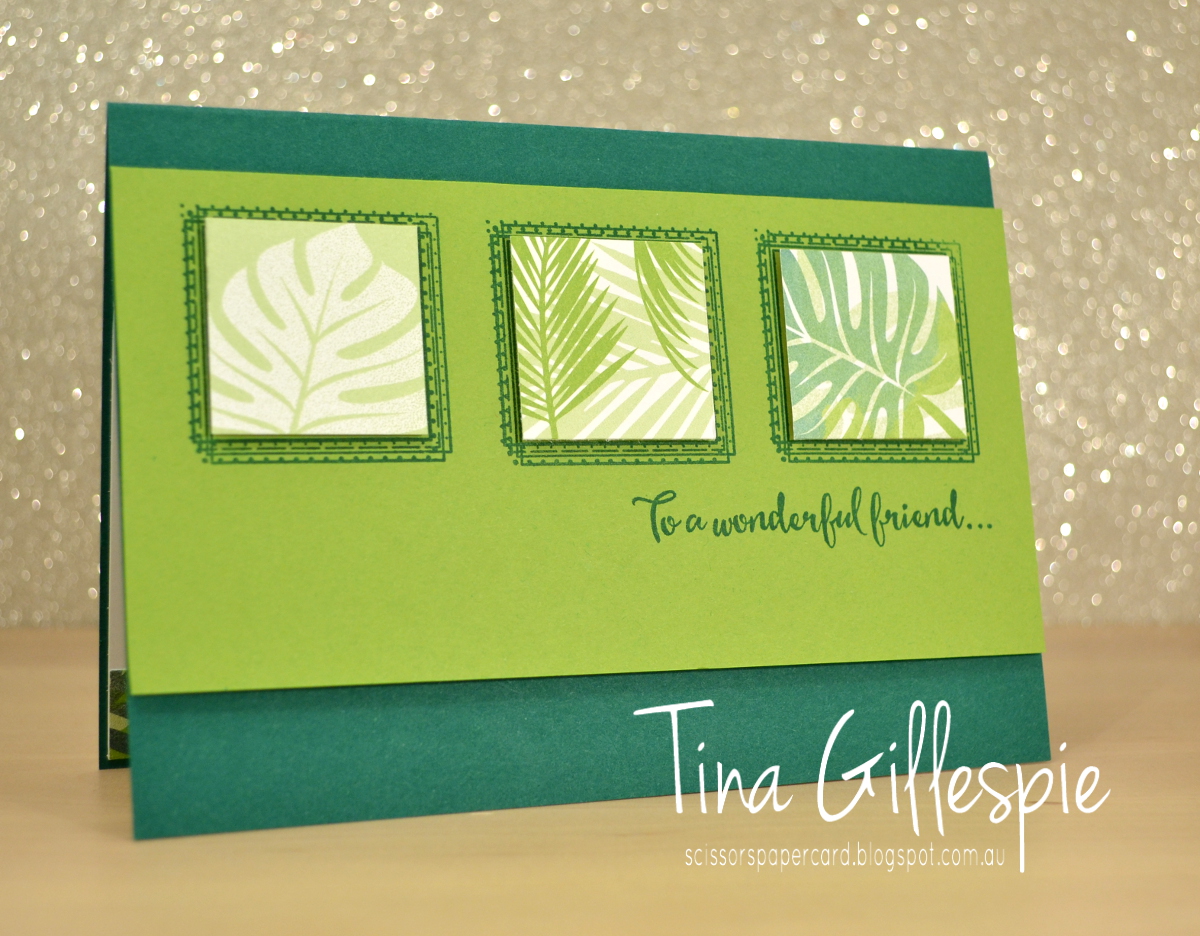
Is that a Kermit quote? I can't remember, it just popped into my head when I was thinking about a title for this post. Anyway... on to toady's card! This week I have a card that I CASEd from the Annual Catalogue. I recently purchased Swirly Frames and this was my first time using it. I liked the green card on page 137, so away I went!
scissorspapercard, Stampin' Up!, Swirly Frames, Dragonfly Dreams, Tropical Escape DSP

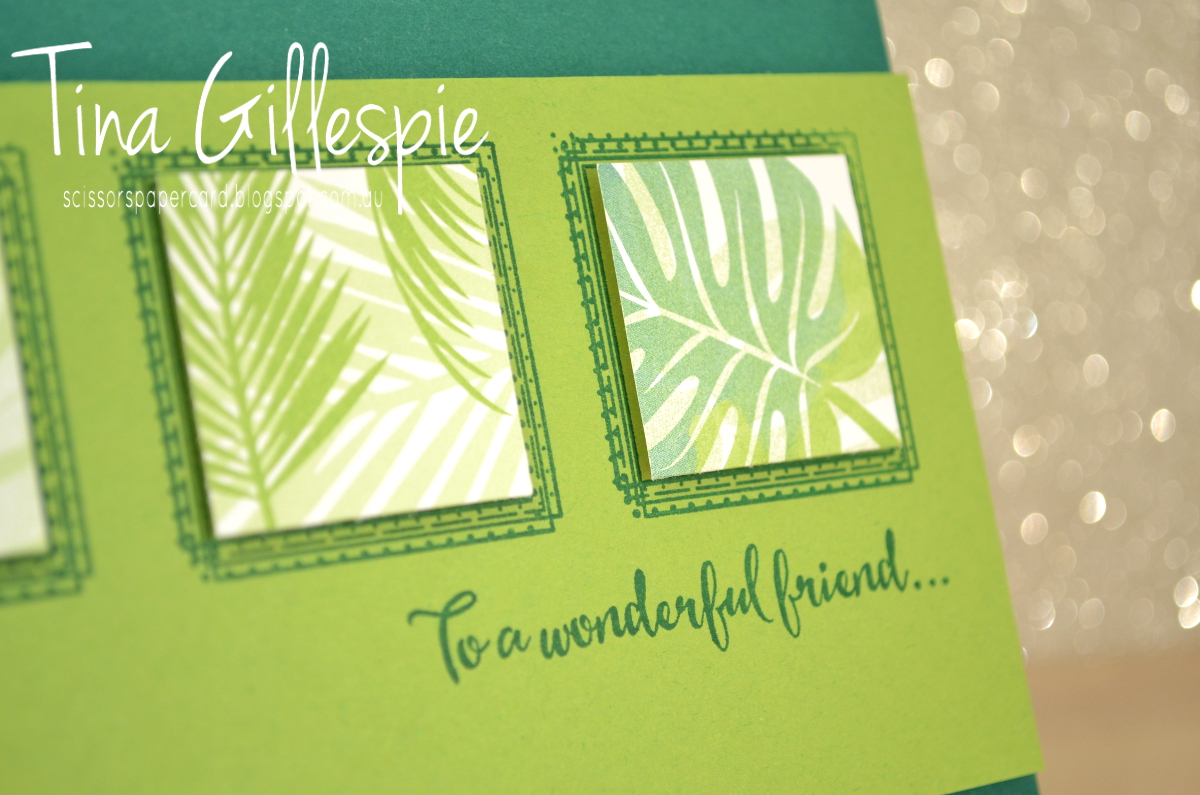
I made a slightly simpler version of the card. While I own both the Tropical Escape DSP and Tropical Thinlits, I do not own the Tropical Chic stamps. I am still in two minds about them - do I really need the stamps? The Concept Artist used the stamps on the squares in the catalogue card, but I just chopped some of the DSP. Easy substitution!
scissorspapercard, Stampin' Up!, Swirly Frames, Dragonfly Dreams, Tropical Escape DSP

I also used a pair of sentiments from Dragonfly Dreams on my card. That's what CASEing is all about  - taking the bits of a card that work for you, and finding something in your stash for the bits that don't.

scissorspapercard, Stampin' Up!, Swirly Frames, Dragonfly Dreams, Tropical Escape DSP

I used some more of the Tropical Escape DSP for the inside. This card is a great way to use up all those tiny scraps that seem to accumulate. The squares on the front were about 1 1/4 inches, and the strip on the inside could be as narrow or as wide as you wish. If your scraps are too narrow, just add a second or third. Too easy!

Bye for now,

Tina

Thursday, 9 August 2018

JAI #421: Just Add A Sketch

Hi!


Time for the next Just Add Ink challenge! This week Narelle has designed a fabulous sketch for us to work with. I love a good sketch challenge - don't you?


Last month my daughter Ada turned 13. When I asked her what she'd like me to make her for her card, I fully expected her to say 'Harry Potter'. She astounded me by sending me an image of a ballerina. She's been taking Jazz and Tap lessons for years, but only picked up ballet this year, so she's a little in love with it right now. I was a lot stuck with what to do with the image she sent, but once I saw this sketch, it all clicked into place!

scissorspapercard, Stampin' Up!, Just Add Ink, Picture Perfect Birthday, Glimmer Paper, Smooshing

I used my PictureMate to print the image onto Whisper White cardstock and then smooshed some Melon Mambo ink over the top. The colours of the dance studio she attends are hot pink, black and white, so they were the colours I stick with. Of course, any dancer knows you need to add some bling, hence the Glimmer Paper panels along the sides.

scissorspapercard, Stampin' Up!, Just Add Ink, Picture Perfect Birthday, Glimmer Paper, Smooshing

I had to flip the sketch to make the elements of it fit around the dancer. I used vellum for the circle so it didn't cover too much of the smooshing. The numbers were stickers I had in my stash. They were a pale pink that didn't work with my colour scheme, so I tapped my Stazon inkpad over the top to change the colour. You can still see the pale pink along the sides, but I liked that effect. They were a bit plain when they were just black, so I went over the top with my Wink Of Stella pen to add some glitz.

scissorspapercard, Stampin' Up!, Just Add Ink, Picture Perfect Birthday, Glimmer Paper, Smooshing

I also printed the ballerina for the inside, just waaayyyyy smaller. I'm pleased to say that Ada loved the card. I'm always a bit anxious showing her, as she can be fussy - typical teenager!

The rest fit eDesign Team have done Narelle's sketch proud. You can see their cards over at the Just Add Ink blog.

Bye for now,

Tina

Tuesday, 7 August 2018

Calypso Statements

Hi!

Welcome to the new Colour Creations Blog Share. This week we are featuring Calypso Coral.


Did you know that in Greek mythology Calypso was a nymph who was the daughter of Titan Atlas and Pleione and is famous for trying to keep Odysseus captive so she could marry him - sadly for Calypso, he was already married! Thanks, Wikipedia! Totally irrelevant to my card, but interesting nonetheless.

scissorspapercard, Stampin' Up!, Art With Heart, Colour Creations, Floral Statements, Flourishing Phrases, Stampin' Blends, Subtle DTIEF

I've had this image from Floral Statements stamped and ready to colour for over a year, and I decided that this week's Colour Creations was finally the time to use it. I coloured the flower with my Calypso Coral and Old Olive Blends.

scissorspapercard, Stampin' Up!, Art With Heart, Colour Creations, Floral Statements, Flourishing Phrases, Stampin' Blends, Subtle DTIEF

I also used my Light Cherry Cobbler Blend to add some darker highlights to the flowers, and finished by using my Light Pool Party Blend to draw an outline around the outside of the image. It's a simple trick that helps the image to pop against the white background.

scissorspapercard, Stampin' Up!, Art With Heart, Colour Creations, Floral Statements, Flourishing Phrases, Stampin' Blends, Subtle DTIEF

I finished the inside with a sentiment and some leaves from Flourishing Phrases. I found that the leaves were a bit stark for what I wanted, so I went over them with a Blender Pen (not to be confused with a Blend marker!). This pulled some of the colour into the veins of the leaves and softened them a little. Much better!

As always, you can find the links to the rest of the blogs over at Catherine's blog. It's always worth a look - the ladies do such a great job with the colours each week.

Bye for now,

Tina

Monday, 6 August 2018

A Fishy CASE

Hi!

I recently got around to purchasing the new set of Embossing Mats, and have been having some fun with them. As is often the case, I found a card to CASE for my first try with them. You can find the card I CASEd here at Kathy Maurer's blog. It was such a fun card that I couldn't resist CASEing it!

scissorspapercard, Stampin' Up!, Jar Of Love, Playful Backgrounds, Better Together, Everyday Jars, Swirly Scribbles, Embossing Mats

I kept the card pretty much the same - only a few minor changes. I switched the colour of the card base, simply because I didn't have enough of the colour Kathy used.  I also used some retired epoxy dots to use for the air bubbles rather than rhinestones.

scissorspapercard, Stampin' Up!, Jar Of Love, Playful Backgrounds, Better Together, Everyday Jars, Swirly Scribbles, Embossing Mats

Can you see better in this picture - the long swirly die from Swirly Scribbles was used to emboss the cardstock base and represent waves? Perfect for the little fishies to swim in!

scissorspapercard, Stampin' Up!, Jar Of Love, Playful Backgrounds, Better Together, Everyday Jars, Swirly Scribbles, Embossing Mats

Kathy didn't show the inside of her card, so I was on my own here. I couldn't resist adding more fish and using the bubbles from my favourite background stamp underneath.

Bye for now,

Tina

Thursday, 2 August 2018

JAI #420: Just Add Inspiration

Hi!


This week at Just Add Ink Nikki has found this fabulous image to inspire our creativity. Isn't it cool? I've never seen a flower like that - I wonder how they did it? Perhaps it's Photoshopped, but that takes the fun out of it!


I briefly toyed with the idea of doing something with my Daisy punch, but my brain clearly wasn't working well that day, and I ended up going in another direction altogether.

scissorspapercard, Stampin' Up!, Just Add Ink, Follow Your Dreams, Chase Your Dreams Framelits

I've been doing a lot of smooshing lately, as I found a better way to do the technique than the way I'd originally learned. I'd only tried one colour backgrounds, so this was the perfect opportunity to splash out and try a multicoloured background. Now I just need to remember the colours I used! I'm pretty sure they were Gorgeous Grape, Mango Melody, Call Me Clover, Melon Mambo and Lovely Lipstick.

scissorspapercard, Stampin' Up!, Just Add Ink, Follow Your Dreams, Chase Your Dreams Framelits

The dreamcatcher had a layer of Wink Of Stella added to give it an extra touch of bling, and then finished off with some pearls. The word 'dream' was cut from some cardstock that I'd watercoloured with Gorgeous Grape and Mango Melody before cutting. It's important to let the cardstock dry first - ask me how I know! LOL

scissorspapercard, Stampin' Up!, Just Add Ink, Follow Your Dreams, Chase Your Dreams Framelits

On the inside I used one of the dies in the set to create a little window. I'd tried the smooshing on a piece of glossy cardstock and wasn't happy with how it turned out, but it was perfect for popping behind the window.

The rest of the Design Team have had just as much fun as I have with this week's Inspiration Challenge. You can see their cards over at the Just Add Ink blog, where you can also link your card. Don't have a blog? You can still enter! Just email us your card and we will enter it for you.

Bye for now,

Tina

Tuesday, 31 July 2018

Clover In The Tropics

Hi!

Welcome to the new Colour Creations Blog Share.


This week it's Call Me Clover's turn. The lush green made me think of the Tropical Chic suite.

scissorspapercard, Stampin' Up!, Art With Heart, Colour Creations, Tropical Escape DSP, Bunch Of Blossoms, Tropical Thinlits

I started by using my sponge brayers to create the ombre panel. I used Call Me Clover, Lemon Lime Twist and Pineapple Punch on Shimmery White paper.

scissorspapercard, Stampin' Up!, Art With Heart, Colour Creations, Tropical Escape DSP, Bunch Of Blossoms, Tropical Thinlits

I used the dies to cut the leaves in both Basic Black and Call Me Clover, and then layered them in pairs. Isn't it a dramatic look?

scissorspapercard, Stampin' Up!, Art With Heart, Colour Creations, Tropical Escape DSP, Bunch Of Blossoms, Tropical Thinlits

On the inside I used the larger die to create a window and the smaller die to add the Call Me Clover accent.

Short and sweet for me tonight! You can find everyone's links at Catherine's blog.

Bye for now,

Tina

Monday, 30 July 2018

Polished Stone Dragonflies

Hi!

Remember a little while ago I was playing around with the Polished Stone technique? Well, I found one more card in my 'To Blog' folder using the technique that I hadn't shown you yet. Here it is!

scissorspapercard, Stampin' Up!, Happy Birthday Gorgeous, Dragonfly Dreams, Detailed Dragonfly Thinlits, Flourish Thinlits, Subtle 3D DTIEF

I used Night Of Navy and Mint Macaron ink to create the Polished Stone panel. Isn't it pretty?

scissorspapercard, Stampin' Up!, Happy Birthday Gorgeous, Dragonfly Dreams, Detailed Dragonfly Thinlits, Flourish Thinlits, Subtle 3D DTIEF

Speaking of pretty - how's that Subtle 3D Dynamic Textured Impressions Embossing Folder? I've been using it so much, as it adds that little something extra on so many cards.

scissorspapercard, Stampin' Up!, Happy Birthday Gorgeous, Dragonfly Dreams, Detailed Dragonfly Thinlits, Flourish Thinlits, Subtle 3D DTIEF

That's the last of my Polished Stone cards for now - hopefully I'll get back to the technique some more soon, as it's a fun one!

Bye for now,

Tina