Tonight the Art With Heart team are sharing creative projects featuring Designer Series Paper. This month, Stampin’ Up! have a special on selected Designer Series Paper packs that allows you to get one free pack when you purchase 3 packs. That's 4 packs for the price of 3! We hope our blog hop inspires you to get crafting with your DSP.
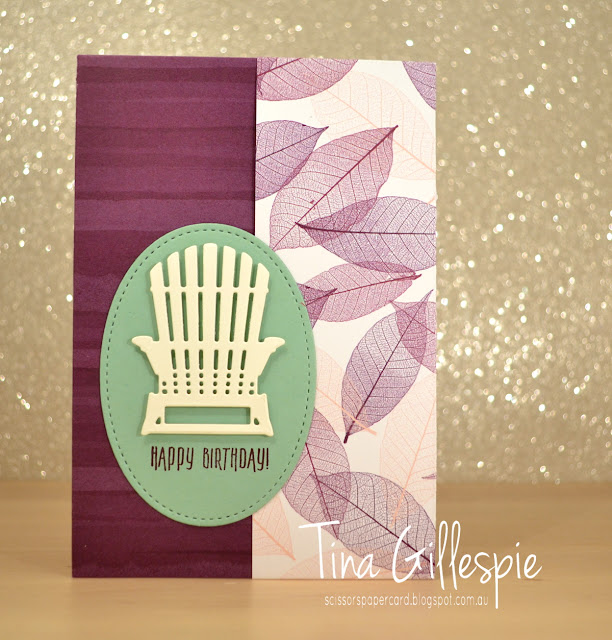
When I was thinking about what to make for this blog hop, I did a google search that was something like "fun things to make with designer series paper". One of the things that came up with this fun No-Cut Patterned Paper Folder by my good friend Di Barnes. Bingo! Di's tutorial is awesome (and free!), and has lots of info, especially on which types of papers work best. Having read all the info, I went for a piece in the Nature's Poem DSP, which is one of the packs on sale this month. It's one of the popular designs from this year's Annual Catalogue.
I kept the front of my card fairly basic, as the inside is where the magic is! The contrast between the two patterns in the DSP is so lovely.
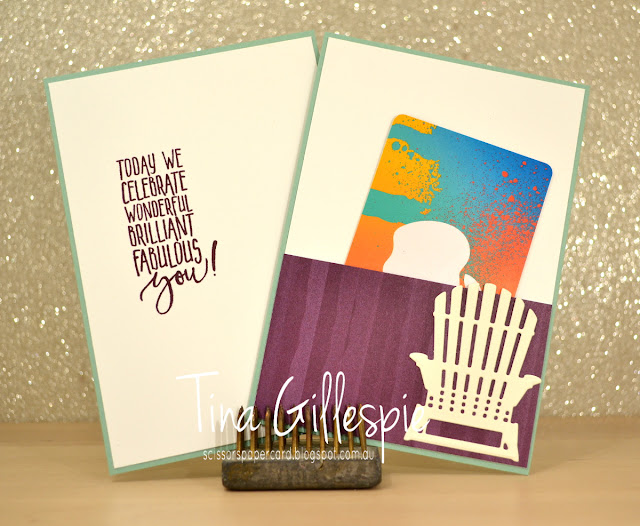
The paper is folded (no cutting!) in such a way that it forms two pockets on the inside - how cool is that? I've cut an insert for each pocket, but Di's instructions also include an adaptation so that you can fit a few cards/envelopes in each pocket.
Here's the two inserts. You can see that I've used another small piece of the DSP to create a place for a gift card. You could probably just tuck the gift card into the the pocket on the card base, but this way it's not going to accidentally slip out of the card. I left the back of the inserts plain, but it would be great as a group card, as there's lots of room for many people to sign. You could even add a photo or two to the back. Lots of ideas!
Now it’s time to hop on over to our next participant, my friend and fellow South Aussie, card maker extraordinaire Kathryn Mangelsdorf.
If you find a broken link or have come to this blog hop from a different entry point, you can view the participants below:
Bye for now,
Tina


Tina this is super cool...I must look up that tutorial. Love the idea of a no cut card.
ReplyDeleteThis one is great. I love the different DSP.
ReplyDeleteLove your no cut paper folder Tina, your colour combination is lovely and decorated perfectly, just love everything about it.xx
ReplyDeleteWow that’s great. Will definitely be looking that tutorial up. Looks great in the Natures Poem DSP
ReplyDeleteWhat a clever fold, that's very cool and lovely colour combination!
ReplyDeleteOh how fun is that fold. Love that colour combo too! We will all be trying this fold now that you have shown us! :)
ReplyDeleteWhat a great card Tina, it really is a fun fold! Love the colours and designs in this DSP.
ReplyDeleteI love the second side on the DSP shown inside the card from the no cut fold. Thanks for taking part in the DSP blog hop.
ReplyDelete